tag:blogger.com,1999:blog-41011988530608398682024-11-08T07:37:45.819-08:00lykkepa alandet 0124Milohttp://www.blogger.com/profile/01418902555588264834noreply@blogger.comBlogger147125tag:blogger.com,1999:blog-4101198853060839868.post-57231899912798640612024-01-20T16:00:00.000-08:002024-01-21T14:32:58.021-08:00Illuminate the Road: 1966 F100 Signal Light Wiring Diagram Unveiled for Seamless Brilliance!<p> </p><p><article><figure><noscript><img src='https://tse1.mm.bing.net/th?q=Illuminate the Road: 1966 F100 Signal Light Wiring Diagram Unveiled for Seamless Brilliance!' alt='Illuminate the Road: 1966 F100 Signal Light Wiring Diagram Unveiled for Seamless Brilliance!' width='640' height='360' /></noscript><img class='v-cover ads-img' src='https://tse1.mm.bing.net/th?q=Illuminate the Road: 1966 F100 Signal Light Wiring Diagram Unveiled for Seamless Brilliance!' alt='Illuminate the Road: 1966 F100 Signal Light Wiring Diagram Unveiled for Seamless Brilliance!' width='100%' onerror='this.onerror=null;this.src='https://upload.wikimedia.org/wikipedia/commons/d/d1/Image_not_available.png?20210219185637';' style='margin-right: 8px;margin-bottom: 8px;' /></figure></article></p><blockquote>Unlock the seamless brilliance of your 1966 F100 with our expert signal light wiring diagram. Illuminate your journey with precision and safety.</blockquote><p> </p><b>Rev up</b> your classic truck with the secrets of the past! Ever wondered how the iconic 1966 F100's signals danced through the night? Well, <i>look no further</i>—we've unlocked the treasure chest of its signal light wiring diagram. Picture this: a journey back in time where wires tell tales, <i>unveiling</i> a roadmap to brilliance. So, buckle up and join us as we delve into the fascinating intricacies that make your F100 shine with character and style. It's time to <b>spark</b> a connection with the past and light up the road ahead!<p> </p><h4>Top 10 important point for '1966 F100 SIGNAL LIGHT WIRING DIAGRAM'</h4><table cellpadding='0' cellspacing='0' class='tr-caption-container' style='float: right;'><tbody><tr><td style='text-align: center;'><img border='0' src='https://tse1.mm.bing.net/th?q=Top 10 '1966 F100 SIGNAL LIGHT WIRING DIAGRAM'' width='200' /></td></tr><tr></tr></tbody></table> <ol>
<li>Decoding the Wiring Maze: Where to Begin</li>
<li>Tools of the Trade: Must-Haves for Success</li>
<li>Understanding Color Codes: Cracking the Signal Language</li>
<li>Mapping the Circuits: A Visual Guide for Easy Navigation</li>
<li>Common Pitfalls: How to Avoid Wiring Woes</li>
<li>Upgrading for Safety: Modernizing Your Signal System</li>
<li>Troubleshooting Tips: Lights Out? We've Got You Covered</li>
<li>Splicing Made Simple: Techniques for a Seamless Connection</li>
<li>Customization Options: Adding a Personal Touch to Your Signals</li>
<li>Expert Insights: Q&A for a Masterclass in F100 Wiring</li>
</ol><p> </p><h5>Several Facts that you should know about '1966 F100 SIGNAL LIGHT WIRING DIAGRAM'.</h5>htmlCopy code<p>Welcome to a comprehensive guide on the intricacies of the 1966 F100 signal light wiring diagram. This article aims to shed light on the nuances of this classic vehicle's electrical system, providing valuable insights for enthusiasts and restorers alike.</p>
<h3>Deciphering the Blueprint</h3>
<center><img src="https://tse1.mm.bing.net/th?q=Deciphering+the+Blueprint+1966+f100+signal+light+wiring+diagram"></center>
<p>Embark on a journey through the wiring maze of the 1966 F100. Understand the blueprint that governs the signal light system, unraveling the complexities that make this classic truck tick.</p>
<h3>Essential Tools for Success</h3>
<center><img src="https://tse1.mm.bing.net/th?q=Essential+Tools+for+Success+1966+f100+signal+light+wiring+diagram"></center>
<p>Equip yourself with the necessary tools for the job. From wire strippers to multimeters, discover the professional toolkit that ensures a smooth and efficient wiring process.</p>
<h3>Cracking the Color Code</h3>
<center><img src="https://tse1.mm.bing.net/th?q=Cracking+the+Color+Code+1966+f100+signal+light+wiring+diagram"></center>
<p>Delve into the significance of color codes within the wiring diagram. Learn how to identify and interpret these codes, unlocking the language of signals that flows through the veins of your F100.</p>
<h3>Navigating the Circuits</h3>
<center><img src="https://tse1.mm.bing.net/th?q=Navigating+the+Circuits+1966+f100+signal+light+wiring+diagram"></center>
<p>Map out the circuits responsible for guiding your signal lights. Gain a visual understanding of the pathways that ensure seamless communication between components.</p>
<h3>Avoiding Common Pitfalls</h3>
<center><img src="https://tse1.mm.bing.net/th?q=Avoiding+Common+Pitfalls+1966+f100+signal+light+wiring+diagram"></center>
<p>Forewarned is forearmed. Explore common pitfalls and challenges associated with the wiring process, along with professional tips on how to sidestep potential issues.</p>
<h3>Modernizing for Safety</h3>
<center><img src="https://tse1.mm.bing.net/th?q=Modernizing+for+Safety+1966+f100+signal+light+wiring+diagram"></center>
<p>Upgrade your signal system to meet modern safety standards. Discover techniques and components that enhance visibility and ensure a safer driving experience.</p>
<h3>Troubleshooting Tips</h3>
<center><img src="https://tse1.mm.bing.net/th?q=Troubleshooting+Tips+1966+f100+signal+light+wiring+diagram"></center>
<p>When lights go out, troubleshooting becomes crucial. Explore a set of tips and tricks for identifying and resolving common issues in your F100's signal light system.</p>
<h3>Mastering the Art of Splicing</h3>
<center><img src="https://tse1.mm.bing.net/th?q=Mastering+the+Art+of+Splicing+1966+f100+signal+light+wiring+diagram"></center>
<p>Splicing is an art. Learn professional techniques for achieving seamless connections, ensuring the longevity and reliability of your F100's signal light wiring.</p>
<h3>Adding a Personal Touch</h3>
<center><img src="https://tse1.mm.bing.net/th?q=Adding+a+Personal+Touch+1966+f100+signal+light+wiring+diagram"></center>
<p>Explore customization options to add a personal touch to your F100. From unique lighting setups to special features, make your vehicle a true reflection of your style.</p>
<h3>Expert Insights and Q&A</h3>
<center><img src="https://tse1.mm.bing.net/th?q=Expert+Insights+and+Q%26A+1966+f100+signal+light+wiring+diagram"></center>
<p>Cap off your journey with expert insights. Engage in a Q&A session covering advanced topics, gaining valuable knowledge from professionals in the field of automotive wiring.</p>
<p> </p>htmlCopy code<p>Welcome to the intricate world of the 1966 F100 signal light wiring diagram, a treasure trove of knowledge that not only unveils the mysteries of automotive wiring but also invites you to embark on a journey through time. In this detailed exploration, we'll navigate the complexities of the 1966 F100 signal light system, offering insights, tips, and a touch of empathy for every enthusiast and restorer.</p>
<h2>Decoding the Blueprint</h2>
<center><img src="https://tse1.mm.bing.net/th?q=Decoding+the+Blueprint+1966+f100+signal+light+wiring+diagram"></center>
<p>Embarking on the journey of understanding the 1966 F100 signal light wiring diagram is like deciphering a blueprint that holds the key to the soul of this classic truck. As we delve into the intricate details, imagine the historical significance of each wire, connecting us not just to a system but to the essence of an era gone by. The wiring diagram becomes a roadmap, guiding us through the inner workings of the vehicle's electrical architecture with precision and purpose.</p>
<h2>Essential Tools for Success</h2>
<center><img src="https://tse1.mm.bing.net/th?q=Essential+Tools+for+Success+1966+f100+signal+light+wiring+diagram"></center>
<p>Equipping oneself for the journey ahead is essential, much like a seasoned traveler preparing for an expedition. The 1966 F100 signal light wiring diagram demands a specific set of tools that act as companions in this exploration. From wire strippers to multimeters, each tool serves a unique purpose, contributing to the success of the wiring process. As we gather our tools, it's not just a mechanical preparation; it's an emotional connection to the craft, a commitment to unveiling the beauty within the blueprint.</p>
<h2>Cracking the Color Code</h2>
<center><img src="https://tse1.mm.bing.net/th?q=Cracking+the+Color+Code+1966+f100+signal+light+wiring+diagram"></center>
<p>Imagine the wiring diagram as a palette of colors, each shade representing a unique function and purpose. Cracking the color code is akin to learning the language of signals that flows through the veins of the 1966 F100. With each color, a story unfolds – a narrative of connections and communications. The color code becomes a poetic expression, and decoding it is an art, allowing us to appreciate the symphony of signals that make this classic truck truly remarkable.</p>
<h2>Navigating the Circuits</h2>
<center><img src="https://tse1.mm.bing.net/th?q=Navigating+the+Circuits+1966+f100+signal+light+wiring+diagram"></center>
<p>Our journey continues as we navigate through the circuits that form the lifelines of the 1966 F100 signal light system. Picture these circuits as roads on a map, guiding the signals to their destination with precision and efficiency. Understanding the pathways is like becoming a cartographer of electrical currents, mapping out the intricate network that brings illumination to the darkest corners of the vehicle. Navigating the circuits is not just a technical feat; it's a poetic dance of electrons.</p>
<h2>Avoiding Common Pitfalls</h2>
<center><img src="https://tse1.mm.bing.net/th?q=Avoiding+Common+Pitfalls+1966+f100+signal+light+wiring+diagram"></center>
<p>As we embark on this journey, it's crucial to be aware of common pitfalls that may lie ahead. Imagine traversing a rugged terrain where challenges await at every turn. Avoiding these pitfalls is not just a matter of skill; it's a testament to our dedication to preserving the integrity of the 1966 F100 signal light system. From frayed wires to faulty connections, each pitfall represents a hurdle that, when overcome, brings us closer to a flawless restoration.</p>
<h2>Modernizing for Safety</h2>
<center><img src="https://tse1.mm.bing.net/th?q=Modernizing+for+Safety+1966+f100+signal+light+wiring+diagram"></center>
<p>Modernizing the signal system goes beyond a mere technical upgrade; it's a commitment to safety and reliability. Imagine the 1966 F100 not just as a relic of the past but as a vehicle that can seamlessly integrate with contemporary safety standards. Our empathy extends to envisioning the joy and peace of mind that comes with knowing your classic truck is equipped with modern features, ensuring a safe journey for you and those who share the road.</p>
<h2>Troubleshooting Tips</h2>
<center><img src="https://tse1.mm.bing.net/th?q=Troubleshooting+Tips+1966+f100+signal+light+wiring+diagram"></center>
<p>Even the most well-prepared journey may encounter unforeseen challenges. Troubleshooting tips become our guide through moments of uncertainty, offering solutions to bring the lights back on when the road gets dim. Imagine these tips as a friendly companion, ready to assist you in moments of need. Troubleshooting is not just about fixing problems; it's about resilience and the satisfaction that comes with overcoming obstacles in the pursuit of a well-lit path.</p>
<h2>Mastering the Art of Splicing</h2>
<center><img src="https://tse1.mm.bing.net/th?q=Mastering+the+Art+of+Splicing+1966+f100+signal+light+wiring+diagram"></center>
<p>Splicing wires is an art that requires precision and finesse. Imagine the process as creating a seamless fusion, where each connection is not just functional but a work of craftsmanship. Mastering the art of splicing is about creating bonds that withstand the test of time, ensuring the longevity and reliability of the 1966 F100 signal light system. It's a tactile experience that transcends the technical, connecting us to the heart of the vehicle.</p>
<h2>Adding a Personal Touch</h2>
<center><img src="https://tse1.mm.bing.net/th?q=Adding+a+Personal+Touch+1966+f100+signal+light+wiring+diagram"></center>
<p>As we near the end of our journey, we find ourselves at a crossroads where customization beckons. Adding a personal touch to the 1966 F100 signal light system is like leaving a mark on the pages of history. Imagine the joy of tailoring the lighting setup to reflect your unique style and preferences. It's a moment of creative expression, where the vehicle becomes a canvas for your imagination. Adding a personal touch is not just a choice; it's a statement that resonates with the soul of the enthusiast.</p>
<h2>Expert Insights and Q&A</h2>
<center><img src="https://tse1.mm.bing.net/th?q=Expert+Insights+and+Q%26A+1966+f100+signal+light+wiring+diagram"></center>
<p>Our journey concludes with a gathering of experts who share their insights and engage in a Q&A session. Imagine sitting down with seasoned professionals, exchanging thoughts and gaining valuable
<p> </p><h6>Another point of view about '1966 F100 SIGNAL LIGHT WIRING DIAGRAM'.</h6><p>1. Imagine the 1966 F100 signal light wiring diagram as a roadmap to the soul of your classic truck, where each wire tells a story of the bygone era.Envision the process of decoding the blueprint as unlocking a time capsule, revealing not just electrical connections but a nostalgic journey through automotive history.Picture the essential tools for success as the companions on a thrilling expedition, each tool having its role in the symphony of restoration.Cracking the color code becomes an artistic endeavor, where the language of signals is spoken in hues, creating a visual masterpiece within the wiring diagram.Navigating the circuits is akin to exploring uncharted territories, with each pathway leading to the heart of illumination in your F100.Avoiding common pitfalls transforms the restoration journey into a strategic game, where foresight and expertise are the keys to overcoming challenges.Modernizing for safety is not just an upgrade but a futuristic vision, blending the classic charm with contemporary standards for a secure and enjoyable ride.Troubleshooting tips become the troubadours of your journey, singing solutions to bring the lights back on when faced with unexpected dimness.Mastering the art of splicing is a dance of wires, where precision and finesse create a choreography that ensures the longevity of your F100's signal light system.Adding a personal touch is the moment of creative flair, where your unique style and preferences illuminate the road, turning your classic truck into a canvas of self-expression.</p><p> </p><strong><u>Conclusion : Illuminate the Road: 1966 F100 Signal Light Wiring Diagram Unveiled for Seamless Brilliance!.</u></strong><p>In conclusion, the exploration of the <u>1966 F100 signal light wiring diagram</u> is not merely an unraveling of electrical complexities but a profound journey through the annals of automotive engineering. Delving into the intricacies of the wiring schematic, enthusiasts and restorers alike are granted a unique opportunity to connect with the heritage of this iconic truck. The <u>1966 F100 signal light wiring diagram</u> serves as a bridge between past and present, where each wire is a conduit, carrying with it the echoes of an era characterized by craftsmanship and innovation.</p>
<p>As we bid farewell to this in-depth exploration, it is our hope that the insights gained have not only demystified the technicalities of the <u>1966 F100 signal light wiring diagram</u> but have also ignited a renewed appreciation for the historical significance embedded in the veins of classic vehicles. Moving forward, may every restoration project be approached with a scholarly curiosity, recognizing that within the intricacies of wiring diagrams lies the essence of automotive heritage. The journey does not conclude here; rather, it extends an invitation for enthusiasts to continue their scholarly pursuit, uncovering the layers of craftsmanship that make the <u>1966 F100 signal light wiring diagram</u> an indelible part of automotive history.</p><p> </p><p><article><figure><noscript><img src='https://tse1.mm.bing.net/th?q=Question and answer Illuminate the Road: 1966 F100 Signal Light Wiring Diagram Unveiled for Seamless Brilliance!' alt='Question and answer Illuminate the Road: 1966 F100 Signal Light Wiring Diagram Unveiled for Seamless Brilliance!' /></noscript><img class='v-cover ads-img' src='https://tse1.mm.bing.net/th?q=Question and answer Illuminate the Road: 1966 F100 Signal Light Wiring Diagram Unveiled for Seamless Brilliance!' alt='Question and answer Illuminate the Road: 1966 F100 Signal Light Wiring Diagram Unveiled for Seamless Brilliance!' width='100%' onerror='this.onerror=null;this.src='https://upload.wikimedia.org/wikipedia/commons/d/d1/Image_not_available.png?20210219185637';' style='margin-right: 8px;margin-bottom: 8px;' /></figure></article></p><p> </p><strong><i>Questions & Answer :</i></strong><p>1. <strong>How can I decipher the color codes in the 1966 F100 signal light wiring diagram?</strong></p>
<ul>
<li>Empathic Answer: Decoding the color codes is like translating the language of your F100's signals. Each color has a unique meaning, so envision it as a vibrant palette where each shade tells a story of electrical connections and functions.</li>
</ul>
<p>2. <strong>What tools are essential for understanding the 1966 F100 signal light wiring diagram?</strong></p>
<ul>
<li>Empathic Answer: Imagine the tools as your companions on a journey through time. From wire strippers to multimeters, these tools are not just instruments but partners in the intricate dance of restoring your F100, adding a touch of craftsmanship to the process.</li>
</ul>
<p>3. <strong>Can modernizing the signal system impact the classic charm of my 1966 F100?</strong></p>
<ul>
<li>Empathic Answer: Modernizing for safety is like adding a layer of protection to a cherished artifact. Envision it as preserving the timeless beauty of your F100 while ensuring it harmoniously coexists with contemporary safety standards, offering you both nostalgia and peace of mind.</li>
</ul>
<p>4. <strong>What troubleshooting tips can help me overcome challenges in the wiring process?</strong></p>
<ul>
<li>Empathic Answer: Troubleshooting is your guide through moments of uncertainty. Picture it as a friendly companion, ready to assist you in moments of need. Each tip is a piece of advice born out of experience, aimed at bringing the lights back on and guiding you through the restoration journey.</li>
</ul>
<p>5. <strong>How can I add a personal touch to the 1966 F100 signal light system?</strong></p>
<ul>
<li>Empathic Answer: Adding a personal touch is like leaving your signature on a work of art. Envision it as a moment of creative expression where your unique style illuminates the road ahead. Your F100 becomes a canvas, and each customization is a stroke that transforms it into a reflection of your automotive passion.</li>
</ul><p> </p>
Keywords : '1966 F100 SIGNAL LIGHT WIRING DIAGRAM'Milohttp://www.blogger.com/profile/01418902555588264834noreply@blogger.com0tag:blogger.com,1999:blog-4101198853060839868.post-2356711818835085002024-01-19T05:00:00.000-08:002024-01-21T14:32:58.502-08:00Dive into the Past: Unraveling the Mysteries with Our 1968 Dodge Coronet Wiring Diagram – Your Key to Classic Car Restoration Success!<p> </p><p><article><figure><noscript><img src='https://tse1.mm.bing.net/th?q=Dive into the Past: Unraveling the Mysteries with Our 1968 Dodge Coronet Wiring Diagram – Your Key to Classic Car Restoration Success!' alt='Dive into the Past: Unraveling the Mysteries with Our 1968 Dodge Coronet Wiring Diagram – Your Key to Classic Car Restoration Success!' width='640' height='360' /></noscript><img class='v-cover ads-img' src='https://tse1.mm.bing.net/th?q=Dive into the Past: Unraveling the Mysteries with Our 1968 Dodge Coronet Wiring Diagram – Your Key to Classic Car Restoration Success!' alt='Dive into the Past: Unraveling the Mysteries with Our 1968 Dodge Coronet Wiring Diagram – Your Key to Classic Car Restoration Success!' width='100%' onerror='this.onerror=null;this.src='https://upload.wikimedia.org/wikipedia/commons/d/d1/Image_not_available.png?20210219185637';' style='margin-right: 8px;margin-bottom: 8px;' /></figure></article></p><blockquote>Unlock the secrets of your 1968 Dodge Coronet with our precise wiring diagram. Master your car's electrical system for seamless restoration and peak performance.</blockquote><p> </p>Embark on a journey through automotive history as we dissect the intricacies of the <b>1968 Dodge Coronet wiring diagram</b>. Like a seasoned <i>journalist</i> unveiling long-buried secrets, we navigate the labyrinth of wires that once powered this iconic classic. Picture yourself as an investigative reporter, peeling back the layers of time, as each connection and circuit tells a story of the engineering marvels of yesteryear. In this pursuit of automotive truth, our guide, the <b>wiring diagram</b>, becomes our journalistic accomplice, revealing the blueprint that once brought this vintage beauty to life. As we decode the language of electrons and pathways, join us on a journalistic expedition into the heart of a 1968 Dodge Coronet, where every wire whispers tales of a bygone era.<p> </p><h4>Top 10 important point for '1968 DODGE CORONET WIRING DIAGRAM'</h4><table cellpadding='0' cellspacing='0' class='tr-caption-container' style='float: right;'><tbody><tr><td style='text-align: center;'><img border='0' src='https://tse1.mm.bing.net/th?q=Top 10 '1968 DODGE CORONET WIRING DIAGRAM'' width='200' /></td></tr><tr></tr></tbody></table> <ol>
<li>Decoding the Matrix of Wires: A Crash Course in 1968 Dodge Coronet's Secret Language</li>
<li>Electric Circus: Navigating the Wire Maze with Style and Grace</li>
<li>Wire Whisperer Chronicles: Tales of a 1968 Dodge's Electrifying Drama</li>
<li>Shock Therapy: Why Your Coronet Deserves a Wiring Makeover</li>
<li>Spaghetti Junction Survival Guide: Making Sense of Tangled Wires</li>
<li>Electrical Hacks 101: Impress Your Car with Your Wiring Wizardry</li>
<li>Current Affairs: Unraveling the Mysteries of 1968 Coronet's Power Play</li>
<li>The Zen of Zenith: Finding Inner Peace in Your Car's Wiring Diagram</li>
<li>From Chaos to Connection: A Comedy of Errors in Coronet's Wiring Odyssey</li>
<li>Wires Gone Wild: An Electrifying Comedy Show in Your Engine Bay!</li>
</ol><p> </p><h5>Several Facts that you should know about '1968 DODGE CORONET WIRING DIAGRAM'.</h5><h3>Decoding the Blueprint</h3>
<p>Understanding the intricacies of your 1968 Dodge Coronet's electrical system begins with the comprehensive <i>wiring diagram</i>. This visual guide is the roadmap to your car's inner workings, revealing the placement and connections of each wire with precision.</p>
<center><img src="https://tse1.mm.bing.net/th?q=Decoding the Blueprint 1968 dodge coronet wiring diagram" alt="Decoding the Blueprint Image"></center>
<h3>Navigating the Wire Maze</h3>
<p>It's easy to feel overwhelmed by the tangled web of wires under your Coronet's hood. Fear not! The wiring diagram acts as your trusty guide, helping you navigate through the maze with ease. Identify each wire's role and simplify the once-daunting task of troubleshooting.</p>
<center><img src="https://tse1.mm.bing.net/th?q=Navigating the Wire Maze 1968 dodge coronet wiring diagram" alt="Navigating the Wire Maze Image"></center>
<h3>Restoration Revolution</h3>
<p>For enthusiasts embarking on a restoration journey, the <i>1968 Dodge Coronet wiring diagram</i> is a game-changer. This invaluable resource empowers you to breathe new life into your classic beauty by ensuring that every electrical connection is restored to its original glory.</p>
<center><img src="https://tse1.mm.bing.net/th?q=Restoration Revolution 1968 dodge coronet wiring diagram" alt="Restoration Revolution Image"></center>
<h3>Electrical Symphony</h3>
<p>Your car's electrical system is like a symphony, and the wiring diagram is the conductor's score. Explore the harmony of electrons flowing through wires, orchestrating a masterpiece that powers every component of your 1968 Dodge Coronet.</p>
<center><img src="https://tse1.mm.bing.net/th?q=Electrical Symphony 1968 dodge coronet wiring diagram" alt="Electrical Symphony Image"></center>
<h3>DIY Diagnostic Delight</h3>
<p>Say goodbye to costly visits to the mechanic. Armed with the wiring diagram, you become the detective in your Coronet's diagnostic journey. Unravel the mysteries behind malfunctions, identify faulty connections, and save both time and money.</p>
<center><img src="https://tse1.mm.bing.net/th?q=DIY Diagnostic Delight 1968 dodge coronet wiring diagram" alt="DIY Diagnostic Delight Image"></center>
<h3>Power Play</h3>
<p>Maximize your Coronet's power potential by delving into the wiring diagram. Learn how each wire contributes to the overall performance of your vehicle. From ignition to lights, understanding the power flow enhances your driving experience.</p>
<center><img src="https://tse1.mm.bing.net/th?q=Power Play 1968 dodge coronet wiring diagram" alt="Power Play Image"></center>
<h3>Customization Chronicles</h3>
<p>For those seeking a personalized touch, the wiring diagram is the starting point for customization. Whether adding new features or modifying existing ones, this guide ensures that your electrical modifications are seamlessly integrated into the Coronet's system.</p>
<center><img src="https://tse1.mm.bing.net/th?q=Customization Chronicles 1968 dodge coronet wiring diagram" alt="Customization Chronicles Image"></center>
<h3>Maintenance Magic</h3>
<p>Regular maintenance is the key to a healthy car, and the wiring diagram is your magic wand. Stay ahead of potential issues by using the diagram as a tool for routine checks and preventive measures, ensuring your Coronet runs smoothly for years to come.</p>
<center><img src="https://tse1.mm.bing.net/th?q=Maintenance Magic 1968 dodge coronet wiring diagram" alt="Maintenance Magic Image"></center><p> </p><h2>The Evolution of Automotive Electrical Systems</h2>
<p>The <i>1968 Dodge Coronet wiring diagram</i> serves as a pivotal document in understanding the evolution of automotive electrical systems during a transformative era. In the late 1960s, as vehicles embraced modern technologies, the wiring diagram became a crucial tool for engineers and enthusiasts alike. This comprehensive guide documented the intricate network of wires that powered and connected various components within the 1968 Dodge Coronet, providing a roadmap for both assembly and troubleshooting.</p>
<center><img src="https://tse1.mm.bing.net/th?q=The Evolution of Automotive Electrical Systems 1968 dodge coronet wiring diagram" alt="Evolution of Automotive Electrical Systems Image"></center>
<h3>The Blueprint of Innovation</h3>
<p>At the heart of every automobile is its electrical system, and the <i>1968 Dodge Coronet wiring diagram</i> is akin to a detailed blueprint, mapping out the pathways of electric currents that bring the vehicle to life. This meticulous documentation represents a shift in automotive engineering towards more sophisticated and integrated electrical systems, setting the stage for the technological advancements that would follow in subsequent decades.</p>
<center><img src="https://tse1.mm.bing.net/th?q=The Blueprint of Innovation 1968 dodge coronet wiring diagram" alt="Blueprint of Innovation Image"></center>
<h3>Interconnected Systems: A Symphony of Wires</h3>
<p>As we delve into the <i>1968 Dodge Coronet wiring diagram</i>, it becomes evident that the electrical system is more than just a collection of isolated components—it's a symphony of interconnected systems working in harmony. From the ignition system to the lighting circuits, each wire plays a specific role, contributing to the overall performance of the vehicle. This level of integration marked a departure from earlier, simpler electrical designs.</p>
<center><img src="https://tse1.mm.bing.net/th?q=Interconnected Systems: A Symphony of Wires 1968 dodge coronet wiring diagram" alt="Interconnected Systems Image"></center>
<h3>Advancements in Safety and Comfort</h3>
<p>The <i>1968 Dodge Coronet wiring diagram</i> not only illustrates the complexity of electrical connections but also highlights the advancements in safety and comfort that were becoming paramount in the automotive industry. From safety features like seatbelt warning systems to innovations in climate control and lighting, the wiring diagram unveils the technological strides made to enhance the driving experience.</p>
<center><img src="https://tse1.mm.bing.net/th?q=Advancements in Safety and Comfort 1968 dodge coronet wiring diagram" alt="Advancements in Safety and Comfort Image"></center>
<h3>Assembly Guidance for Engineers</h3>
<p>For the engineers responsible for assembling the 1968 Dodge Coronet, the wiring diagram served as a comprehensive guide. Each wire's placement and connection were meticulously detailed, ensuring a standardized approach to assembly on the production line. This level of precision not only expedited the manufacturing process but also contributed to the overall reliability of the vehicle.</p>
<center><img src="https://tse1.mm.bing.net/th?q=Assembly Guidance for Engineers 1968 dodge coronet wiring diagram" alt="Assembly Guidance Image"></center>
<h3>Diagnostic Empowerment for Enthusiasts</h3>
<p>Enthusiasts and mechanics alike found a valuable resource in the <i>1968 Dodge Coronet wiring diagram</i> for diagnostic purposes. Troubleshooting electrical issues became a more systematic and efficient process with the aid of this document. Identifying faulty connections, short circuits, or malfunctions was made easier, allowing for a quicker resolution of issues and reducing downtime for owners.</p>
<center><img src="https://tse1.mm.bing.net/th?q=Diagnostic Empowerment for Enthusiasts 1968 dodge coronet wiring diagram" alt="Diagnostic Empowerment Image"></center>
<h3>Technological Heritage: Bridging the Past and Present</h3>
<p>Examining the <i>1968 Dodge Coronet wiring diagram</i> is akin to opening a time capsule that bridges the past and present of automotive technology. While the technology itself may seem rudimentary by today's standards, the foundational principles established in these early wiring diagrams laid the groundwork for the sophisticated electrical systems found in contemporary vehicles.</p>
<center><img src="https://tse1.mm.bing.net/th?q=Technological Heritage 1968 dodge coronet wiring diagram" alt="Technological Heritage Image"></center>
<h3>Preserving Automotive History</h3>
<p>Beyond its technical significance, the <i>1968 Dodge Coronet wiring diagram</i> holds cultural and historical value. It serves as a tangible artifact of an era when automobiles underwent a technological metamorphosis. Preserving and understanding these documents not only honors the engineers and designers of the past but also contributes to a comprehensive narrative of automotive history.</p>
<center><img src="https://tse1.mm.bing.net/th?q=Preserving Automotive History 1968 dodge coronet wiring diagram" alt="Preserving Automotive History Image"></center>
<p>In conclusion, the <i>1968 Dodge Coronet wiring diagram</i> is more than just a technical document; it is a testament to the evolution of automotive engineering. As we dissect its intricate details, we gain insights not only into the electrical systems of a specific vehicle but also into the broader transformation that was taking place in the automotive industry during that pivotal period.</p><p> </p><h6>Another point of view about '1968 DODGE CORONET WIRING DIAGRAM'.</h6><p>1. The <i>1968 Dodge Coronet wiring diagram</i> is like a roadmap for your car's electrical system, showing how everything connects and works together.</p>
<p>2. It helps you understand the different wires and what each one is responsible for, from the ignition system to the lights.</p>
<p>3. For car enthusiasts, it's a valuable tool for restoring and maintaining their classic vehicles, ensuring everything runs smoothly.</p>
<p>4. Mechanics find it handy for diagnosing electrical issues, making troubleshooting more straightforward and efficient.</p>
<p>5. As you follow the lines on the diagram, you get a sense of how technology was advancing in the late 1960s, especially in terms of safety and comfort features.</p>
<p>6. The diagram isn't just for professionals; even DIYers can benefit from it, whether they're customizing their Coronet or just doing routine maintenance.</p>
<p>7. It's like a snapshot of automotive history, showing how cars were wired during a time when technology was rapidly evolving.</p>
<p>8. Understanding your car's wiring diagram is empowering, giving you the knowledge to tackle electrical issues and appreciate the inner workings of your 1968 Dodge Coronet.</p><p> </p><strong><u>Conclusion : Dive into the Past: Unraveling the Mysteries with Our 1968 Dodge Coronet Wiring Diagram – Your Key to Classic Car Restoration Success!.</u></strong><p>In conclusion, delving into the intricacies of the <em><u>1968 Dodge Coronet wiring diagram</u></em> unveils not only the technical blueprint of a classic automobile but also a historical snapshot of a transformative era in automotive engineering. This document, akin to an archaeological artifact, provides a tangible link to a time when the automotive industry was undergoing a technological metamorphosis. From the integration of safety features to the orchestration of an electrical symphony, the <em><u>wiring diagram</u></em> captures the essence of a period where innovation and advancement were steering the course of vehicular evolution.</p>
<p>As enthusiasts and curious minds alike explore the <em><u>1968 Dodge Coronet wiring diagram</u></em>, it is an invitation to not only understand the complexities of a bygone electrical system but also to appreciate the foundational principles that laid the groundwork for the sophisticated automotive technologies we encounter today. Preserving this piece of automotive history is not merely an academic exercise but an acknowledgment of the engineers and designers who paved the way for the present. So, as you embark on your journey into the wiring diagram, consider it more than a technical document—regard it as a window into the past, a key to comprehending the ever-evolving tapestry of automotive ingenuity.</p><p> </p><p><article><figure><noscript><img src='https://tse1.mm.bing.net/th?q=Question and answer Dive into the Past: Unraveling the Mysteries with Our 1968 Dodge Coronet Wiring Diagram – Your Key to Classic Car Restoration Success!' alt='Question and answer Dive into the Past: Unraveling the Mysteries with Our 1968 Dodge Coronet Wiring Diagram – Your Key to Classic Car Restoration Success!' /></noscript><img class='v-cover ads-img' src='https://tse1.mm.bing.net/th?q=Question and answer Dive into the Past: Unraveling the Mysteries with Our 1968 Dodge Coronet Wiring Diagram – Your Key to Classic Car Restoration Success!' alt='Question and answer Dive into the Past: Unraveling the Mysteries with Our 1968 Dodge Coronet Wiring Diagram – Your Key to Classic Car Restoration Success!' width='100%' onerror='this.onerror=null;this.src='https://upload.wikimedia.org/wikipedia/commons/d/d1/Image_not_available.png?20210219185637';' style='margin-right: 8px;margin-bottom: 8px;' /></figure></article></p><p> </p><strong><i>Questions & Answer :</i></strong><p><strong>1. How can I obtain a copy of the 1968 Dodge Coronet wiring diagram?</strong></p>
<ul>
<li>Visit official Dodge or automotive manual websites for downloadable versions.</li>
<li>Check with online forums or communities where fellow enthusiasts may share resources.</li>
<li>Local libraries or auto repair shops might have manuals available for reference.</li>
</ul>
<p><strong>2. Is understanding the wiring diagram essential for DIY repairs?</strong></p>
<ul>
<li>Yes, comprehending the wiring diagram is crucial for identifying and resolving electrical issues.</li>
<li>It empowers DIYers to perform tasks ranging from basic maintenance to advanced modifications.</li>
<li>Refer to the diagram for a comprehensive understanding of your Coronet's electrical system.</li>
</ul>
<p><strong>3. Are there any online tutorials available for interpreting the wiring diagram?</strong></p>
<ul>
<li>Many automotive websites and YouTube channels offer step-by-step tutorials for decoding the diagram.</li>
<li>Look for resources that break down each component and its corresponding wiring.</li>
<li>Consider joining online communities where members may share insights and guidance.</li>
</ul>
<p><strong>4. Can the wiring diagram help with customizing my 1968 Dodge Coronet?</strong></p>
<ul>
<li>Absolutely, the diagram is a valuable tool for understanding the existing wiring and integrating custom modifications seamlessly.</li>
<li>It provides a clear map for adding new features or altering the electrical setup to suit your preferences.</li>
<li>Always follow safety guidelines and consult the diagram during any customization process.</li>
</ul>
<p><strong>5. How often should I refer to the wiring diagram for maintenance?</strong></p>
<ul>
<li>Regularly consult the diagram during routine maintenance checks to ensure the electrical system is in optimal condition.</li>
<li>Use it as a reference for identifying potential issues before they become major problems.</li>
<li>Consider the wiring diagram a helpful companion for keeping your 1968 Dodge Coronet in top shape.</li>
</ul>
<p>Remember, the <em>1968 Dodge Coronet wiring diagram</em> is your go-to resource for understanding, maintaining, and customizing the electrical system of your classic vehicle.</p><p> </p>
Keywords : '1968 DODGE CORONET WIRING DIAGRAM'Milohttp://www.blogger.com/profile/01418902555588264834noreply@blogger.com0tag:blogger.com,1999:blog-4101198853060839868.post-74970593421789569742024-01-17T18:00:00.000-08:002024-01-21T14:32:58.826-08:00Wipe Away the Mystery: Unveiling the 1968 F100 Wiper Circuit Diagram for Classic Truck Enthusiasts!<p> </p><p><article><figure><noscript><img src='https://tse1.mm.bing.net/th?q=Wipe Away the Mystery: Unveiling the 1968 F100 Wiper Circuit Diagram for Classic Truck Enthusiasts!' alt='Wipe Away the Mystery: Unveiling the 1968 F100 Wiper Circuit Diagram for Classic Truck Enthusiasts!' width='640' height='360' /></noscript><img class='v-cover ads-img' src='https://tse1.mm.bing.net/th?q=Wipe Away the Mystery: Unveiling the 1968 F100 Wiper Circuit Diagram for Classic Truck Enthusiasts!' alt='Wipe Away the Mystery: Unveiling the 1968 F100 Wiper Circuit Diagram for Classic Truck Enthusiasts!' width='100%' onerror='this.onerror=null;this.src='https://upload.wikimedia.org/wikipedia/commons/d/d1/Image_not_available.png?20210219185637';' style='margin-right: 8px;margin-bottom: 8px;' /></figure></article></p><blockquote>Unlock the secrets of the 1968 F100 Wiper Circuit Diagram. Gain professional insights into vintage automotive engineering for enhanced restoration expertise.</blockquote><p> </p>In the fascinating realm of classic trucks, the <b>1968 F100 Wiper Circuit Diagram</b> stands as a pivotal piece of automotive history. As we embark on a journey through time, let's delve into the intricacies of this iconic vehicle's wiper system. <i>Empathically</i> connecting enthusiasts with the past, this circuit diagram serves as a window into the innovative engineering that defined an era. Picture yourself behind the wheel, raindrops cascading down, and with a simple flick, the wipers dance to the beat of technological prowess. The allure of the <b>1968 F100 Wiper Circuit Diagram</b> is more than just wires and connections; it's a symphony of automotive empathy, bridging the gap between then and now.<p> </p><h4>Top 10 important point for '1968 F100 Wiper Circuit Diagram'</h4><table cellpadding='0' cellspacing='0' class='tr-caption-container' style='float: right;'><tbody><tr><td style='text-align: center;'><img border='0' src='https://tse1.mm.bing.net/th?q=Top 10 '1968 F100 Wiper Circuit Diagram'' width='200' /></td></tr><tr></tr></tbody></table> <ol>
<li>Wiper Wizardry Unveiled</li>
<li>Circuits: Where Magic Happens</li>
<li>Wiper Choreography 101</li>
<li>Electricity's Got the Moves</li>
<li>Wires: The Unsung Heroes</li>
<li>Rainy Days, Wiper Plays</li>
<li>F100: Where Science Meets Swish</li>
<li>Diagram Decoded: Not Rocket Science</li>
<li>Wipe Away Woes with F100 Know-How</li>
<li>Laugh in the Face of Wiper Confusion</li>
</ol><p> </p><h5>Several Facts that you should know about '1968 F100 Wiper Circuit Diagram'.</h5><h3>The Evolution of Automotive Technology</h3>
<center><img src="https://tse1.mm.bing.net/th?q=evolution+of+automotive+technology" alt="Automotive Technology Evolution"></center>
<p>The <i>1968 F100 Wiper Circuit Diagram</i> stands as a testament to the evolution of automotive technology during an era marked by innovation. Examining this diagram unveils the intricate web of electrical connections that powered the windshield wipers of the iconic 1968 F100 truck.</p>
<h3>Decoding the Diagram</h3>
<center><img src="https://tse1.mm.bing.net/th?q=decoding+wiper+circuit+diagram" alt="Decoding Wiper Circuit Diagram"></center>
<p>Delving into the intricacies of the wiper circuit diagram, one encounters a visual symphony of lines and symbols. This section aims to decode the various components, showcasing the meticulous design that engineers employed in crafting a functional and efficient wiper system.</p>
<h3>Engineering Marvel: F100 Wiper System</h3>
<center><img src="https://tse1.mm.bing.net/th?q=F100+wiper+system" alt="F100 Wiper System"></center>
<p>Appreciating the F100 wiper system as an engineering marvel involves understanding the synergy between mechanical and electrical components. The diagram provides a blueprint for enthusiasts to grasp the mechanical intricacies of this vintage masterpiece.</p>
<h3>Technological Advancements of 1968</h3>
<center><img src="https://tse1.mm.bing.net/th?q=technological+advancements+1968" alt="Technological Advancements 1968"></center>
<p>Transporting ourselves back to 1968, a pivotal year in technological advancements, we explore how the F100 wiper circuit diagram reflects the cutting-edge innovations of its time. The diagram encapsulates the spirit of an era marked by rapid progress in automotive engineering.</p>
<h3>Electrical Harmony in Motion</h3>
<center><img src="https://tse1.mm.bing.net/th?q=electrical+harmony+in+motion" alt="Electrical Harmony in Motion"></center>
<p>This segment delves into the synchronized dance of electrical signals that orchestrated the fluid motion of windshield wipers. Examining the circuit diagram reveals the harmonious interplay of electrical components that transformed a simple switch into a rhythmic wiper performance.</p>
<h3>Restoration Insights for Enthusiasts</h3>
<center><img src="https://tse1.mm.bing.net/th?q=restoration+insights+enthusiasts" alt="Restoration Insights for Enthusiasts"></center>
<p>For restoration enthusiasts, the 1968 F100 wiper circuit diagram serves as a valuable resource. This section provides insights into leveraging the diagram for meticulous restoration, ensuring that the wiper system functions with the precision intended by the original designers.</p>
<h3>Preserving Automotive Heritage</h3>
<center><img src="https://tse1.mm.bing.net/th?q=preserving+automotive+heritage" alt="Preserving Automotive Heritage"></center>
<p>Preservation is key to safeguarding automotive heritage, and the wiper circuit diagram plays a pivotal role in this endeavor. This paragraph discusses the importance of maintaining and preserving historical documentation, such as circuit diagrams, for future generations.</p>
<h3>Legacy of the 1968 F100 Wiper Circuit Diagram</h3>
<center><img src="https://tse1.mm.bing.net/th?q=legacy+of+F100+wiper+circuit+diagram" alt="Legacy of F100 Wiper Circuit Diagram"></center>
<p>Concluding our exploration, we reflect on the enduring legacy of the 1968 F100 wiper circuit diagram. Its significance extends beyond the confines of automotive engineering, embodying a slice of history that continues to captivate enthusiasts and scholars alike.</p><p> </p><h2>The Timeless Elegance of the 1968 F100 Wiper Circuit Diagram</h2>
<p>Transport yourself to a bygone era, where the automotive landscape was defined by elegance and innovation. In the realm of classic trucks, the <i>1968 F100 Wiper Circuit Diagram</i> emerges as an empathic bridge connecting enthusiasts with the soul of vintage engineering. This intricate diagram, a visual symphony of lines and symbols, tells the story of a time when every component was meticulously crafted to deliver a driving experience like no other.</p>
<h3>The Artistry of Automotive Engineering</h3>
<p>Embarking on a journey through the 1968 F100 wiper circuit diagram is akin to stepping into an art gallery where each line and connection serves as a stroke on the canvas of automotive history. <i>Empathically</i> guiding our exploration, the diagram unveils the artistry of automotive engineering that transcends the utilitarian functionality of windshield wipers.</p>
<center><img src="https://tse1.mm.bing.net/th?q=automotive+engineering+art" alt="Automotive Engineering Art"></center>
<h3>A Mosaic of Connections</h3>
<p>As we dissect the diagram, it becomes evident that it is not just a collection of wires and nodes; it's a mosaic of connections that orchestrates the graceful dance of wipers across the windshield. Each line tells a story, and each symbol represents a carefully calculated decision by the engineers who sought to create a harmonious blend of form and function.</p>
<center><img src="https://tse1.mm.bing.net/th?q=mosaic+of+connections" alt="Mosaic of Connections"></center>
<h3>Empathy in Motion: The Wiper Choreography</h3>
<p>Empathy, an emotion often reserved for human interactions, finds an unexpected home in the motion of windshield wipers. <i>Empathically</i> designed, the 1968 F100 wiper system goes beyond mere functionality. It choreographs a dance with the raindrops, turning a mundane task into a poetic expression of automotive emotion.</p>
<center><img src="https://tse1.mm.bing.net/th?q=wiper+choreography" alt="Wiper Choreography"></center>
<h3>Technological Time Capsule</h3>
<p>Step back to 1968, a year etched in the annals of technological advancement. The F100 wiper circuit diagram serves as a time capsule, encapsulating the spirit of an era where leaps in innovation were transforming the automotive landscape. Each symbol on the diagram is a testament to the relentless pursuit of progress that defined the late '60s.</p>
<center><img src="https://tse1.mm.bing.net/th?q=technological+time+capsule" alt="Technological Time Capsule"></center>
<h3>Electrical Symphony</h3>
<p>Behind the wheel of the 1968 F100, one wasn't just driving; they were conducting an electrical symphony. <i>Empathically</i> tuned to the rhythm of the road, the wiper circuit diagram demystifies the orchestration of electrical signals that powered the rhythmic swaying of the windshield wipers. It's a symphony where the conductor is a simple switch, and the instruments are the wires and connections.</p>
<center><img src="https://tse1.mm.bing.net/th?q=electrical+symphony" alt="Electrical Symphony"></center>
<h3>Restoration: Preserving the Symphony</h3>
<p>For the enthusiasts and restorers, the 1968 F100 wiper circuit diagram is more than a piece of history; it's a guide to preserving the symphony. <i>Empathically</i> guiding restoration efforts, the diagram becomes a roadmap to ensure that every wire is in tune, and every connection resonates with the precision intended by the original engineers.</p>
<center><img src="https://tse1.mm.bing.net/th?q=restoration+of+symphony" alt="Restoration of Symphony"></center>
<h3>Engineering Elegance in Motion</h3>
<p>As we examine the mechanical intricacies, we witness engineering elegance in motion. The F100 wiper system is a marvel where mechanical components seamlessly integrate with electrical counterparts. <i>Empathically</i> designed to withstand the test of time, these components are a testament to an era when craftsmanship took precedence over mass production.</p>
<center><img src="https://tse1.mm.bing.net/th?q=engineering+elegance" alt="Engineering Elegance"></center>
<h3>Legacy of the 1968 F100 Wiper Circuit Diagram</h3>
<p>Concluding our exploration, we reflect on the enduring legacy of the 1968 F100 wiper circuit diagram. It's not just a technical document; it's a legacy that continues to captivate enthusiasts, scholars, and anyone who appreciates the <i>empathic</i> connection between man and machine. This diagram is a reminder that even in the world of circuits and wires, empathy has a place.</p>
<center><img src="https://tse1.mm.bing.net/th?q=legacy+of+F100+wiper+circuit+diagram" alt="Legacy of F100 Wiper Circuit Diagram"></center><p> </p><h6>Another point of view about '1968 F100 Wiper Circuit Diagram'.</h6><p>When it comes to the <strong>1968 F100 Wiper Circuit Diagram</strong>, it's like taking a peek under the hood of automotive nostalgia. Here's a simple breakdown:</p>
<ol>
<li><p><strong>Visual Symphony:</strong> The diagram is like a roadmap of lines and symbols, telling the story of how engineers made the wipers dance.</p></li>
<li><p><strong>Connect-the-Dots:</strong> It's not just a bunch of wires; it's a mosaic of connections, each playing a role in the windshield wiper performance.</p></li>
<li><p><strong>Dance in the Rain:</strong> The wiper system isn't just functional; it's designed to <em>empathically</em> choreograph a dance with raindrops on your windshield.</p></li>
<li><p><strong>Time Capsule:</strong> Dating back to 1968, the diagram captures the essence of a time when technology was making leaps, and cars were at the forefront of innovation.</p></li>
<li><p><strong>Electrical Harmony:</strong> Behind the wheel, you're not just driving; you're conducting an electrical symphony, where every wire and connection plays a note.</p></li>
<li><p><strong>Restoration Guide:</strong> For enthusiasts, the diagram is more than a piece of paper; it's a guide to restoring the symphony, ensuring that every component hits the right note.</p></li>
<li><p><strong>Mechanical Ballet:</strong> Under the surface, the F100 wiper system is a ballet of mechanical components elegantly syncing with electrical elements.</p></li>
<li><p><strong>Legacy:</strong> As we reflect, the diagram isn't just a technical drawing; it's a legacy that continues to connect us to the charm of a classic era in automotive history.</p></li>
</ol>
<p>So, next time you gaze at the 1968 F100 Wiper Circuit Diagram, see it not just as lines on paper but as a snapshot of a time when simplicity and functionality were elegantly intertwined.</p><p> </p><strong><u>Conclusion : Wipe Away the Mystery: Unveiling the 1968 F100 Wiper Circuit Diagram for Classic Truck Enthusiasts!.</u></strong><p>As we wrap up our journey through the intricacies of the <u><em>1968 F100 Wiper Circuit Diagram</em></u>, let's pause to reflect on the wealth of insight we've gained into the vintage engineering marvel that defined an era. For those embarking on a restoration adventure or simply indulging their curiosity, these instructions serve as a guide to navigating the intricate web of wires and connections that bring the wiper system to life.</p>
<p><u><em>Empathically</em></u> designed to connect enthusiasts with the past, the <u><em>1968 F100 Wiper Circuit Diagram</em></u> isn't just a technical drawing but a portal to a time when simplicity met sophistication on the open road. As you delve into the restoration process or explore the history encapsulated in this diagram, consider it a roadmap that <em>empathically</em> guides you through the symphony of mechanical and electrical components, ensuring the windshield wipers of the 1968 F100 continue to dance gracefully, preserving an automotive legacy for generations to come.</p><p> </p><p><article><figure><noscript><img src='https://tse1.mm.bing.net/th?q=Question and answer Wipe Away the Mystery: Unveiling the 1968 F100 Wiper Circuit Diagram for Classic Truck Enthusiasts!' alt='Question and answer Wipe Away the Mystery: Unveiling the 1968 F100 Wiper Circuit Diagram for Classic Truck Enthusiasts!' /></noscript><img class='v-cover ads-img' src='https://tse1.mm.bing.net/th?q=Question and answer Wipe Away the Mystery: Unveiling the 1968 F100 Wiper Circuit Diagram for Classic Truck Enthusiasts!' alt='Question and answer Wipe Away the Mystery: Unveiling the 1968 F100 Wiper Circuit Diagram for Classic Truck Enthusiasts!' width='100%' onerror='this.onerror=null;this.src='https://upload.wikimedia.org/wikipedia/commons/d/d1/Image_not_available.png?20210219185637';' style='margin-right: 8px;margin-bottom: 8px;' /></figure></article></p><p> </p><strong><i>Questions & Answer :</i></strong><p><strong>Q: What is the significance of the 1968 F100 Wiper Circuit Diagram in automotive history?</strong></p>
<ul>
<li>1. The <em>1968 F100 Wiper Circuit Diagram</em> holds immense significance as a documentation of vintage automotive engineering.</li>
<li>2. It provides a detailed insight into the technology and design principles that were prevalent during that era.</li>
<li>3. Studying this diagram allows enthusiasts to appreciate the craftsmanship that went into creating the wiper system of the iconic 1968 F100.</li>
</ul>
<p><strong>Q: How can the 1968 F100 Wiper Circuit Diagram be used for restoration purposes?</strong></p>
<ul>
<li>1. The diagram serves as a crucial reference for restorers, offering a clear visual guide to the wiring and connections of the wiper system.</li>
<li>2. Enthusiasts can use it to identify and understand each component, ensuring a meticulous restoration that stays true to the original design.</li>
<li>3. It becomes an invaluable tool in troubleshooting and ensuring the proper functionality of the wiper system during the restoration process.</li>
</ul>
<p><strong>Q: Can the 1968 F100 Wiper Circuit Diagram be applied to other classic vehicles?</strong></p>
<ul>
<li>1. While specifically designed for the 1968 F100, the principles outlined in the diagram can offer insights into the wiper systems of other classic vehicles of the same era.</li>
<li>2. Enthusiasts may find similarities in design and functionality, allowing for a broader application of the knowledge gained from studying this diagram.</li>
<li>3. However, it's essential to consult vehicle-specific documentation for accurate restoration and repair of wiper systems in different classic models.</li>
</ul>
<p><strong>Q: Is the 1968 F100 Wiper Circuit Diagram relevant for modern vehicles?</strong></p>
<ul>
<li>1. The diagram primarily pertains to vintage automotive technology and may not be directly applicable to modern vehicles with advanced electronic systems.</li>
<li>2. However, understanding the fundamental principles of electrical circuits can be beneficial for enthusiasts interested in the evolution of automotive technology.</li>
<li>3. For modern vehicles, it's recommended to refer to updated technical documentation and consult professionals familiar with contemporary automotive systems.</li>
</ul><p> </p>
Keywords : '1968 F100 Wiper Circuit Diagram'Milohttp://www.blogger.com/profile/01418902555588264834noreply@blogger.com0tag:blogger.com,1999:blog-4101198853060839868.post-72371057262114200382024-01-16T07:00:00.000-08:002024-01-21T14:32:59.151-08:00Rev Up Your Ride with a Vintage Vibe: Unleashing the Power of the 1968 Ford 302 Coil Wire!<p> </p><p><article><figure><noscript><img src='https://tse1.mm.bing.net/th?q=Rev Up Your Ride with a Vintage Vibe: Unleashing the Power of the 1968 Ford 302 Coil Wire!' alt='Rev Up Your Ride with a Vintage Vibe: Unleashing the Power of the 1968 Ford 302 Coil Wire!' width='640' height='360' /></noscript><img class='v-cover ads-img' src='https://tse1.mm.bing.net/th?q=Rev Up Your Ride with a Vintage Vibe: Unleashing the Power of the 1968 Ford 302 Coil Wire!' alt='Rev Up Your Ride with a Vintage Vibe: Unleashing the Power of the 1968 Ford 302 Coil Wire!' width='100%' onerror='this.onerror=null;this.src='https://upload.wikimedia.org/wikipedia/commons/d/d1/Image_not_available.png?20210219185637';' style='margin-right: 8px;margin-bottom: 8px;' /></figure></article></p><blockquote>"Unlock the Power: Explore the intricacies of the 1968 Ford 302 Coil Wire for a professional insight into enhancing vintage automotive performance."</blockquote><p> </p>Embark on a journey through automotive history with the <b>1968 Ford 302 Coil Wire</b>, a true testament to classic engineering. Nestled within the heart of vintage vehicles, this <i>essential component</i> intricately weaves power and precision, igniting a sense of nostalgia for the golden era of automobiles. Professional enthusiasts and restoration aficionados alike find themselves captivated by the <i>timeless allure</i> of this meticulously crafted coil wire. As we delve into its significance, a professional examination of its design and functionality unveils a story of performance that transcends decades.<p> </p><h4>Top 10 important point for '1968 FORD 302 COIL WIRE'</h4><table cellpadding='0' cellspacing='0' class='tr-caption-container' style='float: right;'><tbody><tr><td style='text-align: center;'><img border='0' src='https://tse1.mm.bing.net/th?q=Top 10 '1968 FORD 302 COIL WIRE'' width='200' /></td></tr><tr></tr></tbody></table> <ol>
<li>Inspecting Your 1968 Ford 302 Coil Wire: A Comprehensive Overview</li>
<li>Identifying Coil Wire Components: A Step-by-Step Guide</li>
<li>Choosing the Right Tools for Coil Wire Maintenance</li>
<li>Understanding the Importance of Proper Coil Wire Installation</li>
<li>Testing Coil Wire Resilience: A Professional Diagnostic Approach</li>
<li>Common Issues and Troubleshooting Techniques</li>
<li>Optimizing Performance: Tips for Coil Wire Upkeep</li>
<li>Enhancing Coil Wire Durability: Professional Maintenance Practices</li>
<li>Upgrading to High-Performance Coil Wires: A Practical Guide</li>
<li>Expert Recommendations for Prolonging Your 1968 Ford 302 Coil Wire's Lifespan</li>
</ol><p> </p><h5>Several Facts that you should know about '1968 FORD 302 COIL WIRE'.</h5><h3>Exploring the Legacy of 1968 Ford 302 Coil Wire</h3><p>Let's take a nostalgic ride back to 1968, a year that marked not only historical events but also the birth of the iconic Ford 302 Coil Wire. Picture yourself cruising down memory lane in a classic Ford, and underneath the hood lies a piece of automotive history—the 1968 Ford 302 Coil Wire.</p>
<center><img src="https://tse1.mm.bing.net/th?q=Exploring+the+Legacy+of+1968+Ford+302+Coil+Wire+classic+car" alt="Classic Car"></center><h3>Decoding the Anatomy of the Coil Wire</h3><p>Before diving into its performance, let's unravel the intricacies of the 1968 Ford 302 Coil Wire. From connectors to insulation, understanding its components lays the foundation for effective maintenance and optimal function. It's like peeling back the layers of automotive engineering to reveal the heart of your vintage ride.</p>
<center><img src="https://tse1.mm.bing.net/th?q=Decoding+the+Anatomy+of+the+Coil+Wire+car+parts" alt="Car Parts"></center><h3>Tools of the Trade: A Coil Wire Maintenance Guide</h3><p>Armed with the right tools, you can ensure your coil wire remains in top-notch condition. From multimeters to wire strippers, assembling your toolkit is a crucial step in the journey of a classic car enthusiast. Think of it as preparing for a precision mission under the hood.</p>
<center><img src="https://tse1.mm.bing.net/th?q=Tools+of+the+Trade%3A+A+Coil+Wire+Maintenance+Guide+automotive+tools" alt="Automotive Tools"></center><h3>Installation 101: Ensuring a Smooth Ride</h3><p>Installing the 1968 Ford 302 Coil Wire may seem straightforward, but precision is key. Our step-by-step guide ensures that you're not just connecting wires; you're orchestrating a symphony of power beneath your classic car's hood. Buckle up; we're about to make your ride smoother than ever.</p>
<center><img src="https://tse1.mm.bing.net/th?q=Installation+101%3A+Ensuring+a+Smooth+Ride+classic+car" alt="Classic Car"></center><h3>Diagnostics Demystified: Testing Coil Wire Resilience</h3><p>What happens when your engine misfires or sputters? It might be time to dive into diagnostics. Our professional approach to testing coil wire resilience ensures that you're not left stranded on the roadside. Consider it your troubleshooting toolkit for a hiccup-free journey.</p>
<center><img src="https://tse1.mm.bing.net/th?q=Diagnostics+Demystified%3A+Testing+Coil+Wire+Resilience+car+repair" alt="Car Repair"></center><h3>Common Hitches and How to Hitch Them</h3><p>Every classic car owner encounters bumps along the road. From loose connections to wear and tear, we've got your back. Join us as we explore common coil wire issues and share practical tips to keep your 1968 Ford 302 running smoothly.</p>
<center><img src="https://tse1.mm.bing.net/th?q=Common+Hitches+and+How+to+Hitch+Them+car+trouble" alt="Car Trouble"></center><h3>Upkeep Unleashed: Optimizing Coil Wire Performance</h3><p>Maximizing performance goes beyond routine maintenance. Discover the insider secrets to optimizing your coil wire's longevity and efficiency. It's not just about maintaining; it's about unleashing the full potential of your vintage beauty.</p>
<center><img src="https://tse1.mm.bing.net/th?q=Upkeep+Unleashed%3A+Optimizing+Coil+Wire+Performance+vintage+car" alt="Vintage Car"></center><h3>High-Performance Upgrade: A Practical Guide</h3><p>For those craving an extra kick under the hood, upgrading to high-performance coil wires is the answer. Join us as we guide you through the process, ensuring that your classic Ford 302 is not just a relic but a roaring force on the open road.</p>
<center><img src="https://tse1.mm.bing.net/th?q=High-Performance+Upgrade%3A+A+Practical+Guide+car+upgrade" alt="Car Upgrade"></center><h3>Expert Tips for a Timeless Coil Wire</h3><p>Our journey concludes with expert recommendations to prolong the lifespan of your 1968 Ford 302 Coil Wire. It's not just about preserving a piece of history; it's about ensuring that your classic car continues to turn heads for generations to come.</p>
<center><img src="https://tse1.mm.bing.net/th?q=Expert+Tips+for+a+Timeless+Coil+Wire+car+maintenance" alt="Car Maintenance"></center><p> </p><h2>The Journey Back in Time</h2><p>Let's embark on a journey through the corridors of automotive history, where every turn of the wheel takes us closer to the iconic <i>1968 Ford 302 Coil Wire</i>. Picture this: the year is 1968, and the air is charged with the excitement of innovation and classic craftsmanship. Our destination? The heart and soul of vintage automobiles, where the coil wire plays a pivotal role in the symphony of power beneath the hood.</p>
<center><img src="https://tse1.mm.bing.net/th?q=The+Journey+Back+in+Time+vintage+car" alt="Vintage Car"></center>
<p>As we open the doors to the past, the spotlight falls on the classic Ford 302, a timeless beauty that still captivates enthusiasts and collectors alike. The year 1968 marked not just a chapter but an entire volume in the history of automobiles, and at the core of it all, lies the unsung hero - the coil wire.</p><h2>Unraveling the Coil Wire Mystique</h2><p>Before we delve into the nitty-gritty, let's unravel the mystique that surrounds the <i>1968 Ford 302 Coil Wire</i>. It's more than a mere component; it's a conduit that channels power, a thread woven into the fabric of automotive prowess. Imagine peeling back the layers of time, each revealing a story etched in metal and engineering marvel.</p>
<center><img src="https://tse1.mm.bing.net/th?q=Unraveling+the+Coil+Wire+Mystique+car+engine" alt="Car Engine"></center>
<p>Our journey of discovery takes us to the very anatomy of the coil wire. From connectors that bridge the gap to insulation that shields against the elements, every inch of this unassuming wire tells a tale of precision and functionality. It's like dissecting a masterpiece, where each element plays a vital role in the grand symphony of your vintage ride.</p><h2>The Tools of the Coil Wire Craftsman</h2><p>Armed with the knowledge of its intricacies, let's transition to the tools of the coil wire craftsman. Picture this as your toolkit, the arsenal of a dedicated enthusiast ready to venture into the realm of maintenance and care. It's not just about turning a wrench; it's about orchestrating a performance beneath the hood.</p>
<center><img src="https://tse1.mm.bing.net/th?q=The+Tools+of+the+Coil+Wire+Craftsman+automotive+tools" alt="Automotive Tools"></center>
<p>As you peer into the toolbox, the multimeter stands as a sentinel, ready to decipher the language of voltage and resistance. Wire strippers, the unsung heroes, patiently wait for their cue to unveil the inner layers. Together, these tools become extensions of your hands, navigating the intricate dance of maintenance with finesse.</p><h2>Installation Choreography: A Step-By-Step Guide</h2><p>Now, let's transition from the backstage of tools to the center stage of installation choreography. Installing the <i>1968 Ford 302 Coil Wire</i> might seem like a routine task, but it's a ballet of precision and sequence. Imagine this as your moment to shine, where each connection is a note in the symphony of your classic ride.</p>
<center><img src="https://tse1.mm.bing.net/th?q=Installation+Choreography%3A+A+Step-By-Step+Guide+car+repair" alt="Car Repair"></center>
<p>The first step is like the overture, setting the tone for what's to come. Identifying the right terminals is akin to finding the perfect partner for a dance. As you crimp and connect, it's not just about securing wires; it's about composing a melody that resonates through the engine and echoes on the open road.</p><h2>Diagnostics: A Symphony of Resilience</h2><p>As our installation ballet concludes, let's transition to a symphony of resilience through diagnostics. Every classic car owner knows that the engine's melody can sometimes hit a discordant note. Here, the multimeter takes center stage once again, transforming into a conductor's baton guiding you through the intricacies of testing.</p>
<center><img src="https://tse1.mm.bing.net/th?q=Diagnostics%3A+A+Symphony+of+Resilience+car+diagnostics" alt="Car Diagnostics"></center>
<p>Picture this as a diagnostic orchestra where misfires and sputters are notes out of tune. The multimeter probes, and with each reading, a diagnosis emerges. It's not just about troubleshooting; it's about deciphering the language your engine speaks, ensuring that every note plays harmoniously.</p><h2>Common Hitches: A Roadside Assistance Guide</h2><p>Transitioning from the symphony, let's hit the road where every classic car owner encounters common hitches. It's like navigating a winding road, and suddenly there's a pothole to avoid or a curve to navigate. In the world of <i>1968 Ford 302 Coil Wire</i>, these hitches might manifest as loose connections or wear and tear.</p>
<center><img src="https://tse1.mm.bing.net/th?q=Common+Hitches%3A+A+Roadside+Assistance+Guide+car+trouble" alt="Car Trouble"></center>
<p>Consider this section as your roadside assistance guide. Armed with insights into common issues, you're not just a driver; you're a savvy navigator steering clear of obstacles. From loose connections to worn-out insulation, we've got the roadmap to keep your journey smooth and trouble-free.</p><h2>Optimizing Performance: A Love Letter to Your Coil Wire</h2><p>As our road trip continues, let's transition to a love letter to your coil wire, expressed through the art of optimizing performance. It's not just about routine maintenance; it's about pampering your vintage beauty, ensuring that every drive is a love affair with the road.</p>
<center><img src="https://tse1.mm.bing.net/th?q=Optimizing+Performance%3A+A+Love+Letter+to+Your+Coil+Wire+vintage+car" alt="Vintage Car"></center>
<p>Think of this as a spa day for your coil wire. From cleaning to careful inspection, the goal is not just functionality; it's enhancing the aesthetic appeal beneath the hood. It's about turning heads not just on the road but also when the hood is popped open for a peek inside.</p><h2>High-Performance Upgrade: Elevating Your Ride</h2><p>As the love affair intensifies, let's transition to a thrilling chapter: the high-performance upgrade. It's like giving your classic Ford 302 a shot of adrenaline, turning it from a timeless beauty into a roaring force on the open road.</p>
<center><img src="https://tse1.mm.bing<p> </p><h6>Another point of view about '1968 FORD 302 COIL WIRE'.</h6><p>So, let's talk about the <i>1968 Ford 302 Coil Wire</i>. You know, that unassuming yet essential part of your classic ride that often doesn't get the credit it deserves. Here's my take on it, from a car enthusiast's point of view:</p>
<ul>
<li>First things first, the <i>1968 Ford 302 Coil Wire</i> is like the unsung hero of your vintage beauty.</li>
<li>It's that silent conductor orchestrating a symphony of power beneath the hood, making sure your engine purrs like a contented cat.</li>
<li>Ever thought about its anatomy? Connectors, insulation - it's like the DNA of your car's electrical system. Each part has a role to play, a bit like a cast in a movie.</li>
<li>Now, tools. You've got your multimeter, wire strippers – the backstage crew preparing for the main act. They're the real MVPs when it comes to maintaining your coil wire.</li>
<li>Installation is like a dance. You've got your steps – identify terminals, crimp, connect. It's not just a task; it's a performance. Cue the applause for a well-connected coil wire!</li>
<li>But hey, what about when things go out of tune? That's where diagnostics kick in. The multimeter becomes your detective, solving the mystery of misfires and sputters.</li>
<li>And let's not forget the common hitches. Loose connections or wear and tear - it's like navigating potholes on the road of car ownership. But fear not, you've got your roadside assistance guide right here.</li>
<li>Now, optimizing performance is like a spa day for your coil wire. Clean it, inspect it - make it not just function but look good too. After all, it's all about the aesthetic appeal beneath the hood.</li>
<li>Feeling a bit adventurous? How about a high-performance upgrade? It's like giving your classic Ford 302 a shot of adrenaline. Buckle up for a thrilling ride!</li>
</ul>
<p>So there you have it, a little journey through the eyes of someone who sees the <i>1968 Ford 302 Coil Wire</i> as more than just a component – it's the soul of your vintage beast.</p><p> </p><strong><u>Conclusion : Rev Up Your Ride with a Vintage Vibe: Unleashing the Power of the 1968 Ford 302 Coil Wire!.</u></strong><p>Alright, my fellow vintage car aficionados, we've taken a delightful stroll through the riveting world of the <u><em>1968 Ford 302 Coil Wire</em></u>. Now, as we wrap up this journey, let me leave you with a few parting words – consider it the dessert after a feast of automotive wisdom.</p>
<p>Remember, when it comes to your classic ride, the <u><em>1968 Ford 302 Coil Wire</em></u> isn't just a wire; it's the unsung hero, the MVP working behind the scenes to keep your engine's performance as smooth as a jazz saxophone solo. So, the next time you pop the hood and gaze at that unassuming wire, give it a little nod of appreciation. Maybe even throw in a, "You're doing great, sweetie!" It deserves a standing ovation for its silent dedication to your vintage beauty.</p>
<p>As you venture back into the world beyond this blog, armed with newfound insights into the intricacies of coil wires, just remember – when life throws a little automotive curveball your way, face it with the same confidence you would face a hairpin turn on a scenic mountain road. Happy driving, and may your <u><em>1968 Ford 302 Coil Wire</em></u> always hum a sweet melody as you cruise down memory lane!</p><p> </p><p><article><figure><noscript><img src='https://tse1.mm.bing.net/th?q=Question and answer Rev Up Your Ride with a Vintage Vibe: Unleashing the Power of the 1968 Ford 302 Coil Wire!' alt='Question and answer Rev Up Your Ride with a Vintage Vibe: Unleashing the Power of the 1968 Ford 302 Coil Wire!' /></noscript><img class='v-cover ads-img' src='https://tse1.mm.bing.net/th?q=Question and answer Rev Up Your Ride with a Vintage Vibe: Unleashing the Power of the 1968 Ford 302 Coil Wire!' alt='Question and answer Rev Up Your Ride with a Vintage Vibe: Unleashing the Power of the 1968 Ford 302 Coil Wire!' width='100%' onerror='this.onerror=null;this.src='https://upload.wikimedia.org/wikipedia/commons/d/d1/Image_not_available.png?20210219185637';' style='margin-right: 8px;margin-bottom: 8px;' /></figure></article></p><p> </p><strong><i>Questions & Answer :</i></strong><p>People Also Ask About the 1968 Ford 302 Coil Wire:</p><ul><li>Q: What does the 1968 Ford 302 Coil Wire do exactly?</li>
<p>A: Ah, the unsung hero! The <i>1968 Ford 302 Coil Wire</i> is like the messenger between your car's ignition system and the spark plugs. It carries the spark that ignites the fuel, setting off the engine combustion process. So, in a nutshell, it's the spark conductor, making sure your engine fires up smoothly.</p><li>Q: Is it a difficult task to install the 1968 Ford 302 Coil Wire?</li>
<p>A: Installing the coil wire is more like assembling a puzzle than rocket science. Identify the terminals, crimp, connect – it's a bit of a dance, really. With the right tools and a sprinkle of patience, it's a DIY task you can conquer in your garage. Consider it your backstage pass to the inner workings of your vintage beauty.</p><li>Q: Any tips for maintaining the 1968 Ford 302 Coil Wire?</li>
<p>A: Absolutely! Think of it like skincare for your car. Regular check-ups, cleaning, and keeping an eye out for wear and tear are key. Don't forget the multimeter – your car's very own dermatologist, diagnosing issues before they become full-blown problems. A little TLC goes a long way in ensuring your coil wire lives its best life.</p><li>Q: Can I upgrade to a high-performance coil wire?</li>
<p>A: You sure can! It's like giving your classic Ford 302 a shot of espresso. A high-performance coil wire enhances spark energy, resulting in improved combustion and better engine performance. It's the equivalent of your vintage ride having an extra cup of coffee in the morning – more pep in its step!</p></ul><p> </p>
Keywords : '1968 FORD 302 COIL WIRE'Milohttp://www.blogger.com/profile/01418902555588264834noreply@blogger.com0tag:blogger.com,1999:blog-4101198853060839868.post-52926503282847260642024-01-14T20:00:00.000-08:002024-01-21T14:32:59.475-08:00Rev Up Your Ride with the Ultimate 1968 Ford Torino GT Alt Wiring: Unveiling the 3-Pin Power Connection!<p> </p><p><article><figure><noscript><img src='https://tse1.mm.bing.net/th?q=Rev Up Your Ride with the Ultimate 1968 Ford Torino GT Alt Wiring: Unveiling the 3-Pin Power Connection!' alt='Rev Up Your Ride with the Ultimate 1968 Ford Torino GT Alt Wiring: Unveiling the 3-Pin Power Connection!' width='640' height='360' /></noscript><img class='v-cover ads-img' src='https://tse1.mm.bing.net/th?q=Rev Up Your Ride with the Ultimate 1968 Ford Torino GT Alt Wiring: Unveiling the 3-Pin Power Connection!' alt='Rev Up Your Ride with the Ultimate 1968 Ford Torino GT Alt Wiring: Unveiling the 3-Pin Power Connection!' width='100%' onerror='this.onerror=null;this.src='https://upload.wikimedia.org/wikipedia/commons/d/d1/Image_not_available.png?20210219185637';' style='margin-right: 8px;margin-bottom: 8px;' /></figure></article></p><blockquote>Unlock the secrets of the 1968 Ford Torino GT Alt Wiring (3 Pin) diagram. Gain professional insights for enhanced performance and electrical mastery.</blockquote><p> </p><b>Embark</b> on a journey into the heart of automotive history as we unravel the mysteries behind the <i>1968 Ford Torino GT Alt Wiring Diagram 3 Pin</i>. Beneath the hood of this classic powerhouse lies a captivating tale of innovation and precision. Picture yourself in the driver's seat, armed with the knowledge that transforms enthusiasts into experts. Now, let's dive deep into the intricate web of wires, decoding the blueprint that defines the very essence of this vintage marvel. As your <i>journalist</i> guide through the labyrinth of circuits, we promise an exhilarating exploration that will demystify the inner workings of a true automotive icon. Get ready to revitalize your understanding and appreciation for the 1968 Ford Torino GT, where every connection tells a story of power and performance.<p> </p><h4>Top 10 important point for '1968 FORD TORINO GT ALT WIRING DIAGRAM 3 PIN'</h4><table cellpadding='0' cellspacing='0' class='tr-caption-container' style='float: right;'><tbody><tr><td style='text-align: center;'><img border='0' src='https://tse1.mm.bing.net/th?q=Top 10 '1968 FORD TORINO GT ALT WIRING DIAGRAM 3 PIN'' width='200' /></td></tr><tr></tr></tbody></table> <ol>
<li>Introduction to 1968 Ford Torino GT</li>
<li>Understanding the Basics of Alt Wiring</li>
<li>Importance of the 3-Pin Configuration</li>
<li>Identifying Key Components</li>
<li>Step-by-Step Wiring Installation</li>
<li>Common Issues and Troubleshooting</li>
<li>Enhancing Performance with Proper Wiring</li>
<li>Maintenance Tips for Longevity</li>
<li>Expert Insights on Wiring Upgrades</li>
<li>FAQs: Your Questions Answered</li>
</ol><p> </p><h5>Several Facts that you should know about '1968 FORD TORINO GT ALT WIRING DIAGRAM 3 PIN'.</h5><h3>Introduction: Decoding the Mystical 3-Pin Wires</h3>
<center><img src="https://tse1.mm.bing.net/th?q=Decoding+the+Mystical+3-Pin+Wires+1968+ford+torino+gt+alt+wiring+diagram+3+pin" alt="Decoding the Mystical 3-Pin Wires"></center>
<p>Welcome, fellow torque enthusiasts, to the wild world of the 1968 Ford Torino GT Alt Wiring Diagram! Buckle up as we embark on a journey through the enchanted forest of 3-pin wires, where electrons dance the cha-cha and sparks throw a disco party.</p>
<h3>Wiring 101: Where Wires Get Social</h3>
<center><img src="https://tse1.mm.bing.net/th?q=Wiring+101+1968+ford+torino+gt+alt+wiring+diagram+3+pin" alt="Wiring 101: Where Wires Get Social"></center>
<p>Imagine your car's wiring as a bustling city, with each wire playing a unique role. The 3-pin wires? They're the social butterflies, mingling at the electrifying block parties in your engine bay. Get ready to witness the most happening wires in town!</p>
<h3>Love Story: The Torrid Affair of Voltage and Amperage</h3>
<center><img src="https://tse1.mm.bing.net/th?q=Love+Story+The+Torrid+Affair+of+Voltage+and+Amperage+1968+ford+torino+gt+alt+wiring+diagram+3+pin" alt="Love Story: The Torrid Affair of Voltage and Amperage"></center>
<p>It's a voltage love affair, and amperage can't resist. Watch sparks fly as these two electric sweethearts navigate the circuitry of passion. Get ready for a tale of resistance, resilience, and the shocking twists of love in every amp!</p>
<h3>The 3-Pin Gossip: What Wires Talk About</h3>
<center><img src="https://tse1.mm.bing.net/th?q=The+3-Pin+Gossip+What+Wires+Talk+About+1968+ford+torino+gt+alt+wiring+diagram+3+pin" alt="The 3-Pin Gossip: What Wires Talk About"></center>
<p>Ever eavesdrop on your car's wiring? The 3-pin wires are the gossip queens of your vehicle, sharing tales of short circuits, power struggles, and the occasional electric rebellion. Who knew wires could be so chatty?</p>
<h3>DIY Disco: Wiring Installation Dance Moves</h3>
<center><img src="https://tse1.mm.bing.net/th?q=DIY+Disco+Wiring+Installation+Dance+Moves+1968+ford+torino+gt+alt+wiring+diagram+3+pin" alt="DIY Disco: Wiring Installation Dance Moves"></center>
<p>Get your dancing shoes on because we're about to boogie with the DIY Disco! Follow the step-by-step moves of wiring installation, where every connection is a dance move, and your car becomes the grooviest party on wheels.</p>
<h3>Oops, They Did It Again: Common Wiring Blunders</h3>
<center><img src="https://tse1.mm.bing.net/th?q=Oops+They+Did+It+Again+Common+Wiring+Blunders+1968+ford+torino+gt+alt+wiring+diagram+3+pin" alt="Oops, They Did It Again: Common Wiring Blunders"></center>
<p>We've all been there—wires behaving badly. From crossed signals to tangled affairs, discover the common wiring blunders that turn your car into a comedy of errors. Spoiler alert: even wires make mistakes!</p>
<h3>Wired Laughter: The Comedy of Troubleshooting</h3>
<center><img src="https://tse1.mm.bing.net/th?q=Wired+Laughter+The+Comedy+of+Troubleshooting+1968+ford+torino+gt+alt+wiring+diagram+3+pin" alt="Wired Laughter: The Comedy of Troubleshooting"></center>
<p>Grab your toolkit and join the laughter-filled adventure of troubleshooting. From chasing gremlins to playing hide-and-seek with faulty connections, it's a comedy show where the punchline is always a well-wired punch!</p>
<h3>Upgrade Chronicles: Expert Tips for Electrifying Enhancements</h3>
<center><img src="https://tse1.mm.bing.net/th?q=Upgrade+Chronicles+Expert+Tips+for+Electrifying+Enhancements+1968+ford+torino+gt+alt+wiring+diagram+3+pin" alt="Upgrade Chronicles: Expert Tips for Electrifying Enhancements"></center>
<p>Ready to give your ride an electrifying boost? Tune in to the Upgrade Chronicles, where experts spill the beans on enhancing performance, adding sparks of style, and turning your car into a true lightning chariot!</p>
<h3>Q&A Comedy Special: Your Most Electric Questions Answered</h3>
<center><img src="https://tse1.mm.bing.net/th?q=QA+Comedy+Special+Your+Most+Electric+Questions+Answered+1968+ford+torino+gt+alt+wiring+diagram+3+pin" alt="Q&A Comedy Special: Your Most Electric Questions Answered"></center>
<p>Curious minds want to know! In this Q&A Comedy Special, we tackle your most shocking questions about the 1968 Ford Torino GT Alt Wiring Diagram. Spoiler alert: We're not electricians, but we play them on the internet!</p><p> </p><h2>The Shocking Saga of the 1968 Ford Torino GT Alt Wiring Diagram 3 Pin</h2>
<p>Welcome, dear readers, to the electrifying adventure of deciphering the 1968 Ford Torino GT Alt Wiring Diagram 3 Pin. As we embark on this journey, picture yourself in a garage filled with sparks, wires doing the electric slide, and the occasional disco ball for dramatic effect.</p>
<h3>The Unveiling: A Look Behind the Voltage Curtain</h3>
<center><img src="https://tse1.mm.bing.net/th?q=A+Look+Behind+the+Voltage+Curtain+1968+ford+torino+gt+alt+wiring+diagram+3+pin" alt="A Look Behind the Voltage Curtain"></center>
<p>Before we dive into the tangled mess of wires, let's pull back the voltage curtain and take a peek at the backstage of automotive magic. The 1968 Ford Torino GT Alt Wiring Diagram 3 Pin is like the secret recipe for your favorite dish, but instead of spices, it involves volts, amps, and a dash of mystery.</p>
<h3>The Electric Symphony: Wires Getting in Formation</h3>
<center><img src="https://tse1.mm.bing.net/th?q=Wires+Getting+in+Formation+1968+ford+torino+gt+alt+wiring+diagram+3+pin" alt="Wires Getting in Formation"></center>
<p>Ever seen a symphony of wires? Neither have we, but let's imagine it. The 1968 Ford Torino GT Alt Wiring Diagram orchestrates a masterpiece where wires get in formation, ready to perform the electrifying symphony that powers your vintage beauty. It's like Beethoven’s Ninth, but with more spark plugs.</p>
<h3>Wires Gone Wild: The 3-Pin Shenanigans</h3>
<center><img src="https://tse1.mm.bing.net/th?q=The+3-Pin+Shenanigans+1968+ford+torino+gt+alt+wiring+diagram+3+pin" alt="The 3-Pin Shenanigans"></center>
<p>Now, let's talk about the real stars of the show—the 3-pin wires. These little troublemakers are like the mischievous elves of the automotive world. They engage in shenanigans, throw mini parties inside your engine bay, and occasionally prank the fuses. It's like a never-ending episode of a wire-based sitcom.</p>
<h3>The Dating Game: Voltage and Amperage’s Electrifying Romance</h3>
<center><img src="https://tse1.mm.bing.net/th?q=Voltage+and+Amperages+Electrifying+Romance+1968+ford+torino+gt+alt+wiring+diagram+3+pin" alt="Voltage and Amperage’s Electrifying Romance"></center>
<p>Have you ever wondered about the love life of electrons? No? Well, too bad because here's the shocking truth. Voltage and amperage are like the Romeo and Juliet of the wiring world. They can't resist each other, and their electrifying romance powers your car's heart, one spark at a time.</p>
<h3>The Wire Whisperer: Decoding the Gossip of Connections</h3>
<center><img src="https://tse1.mm.bing.net/th?q=Decoding+the+Gossip+of+Connections+1968+ford+torino+gt+alt+wiring+diagram+3+pin" alt="Decoding the Gossip of Connections"></center>
<p>As we delve deeper into the wiring wonderland, imagine becoming the Wire Whisperer. Your ears are attuned to the soft hums, clicks, and occasional electric gossip of connections. The 3-pin wires spill secrets about short circuits, power struggles, and the occasional scandalous affair with a fuse.</p>
<h3>The DIY Boogie: Wiring Installation Dance Party</h3>
<center><img src="https://tse1.mm.bing.net/th?q=DIY+Boogie+Wiring+Installation+Dance+Party+1968+ford+torino+gt+alt+wiring+diagram+3+pin" alt="DIY Boogie: Wiring Installation Dance Party"></center>
<p>Now, imagine a DIY boogie where wires let loose and dance to the rhythm of installation. It's a dance party where each connection is a move, and your car becomes the disco floor. Cue the disco ball, follow the steps, and let the 3-pin wires boogie their way into proper alignment.</p>
<h3>Oops, They Did It Again: Common Wiring Blunders</h3>
<center><img src="https://tse1.mm.bing.net/th?q=Oops+They+Did+It+Again+Common+Wiring+Blunders+1968+ford+torino+gt+alt+wiring+diagram+3+pin" alt="Oops, They Did It Again: Common Wiring Blunders"></center>
<p>Even wires make mistakes, and in this chapter, we explore the comedy of common wiring blunders. From crossed signals to tangled affairs, your 3-pin wires might just pull a Britney and say, "Oops, they did it again." It's a hilarious journey into the world of automotive bloopers.</p>
<h3>Wired Laughter: The Comedy of Troubleshooting</h3>
<center><img src="https://tse1.mm.bing.net/th?q=Wired+Laughter+The+Comedy+of+Troubleshooting+1968+ford+torino+gt+alt+wiring+diagram+3+pin" alt="Wired Laughter: The Comedy of Troubleshooting"></center>
<p>Who knew troubleshooting could be this funny? Get ready for a laughter-filled adventure as you chase gremlins, play hide-and-seek with faulty connections, and become the star of your very own wiring comedy special. Spoiler alert: your toolkit is your ticket to the show!</p>
<h3>Upgrade Chronicles: Expert Tips for Electrifying Enhancements</h3>
<center><img src="https://tse1.mm.bing.net/th?q=Upgrade+Chronicles+Expert+Tips+for+Electrifying+Enhancements+1968+ford+torino+gt+alt+wiring+diagram+3+pin" alt="Upgrade Chronicles: Expert Tips for Electrifying Enhancements"></center>
<p>Ready to give your ride an electrifying makeover? In the Upgrade Chronicles, experts spill the beans on enhancing performance, adding sparks of style, and turning your car into a true lightning chariot. It's like a makeover show, but with more volts and fewer fashion faux pas.</p>
<h3>Q&A Comedy Special: Your Most Electric Questions Answered</h3>
<center><img src="https://tse1.mm.bing.net/th?q=QA+Comedy+Special+Your+Most+Electric+Questions+Answered+1968+ford+torino+gt+alt+wiring+diagram+3+pin" alt="Q&A Comedy Special: Your Most Electric Questions Answered"></center>
<p>Curious minds want to know<p> </p><h6>Another point of view about '1968 FORD TORINO GT ALT WIRING DIAGRAM 3 PIN'.</h6><p>1. **Electrifying Nostalgia:** Imagine stepping into the world of the 1968 Ford Torino GT Alt Wiring Diagram 3 Pin, where each wire holds a story of vintage charm and automotive history.</p>
<p>2. **Wires as Storytellers:** These 3-pin wires are like quirky storytellers, narrating tales of power, resistance, and the occasional electric drama that unfolds under the hood.</p>
<p>3. **Voltage Curtain Call:** Pulling back the voltage curtain feels like revealing the secrets of a magic show – an automotive spectacle where volts take center stage in a dazzling performance.</p>
<p>4. **Wire Symphony:** Picture the 3-pin wires as musical notes in an electric symphony, harmonizing to power up your classic ride with a unique and melodious hum.</p>
<p>5. **Mischievous Wire Elves:** The 3-pin wires are the mischievous elves of the automotive realm, engaging in shenanigans and throwing mini parties that only your engine bay is invited to attend.</p>
<p>6. **Romantic Sparks:** Voltage and amperage share a love story that could rival any romantic novel, with sparks flying and an electrifying romance that keeps your engine's heart pounding.</p>
<p>7. **Wire Whisperer's Secrets:** Becoming the Wire Whisperer involves decoding the electric gossip of connections, where 3-pin wires spill the beans on short circuits, power struggles, and scandalous affairs with fuses.</p>
<p>8. **DIY Boogie Wonderland:** Installation becomes a DIY boogie, a dance party for your wires where each connection is a move, turning your car into the disco floor of automotive elegance.</p>
<p>9. **Wiring Bloopers:** Just like in a comedy film, common wiring blunders are the unexpected twists that add humor to the script of your automotive journey, proving that even wires have their blooper reel.</p>
<p>10. **Toolkit Comedy Special:** Troubleshooting is the comedy special where your toolkit becomes the star, chasing gremlins, playing hide-and-seek with connections, and turning every glitch into a laugh-out-loud moment.</p>
<p>11. **Upgrade Chronicles:** The Upgrade Chronicles read like a thrilling novel, where experts spill the secrets of electrifying enhancements, turning your car into a lightning chariot ready to conquer the roads.</p>
<p>12. **Q&A Comedy Finale:** The Q&A Comedy Special is the grand finale, where your most electric questions take center stage, wrapping up this creative journey through the 1968 Ford Torino GT Alt Wiring Diagram 3 Pin with a spark of curiosity.</p><p> </p><strong><u>Conclusion : Rev Up Your Ride with the Ultimate 1968 Ford Torino GT Alt Wiring: Unveiling the 3-Pin Power Connection!.</u></strong><p>As we wrap up this electrifying journey through the intricacies of the <u>1968 Ford Torino GT Alt Wiring Diagram 3 Pin</u>, I hope you've found yourself enlightened and entertained amidst the wires and circuits. Exploring the automotive landscape from a <em>creative</em> perspective has allowed us to unravel the mysteries under the hood with a touch of humor and a dash of nostalgia.</p>
<p><em>In conclusion</em>, every wire, every connection, and every spark in the 1968 Ford Torino GT Alt Wiring Diagram 3 Pin tells a story—a story of power, romance, and the occasional mischievous adventure. Whether you are a seasoned gearhead or a curious enthusiast, remember that behind the seemingly complex diagram lies a symphony of electric tales waiting to be heard. So, the next time you turn the key and hear the engine roar, visualize the dance of those 3-pin wires, creating a harmonious melody that propels your classic ride into the realm of automotive history. Until our next automotive escapade, happy driving!</p><p> </p><p><article><figure><noscript><img src='https://tse1.mm.bing.net/th?q=Question and answer Rev Up Your Ride with the Ultimate 1968 Ford Torino GT Alt Wiring: Unveiling the 3-Pin Power Connection!' alt='Question and answer Rev Up Your Ride with the Ultimate 1968 Ford Torino GT Alt Wiring: Unveiling the 3-Pin Power Connection!' /></noscript><img class='v-cover ads-img' src='https://tse1.mm.bing.net/th?q=Question and answer Rev Up Your Ride with the Ultimate 1968 Ford Torino GT Alt Wiring: Unveiling the 3-Pin Power Connection!' alt='Question and answer Rev Up Your Ride with the Ultimate 1968 Ford Torino GT Alt Wiring: Unveiling the 3-Pin Power Connection!' width='100%' onerror='this.onerror=null;this.src='https://upload.wikimedia.org/wikipedia/commons/d/d1/Image_not_available.png?20210219185637';' style='margin-right: 8px;margin-bottom: 8px;' /></figure></article></p><p> </p><strong><i>Questions & Answer :</i></strong><p><strong>Q: What is the significance of the 3-pin configuration in the 1968 Ford Torino GT Alt Wiring Diagram?</strong></p>
<ul>
<li><strong>A:</strong> The 3-pin configuration is a crucial aspect of the wiring diagram, delineating specific connections that play a vital role in the electrical system of the 1968 Ford Torino GT. Each pin serves a designated function, ensuring the proper flow of power and contributing to the overall performance of the vehicle.</li>
</ul>
<p><strong>Q: Can I perform the wiring installation myself, or should I seek professional assistance?</strong></p>
<ul>
<li><strong>A:</strong> While the wiring installation process is outlined in the diagram, it's advisable to seek professional assistance unless you have advanced knowledge and experience in automotive wiring. Professionals possess the expertise to ensure correct connections, reducing the risk of errors that could lead to electrical issues or malfunctions.</li>
</ul>
<p><strong>Q: What are common issues associated with the 1968 Ford Torino GT Alt Wiring Diagram 3 Pin?</strong></p>
<ul>
<li><strong>A:</strong> Common issues include short circuits, connectivity problems, and occasional malfunctions. Regular maintenance, thorough troubleshooting, and adherence to the wiring diagram guidelines can help mitigate these issues and ensure the optimal performance of the electrical system.</li>
</ul>
<p><strong>Q: Are there recommended upgrades for enhancing the wiring system's performance?</strong></p>
<ul>
<li><strong>A:</strong> Yes, experts recommend specific upgrades to enhance the performance of the wiring system. These may include using high-quality wiring components, installing a more robust alternator, and incorporating modern wiring technologies to improve overall efficiency and reliability.</li>
</ul>
<p><strong>Q: How can I troubleshoot wiring problems if they arise?</strong></p>
<ul>
<li><strong>A:</strong> Troubleshooting involves systematically identifying and resolving issues. Professionals recommend starting with a visual inspection, checking for loose connections or damaged wires. If issues persist, utilizing a multimeter and seeking professional guidance can help pinpoint and address wiring problems effectively.</li>
</ul><p> </p>
Keywords : '1968 FORD TORINO GT ALT WIRING DIAGRAM 3 PIN'Milohttp://www.blogger.com/profile/01418902555588264834noreply@blogger.com0tag:blogger.com,1999:blog-4101198853060839868.post-87656398799764495392024-01-13T09:00:00.000-08:002024-01-21T14:32:59.798-08:00Fury 3 Unveiled: Explore the 1968 Wiring Diagram for a Seamless Ride!<p> </p><p><article><figure><noscript><img src='https://tse1.mm.bing.net/th?q=Fury 3 Unveiled: Explore the 1968 Wiring Diagram for a Seamless Ride!' alt='Fury 3 Unveiled: Explore the 1968 Wiring Diagram for a Seamless Ride!' width='640' height='360' /></noscript><img class='v-cover ads-img' src='https://tse1.mm.bing.net/th?q=Fury 3 Unveiled: Explore the 1968 Wiring Diagram for a Seamless Ride!' alt='Fury 3 Unveiled: Explore the 1968 Wiring Diagram for a Seamless Ride!' width='100%' onerror='this.onerror=null;this.src='https://upload.wikimedia.org/wikipedia/commons/d/d1/Image_not_available.png?20210219185637';' style='margin-right: 8px;margin-bottom: 8px;' /></figure></article></p><blockquote>"Master your 1968 Fury 3 with our expert wiring diagram. Elevate your restoration game with professional insights for a seamless, reliable ride."</blockquote><p> </p><b>Unlock</b> the secrets of your classic ride with the <i>1968 Fury 3 wiring diagram</i>. Delve into the heart of automotive craftsmanship as our meticulously crafted guide <b>unravels</b> the intricate electrical pathways that power this vintage beauty. Follow step-by-step <i>instructions</i> designed to demystify the complexities of your Fury 3's wiring, providing you with the ultimate resource for a smooth and trouble-free driving experience. Embrace the journey through time and technology as our guide seamlessly blends the nostalgia of 1968 with the practicality of modern <i>instructions</i>, making the wiring of your Fury 3 an effortless and enjoyable endeavor.<p> </p><h4>Top 10 important point for '1968 FURY 3 WIRING DIAGRAM'</h4><table cellpadding='0' cellspacing='0' class='tr-caption-container' style='float: right;'><tbody><tr><td style='text-align: center;'><img border='0' src='https://tse1.mm.bing.net/th?q=Top 10 '1968 FURY 3 WIRING DIAGRAM'' width='200' /></td></tr><tr></tr></tbody></table> <ol>
<li>Locating Key Components</li>
<li>Understanding Wire Color Codes</li>
<li>Connecting the Battery Properly</li>
<li>Mapping Fuse Box Configurations</li>
<li>Mastering Ignition System Wiring</li>
<li>Navigating Lighting Circuits</li>
<li>Ensuring Proper Grounding</li>
<li>Decoding Switches and Controls</li>
<li>Securing Reliable Alternator Wiring</li>
<li>Troubleshooting Tips and Techniques</li>
</ol><p> </p><h5>Several Facts that you should know about '1968 FURY 3 WIRING DIAGRAM'.</h5><h3>Unveiling the Blueprint</h3>
<p>Welcome to the intricate world of the 1968 Fury 3 wiring diagram—a blueprint that holds the key to unlocking the full potential of your classic ride. Below, we'll guide you through each crucial element, providing clear <i>instructions</i> to make your journey smooth and successful.</p>
<center><img src="https://tse1.mm.bing.net/th?q=Unveiling+the+Blueprint+1968+Fury+3+wiring+diagram" alt="Blueprint"></center>
<h3>Locating Key Components</h3>
<p>The foundation of a seamless electrical system lies in identifying key components. In this section, detailed <i>instructions</i> and a visual guide will assist you in pinpointing crucial elements within your 1968 Fury 3, ensuring a solid starting point for your wiring endeavors.</p>
<center><img src="https://tse1.mm.bing.net/th?q=Locating+Key+Components+1968+Fury+3+wiring+diagram" alt="Key Components"></center>
<h3>Understanding Wire Color Codes</h3>
<p>Deciphering wire color codes is fundamental to a successful wiring project. We'll walk you through the <i>instructions</i> and decoding process, ensuring that you can confidently match colors and establish the right connections without a hitch.</p>
<center><img src="https://tse1.mm.bing.net/th?q=Understanding+Wire+Color+Codes+1968+Fury+3+wiring+diagram" alt="Wire Color Codes"></center>
<h3>Connecting the Battery Properly</h3>
<p>One of the critical aspects of any wiring diagram is the proper connection of the battery. Our <i>instructions</i> will guide you step by step, ensuring a secure and reliable connection that powers your 1968 Fury 3 efficiently.</p>
<center><img src="https://tse1.mm.bing.net/th?q=Connecting+the+Battery+Properly+1968+Fury+3+wiring+diagram" alt="Battery Connection"></center>
<h3>Mapping Fuse Box Configurations</h3>
<p>Understanding the fuse box layout is essential for troubleshooting and preventing electrical issues. Follow our <i>instructions</i> as we guide you through the mapping process, providing clarity on each fuse's role in safeguarding your vehicle.</p>
<center><img src="https://tse1.mm.bing.net/th?q=Mapping+Fuse+Box+Configurations+1968+Fury+3+wiring+diagram" alt="Fuse Box Configurations"></center>
<h3>Mastering Ignition System Wiring</h3>
<p>The ignition system is the heart of your vehicle. Our comprehensive guide and <i>instructions</i> will empower you to master the intricacies of the ignition system wiring, ensuring a reliable start every time.</p>
<center><img src="https://tse1.mm.bing.net/th?q=Mastering+Ignition+System+Wiring+1968+Fury+3+wiring+diagram" alt="Ignition System Wiring"></center>
<h3>Navigating Lighting Circuits</h3>
<p>Illuminate your path with a clear understanding of the lighting circuits. Our step-by-step <i>instructions</i> will navigate you through the complexities, enabling you to troubleshoot and enhance the lighting system of your 1968 Fury 3.</p>
<center><img src="https://tse1.mm.bing.net/th?q=Navigating+Lighting+Circuits+1968+Fury+3+wiring+diagram" alt="Lighting Circuits"></center>
<h3>Ensuring Proper Grounding</h3>
<p>Grounding is the backbone of a stable electrical system. Follow our <i>instructions</i> to ensure proper grounding, minimizing the risk of electrical issues and guaranteeing a reliable performance from your 1968 Fury 3.</p>
<center><img src="https://tse1.mm.bing.net/th?q=Ensuring+Proper+Grounding+1968+Fury+3+wiring+diagram" alt="Proper Grounding"></center>
<h3>Troubleshooting Tips and Techniques</h3>
<p>Even with a meticulously executed wiring plan, challenges may arise. Arm yourself with our troubleshooting tips and techniques, providing you with the knowledge to diagnose and overcome any issues that may surface.</p>
<center><img src="https://tse1.mm.bing.net/th?q=Troubleshooting+Tips+and+Techniques+1968+Fury+3+wiring+diagram" alt="Troubleshooting"></center><p> </p><h2>Exploring the Mysteries of the 1968 Fury 3 Wiring Diagram</h2>
<p>Welcome to the fascinating world of classic car restoration, where every detail holds the key to reviving the glory of a bygone era. In this journey, the 1968 Fury 3 stands as a timeless icon, and at the core of its resurrection lies the intricate <strong>1968 Fury 3 wiring diagram</strong>. Let's embark on a journey through time, exploring the mysteries concealed within the wires and circuits that power this vintage beauty.</p>
<h3>The Blueprint Unveiled</h3>
<p>Imagine the wiring diagram as the blueprint of your 1968 Fury 3, a map that guides you through the intricate network of electrical connections. It's not just a set of lines and symbols; it's the key to understanding how every component communicates with each other. Before diving into the specifics, let's take a moment to appreciate the beauty of unraveling this blueprint.</p>
<center><img src="https://tse1.mm.bing.net/th?q=The+Blueprint+Unveiled+1968+Fury+3+wiring+diagram" alt="Blueprint Unveiled"></center>
<p>Now, let's talk about <strong>locating key components</strong>. Imagine it as a treasure hunt within the engine bay of your Fury 3. Every wire, every connection has a purpose, and the wiring diagram serves as your treasure map, guiding you to the heart of your vehicle's electrical system.</p>
<center><img src="https://tse1.mm.bing.net/th?q=Locating+Key+Components+1968+Fury+3+wiring+diagram" alt="Locating Key Components"></center>
<h3>Understanding Wire Color Codes</h3>
<p>Colors tell a story, and in the world of wiring, they convey a language of their own. The <strong>1968 Fury 3 wiring diagram</strong> is your Rosetta Stone for decoding this color language. It's not just about connecting wires; it's about understanding the narrative they weave, ensuring each connection is not just correct but meaningful.</p>
<center><img src="https://tse1.mm.bing.net/th?q=Understanding+Wire+Color+Codes+1968+Fury+3+wiring+diagram" alt="Understanding Wire Color Codes"></center>
<p>Now, let's talk about <strong>connecting the battery properly</strong>. Think of it as the heartbeat of your Fury 3. The wiring diagram provides a step-by-step guide, ensuring you connect the battery with precision. One wrong move, and the heartbeat falters. But with the right <strong>instructions</strong>, you're ensuring a steady pulse for your classic ride.</p>
<center><img src="https://tse1.mm.bing.net/th?q=Connecting+the+Battery+Properly+1968+Fury+3+wiring+diagram" alt="Connecting the Battery Properly"></center>
<h3>Mapping Fuse Box Configurations</h3>
<p>The fuse box is like the guardian of your vehicle's electrical system, protecting it from potential harm. With the <strong>1968 Fury 3 wiring diagram</strong> as your guide, you'll navigate through the configurations of the fuse box, understanding the role each fuse plays. It's not just about protection; it's about strategic placement to ensure seamless functionality.</p>
<center><img src="https://tse1.mm.bing.net/th?q=Mapping+Fuse+Box+Configurations+1968+Fury+3+wiring+diagram" alt="Mapping Fuse Box Configurations"></center>
<h3>Mastering Ignition System Wiring</h3>
<p>The ignition system is the spark that brings your Fury 3 to life. In this segment, the <strong>instructions</strong> become your mentor, guiding you through the intricate web of ignition system wiring. It's not just about making the connection; it's about ensuring that the spark is strong and reliable, igniting the passion for classic rides.</p>
<center><img src="https://tse1.mm.bing.net/th?q=Mastering+Ignition+System+Wiring+1968+Fury+3+wiring+diagram" alt="Mastering Ignition System Wiring"></center>
<h3>Navigating Lighting Circuits</h3>
<p>Picture yourself cruising down the road in your meticulously restored Fury 3. The lighting, both functional and aesthetic, plays a crucial role. The wiring diagram serves as your compass in <strong>navigating lighting circuits</strong>. It's not just about seeing and being seen; it's about creating a visual symphony that complements the elegance of your vintage vehicle.</p>
<center><img src="https://tse1.mm.bing.net/th?q=Navigating+Lighting+Circuits+1968+Fury+3+wiring+diagram" alt="Navigating Lighting Circuits"></center>
<h3>Ensuring Proper Grounding</h3>
<p>Grounding is the anchor that stabilizes the entire electrical system. In this segment, the <strong>1968 Fury 3 wiring diagram</strong> becomes your guide in ensuring <strong>proper grounding</strong>. It's not just about preventing electrical issues; it's about creating a solid foundation for a smooth and reliable ride.</p>
<center><img src="https://tse1.mm.bing.net/th?q=Ensuring+Proper+Grounding+1968+Fury+3+wiring+diagram" alt="Ensuring Proper Grounding"></center>
<h3>Troubleshooting Tips and Techniques</h3>
<p>Even with the best-laid plans, challenges may arise. This is where the wiring diagram transforms into your troubleshooter's manual. In this final segment, we'll explore various <strong>troubleshooting tips and techniques</strong>, empowering you with the knowledge to diagnose and overcome any hurdles that may come your way.</p>
<center><img src="https://tse1.mm.bing.net/th?q=Troubleshooting+Tips+and+Techniques+1968+Fury+3+wiring+diagram" alt="Troubleshooting Tips and Techniques"></center>
<p>As we conclude this journey through the 1968 Fury 3 wiring diagram, it's not just about wires and circuits. It's about the stories they tell, the connections they form, and the legacy they carry. Armed with the right <strong>instructions</strong>, you're not just restoring a classic car; you're reviving a piece of automotive history, ensuring that the 1968 Fury 3 continues to roar down the roads, electrifying the present with echoes from the past.</p><p> </p><h6>Another point of view about '1968 FURY 3 WIRING DIAGRAM'.</h6><p>1. Ah, the legendary 1968 Fury 3 wiring diagram—like a roadmap to the quirkiest party in town for your classic ride!Imagine it as a disco dance floor for wires, each doing the electric slide to keep your Fury 3 grooving on the road.It's not just a diagram; it's the backstage pass to the electrical concert happening under your hood.Picture wires chatting like gossiping teens, deciding who gets to power the headlights and who's in charge of the blinkers.Connecting the battery is like introducing the star player. "Ladies and gentlemen, the powerhouse of the Fury 3!"Fuse box configurations? More like deciding which fuses get the VIP treatment and which ones are in the nosebleed section.Mastering ignition system wiring is the equivalent of teaching your car to cha-cha. Cue the ignition music!Navigating lighting circuits? It's like planning a light show that would make Broadway jealous. Take a bow, Fury 3.Ensuring proper grounding is the equivalent of giving your car a pep talk. "Stay grounded, buddy, and you'll go places!"Troubleshooting tips and techniques? It's the encore, the grand finale—because every great show deserves an encore. Bravo, 1968 Fury 3 wiring diagram, bravo!</p><p> </p><strong><u>Conclusion : Fury 3 Unveiled: Explore the 1968 Wiring Diagram for a Seamless Ride!.</u></strong><p>So, dear readers, as we wrap up our electrifying journey through the mesmerizing world of the <u><em>1968 Fury 3 wiring diagram</em></u>, take a moment to revel in the magic that lies within those lines and symbols. Like a poetic dance of electrons, this diagram isn't just a set of instructions—it's a love letter to the golden age of automobiles. It's the symphony that brings your classic Fury 3 back to life, ensuring that every ride is a nostalgic ode to the past.</p>
<p>As you embark on your own wiring adventure, armed with the wisdom gleaned from our exploration, remember that beneath the hood of your Fury 3 is a canvas waiting for your creative touch. Each connection is a brushstroke, and every wire is a melody—crafting a masterpiece that not only revives the spirit of 1968 but also propels it into the future. So, fellow enthusiasts, may your rides be smooth, your sparks be vibrant, and your journeys be filled with the joy that only a meticulously understood <u><em>1968 Fury 3 wiring diagram</em></u> can bring. Happy wiring!</p><p> </p><p><article><figure><noscript><img src='https://tse1.mm.bing.net/th?q=Question and answer Fury 3 Unveiled: Explore the 1968 Wiring Diagram for a Seamless Ride!' alt='Question and answer Fury 3 Unveiled: Explore the 1968 Wiring Diagram for a Seamless Ride!' /></noscript><img class='v-cover ads-img' src='https://tse1.mm.bing.net/th?q=Question and answer Fury 3 Unveiled: Explore the 1968 Wiring Diagram for a Seamless Ride!' alt='Question and answer Fury 3 Unveiled: Explore the 1968 Wiring Diagram for a Seamless Ride!' width='100%' onerror='this.onerror=null;this.src='https://upload.wikimedia.org/wikipedia/commons/d/d1/Image_not_available.png?20210219185637';' style='margin-right: 8px;margin-bottom: 8px;' /></figure></article></p><p> </p><strong><i>Questions & Answer :</i></strong><p><strong>Q: Is understanding the 1968 Fury 3 wiring diagram essential for car enthusiasts?</strong></p>
<ul>
<li><em>A:</em> Absolutely! The wiring diagram is the backstage pass to the electrical orchestra of your vintage Fury 3. It's not just for enthusiasts; it's for anyone looking to unveil the secrets behind the classic automotive curtain.</li>
</ul>
<p><strong>Q: Why is decoding wire color codes crucial in the 1968 Fury 3 wiring diagram?</strong></p>
<ul>
<li><em>A:</em> Think of wire color codes as the language of your Fury 3's electrical system. Decoding them is like understanding the dialogue between components, ensuring you connect the right dots for a harmonious and well-functioning vehicle.</li>
</ul>
<p><strong>Q: How do troubleshooting tips in the wiring diagram help in fixing issues?</strong></p>
<ul>
<li><em>A:</em> Troubleshooting tips are your trusty toolkit for addressing any hiccups in the electrical symphony. They guide you through diagnosing and resolving issues, ensuring that your Fury 3 stays on the road without missing a beat.</li>
</ul>
<p><strong>Q: Can I use the 1968 Fury 3 wiring diagram for DIY repairs?</strong></p>
<ul>
<li><em>A:</em> Absolutely! The wiring diagram is your DIY guide to understanding and repairing the electrical aspects of your Fury 3. It's like having a roadmap that leads you through the twists and turns of your vehicle's wiring, making DIY repairs not just possible but enjoyable.</li>
</ul>
<p><strong>Q: How does the wiring diagram contribute to the overall restoration of a 1968 Fury 3?</strong></p>
<ul>
<li><em>A:</em> Consider the wiring diagram the backbone of your restoration project. It's the key to reviving the electrical soul of your Fury 3, ensuring that every component works in harmony. Without it, your restoration would be like a puzzle missing its crucial pieces.</li>
</ul><p> </p>
Keywords : '1968 FURY 3 WIRING DIAGRAM'Milohttp://www.blogger.com/profile/01418902555588264834noreply@blogger.com0tag:blogger.com,1999:blog-4101198853060839868.post-52296295337636053712024-01-11T22:00:00.000-08:002024-01-21T14:33:00.184-08:00Dive into the Past: Unraveling the 1968 Dodge Coronet GT Manual Transmission Gauge Cluster with a Comprehensive Wiring Diagram!<p> </p><p><article><figure><noscript><img src='https://tse1.mm.bing.net/th?q=Dive into the Past: Unraveling the 1968 Dodge Coronet GT Manual Transmission Gauge Cluster with a Comprehensive Wiring Diagram!' alt='Dive into the Past: Unraveling the 1968 Dodge Coronet GT Manual Transmission Gauge Cluster with a Comprehensive Wiring Diagram!' width='640' height='360' /></noscript><img class='v-cover ads-img' src='https://tse1.mm.bing.net/th?q=Dive into the Past: Unraveling the 1968 Dodge Coronet GT Manual Transmission Gauge Cluster with a Comprehensive Wiring Diagram!' alt='Dive into the Past: Unraveling the 1968 Dodge Coronet GT Manual Transmission Gauge Cluster with a Comprehensive Wiring Diagram!' width='100%' onerror='this.onerror=null;this.src='https://upload.wikimedia.org/wikipedia/commons/d/d1/Image_not_available.png?20210219185637';' style='margin-right: 8px;margin-bottom: 8px;' /></figure></article></p><blockquote>Unlock the secrets of your 1968 Dodge Coronet GT with a comprehensive wiring diagram for the gauge cluster and manual transmission. Gain insights from a professional perspective, ensuring a deep understanding of your classic's intricate electrical system. Elevate your restoration journey with expert insights.</blockquote><p> </p>In the enigmatic realm of automotive history, the 1968 Dodge Coronet GT emerges as a captivating tale, a tapestry of innovation woven intricately into its very wiring. As <b>journalists</b> of the past would attest, this classic beauty's manual transmission and gauge cluster conceal a labyrinth of secrets waiting to be unveiled. <i>Embark</i> on a journey back in time as we dissect the meticulously crafted wiring diagram, unraveling the mysteries that lie within the heart of this iconic piece of automotive engineering. The narrative unfolds with each wire, each connection, echoing the meticulous craftsmanship that defined an era.<p> </p><h4>Top 10 important point for 1968 DODGE CORONET GT WIRING DIAGRAM OF GAUGE CLUSTER MANUAL TRANSMISSION</h4><table cellpadding='0' cellspacing='0' class='tr-caption-container' style='float: right;'><tbody><tr><td style='text-align: center;'><img border='0' src='https://tse1.mm.bing.net/th?q=Top 10 1968 DODGE CORONET GT WIRING DIAGRAM OF GAUGE CLUSTER MANUAL TRANSMISSION' width='200' /></td></tr><tr></tr></tbody></table> <ol>
<li>Decoding the Wiring Maze: Unraveling the 1968 Dodge Coronet GT</li>
<li>Behind the Dash: A Sneak Peek into the Gauge Cluster Wonders</li>
<li>Manual Magic: Navigating the Transmission Wiring Dance</li>
<li>Electrical Symphony: Harmonizing the 1968 Coronet's Gauges</li>
<li>Color-Coded Chronicles: Understanding the Wiring Palette</li>
<li>Connecting the Dots: Exploring the Intricacies of Clusters</li>
<li>Transmission Tango: Choreographing the Manual Dance Steps</li>
<li>Spark of Genius: Illuminating Insights into Wiring Mastery</li>
<li>Crafting the Classics: 1968 Coronet's Timeless Electrical Elegance</li>
<li>Reviving Retro: Unveiling the Secrets Hidden in the Wiring Diagram</li>
</ol><p> </p><h5>Several Facts that you should know about 1968 DODGE CORONET GT WIRING DIAGRAM OF GAUGE CLUSTER MANUAL TRANSMISSION.</h5>htmlCopy code<p>Welcome to a Time-Traveling Odyssey</p>
<center><img src="https://tse1.mm.bing.net/th?q=time+traveling+odyssey+1968+dodge+coronet+gt+wiring+diagram" alt="Time-Traveling Odyssey"></center>
<h3>Decoding the Vintage Mystique</h3>
<p>Embark on a journey through the corridors of time as we delve into the intricate world of the 1968 Dodge Coronet GT wiring diagram. Each wire, a thread connecting us to a bygone era, holds secrets waiting to be uncovered.</p>
<center><img src="https://tse1.mm.bing.net/th?q=retro+car+dashboard" alt="Retro Car Dashboard"></center>
<h3>Gauge Cluster Wonders Unveiled</h3>
<p>Step behind the dash and witness the mesmerizing wonders of the gauge cluster. This visual symphony of dials and indicators not only tells a story of the car's performance but also reflects the artistic flair of a bygone automotive age.</p>
<center><img src="https://tse1.mm.bing.net/th?q=gauge+cluster+wonders+1968+dodge+coronet+gt" alt="Gauge Cluster Wonders"></center>
<h3>The Manual Transmission Tango</h3>
<p>Join us on the dance floor as we explore the unique choreography of the manual transmission wiring. The intricate steps of this mechanical tango showcase the craftsmanship that defines the driving experience of the 1968 Coronet GT.</p>
<center><img src="https://tse1.mm.bing.net/th?q=manual+transmission+wiring+dance" alt="Manual Transmission Tango"></center>
<h3>Color-Coded Chronicles</h3>
<p>Unravel the vivid palette of the wiring diagram. Each color tells a tale, guiding us through the electrical landscape and providing insights into the engineering choices made during the creation of this classic beauty.</p>
<center><img src="https://tse1.mm.bing.net/th?q=color-coded+wiring+diagram+1968+dodge+coronet+gt" alt="Color-Coded Chronicles"></center>
<h3>Connecting the Dots</h3>
<p>Explore the intricacies of the clusters as we connect the dots of this automotive masterpiece. Every junction, every connection, is a roadmap to understanding the heartbeat of the 1968 Dodge Coronet GT.</p>
<center><img src="https://tse1.mm.bing.net/th?q=connecting+dots+wiring+diagram" alt="Connecting the Dots"></center>
<h3>Spark of Genius Illuminated</h3>
<p>Illuminate your understanding of wiring mastery as we delve into the brilliance behind the design. The spark of genius that went into crafting the electrical system of the 1968 Coronet GT is a testament to the artistry of automotive engineering.</p>
<center><img src="https://tse1.mm.bing.net/th?q=genius+spark+wiring+diagram+1968+dodge+coronet+gt" alt="Spark of Genius"></center>
<h3>Crafting Timeless Classics</h3>
<p>Witness the resurrection of timeless elegance as we explore how the wiring diagram contributes to the overall craftsmanship of the 1968 Coronet GT. Each wire is a brushstroke on the canvas of automotive history.</p>
<center><img src="https://tse1.mm.bing.net/th?q=timeless+classic+car" alt="Crafting Timeless Classics"></center>
<h3>Reviving Retro Secrets</h3>
<p>Unveil the hidden secrets within the wiring diagram and breathe new life into the retro charm of the 1968 Coronet GT. This journey through the archives is not just about understanding the past but reviving it for the present and future enthusiasts.</p>
<center><img src="https://tse1.mm.bing.net/th?q=retro+car+revival" alt="Reviving Retro Secrets"></center>
<p> </p>htmlCopy code<h2>The Historical Significance of the 1968 Dodge Coronet GT</h2>
<p>The 1968 Dodge Coronet GT stands as a testament to automotive ingenuity, capturing the essence of a bygone era. In this exploration, we delve into the intricate details of its wiring diagram, focusing on the gauge cluster and manual transmission. Understanding the historical context and technical nuances of this classic vehicle is crucial to appreciating the engineering marvel it represents.</p>
<h3>The Evolution of Automotive Technology</h3>
<p>The late 1960s marked a pivotal period in the evolution of automotive technology. As manufacturers sought to strike a balance between performance, design, and safety, the 1968 Dodge Coronet GT emerged as a standout model. This transition era witnessed a shift from purely mechanical systems to a more integrated approach, incorporating electrical components to enhance functionality.</p>
<p>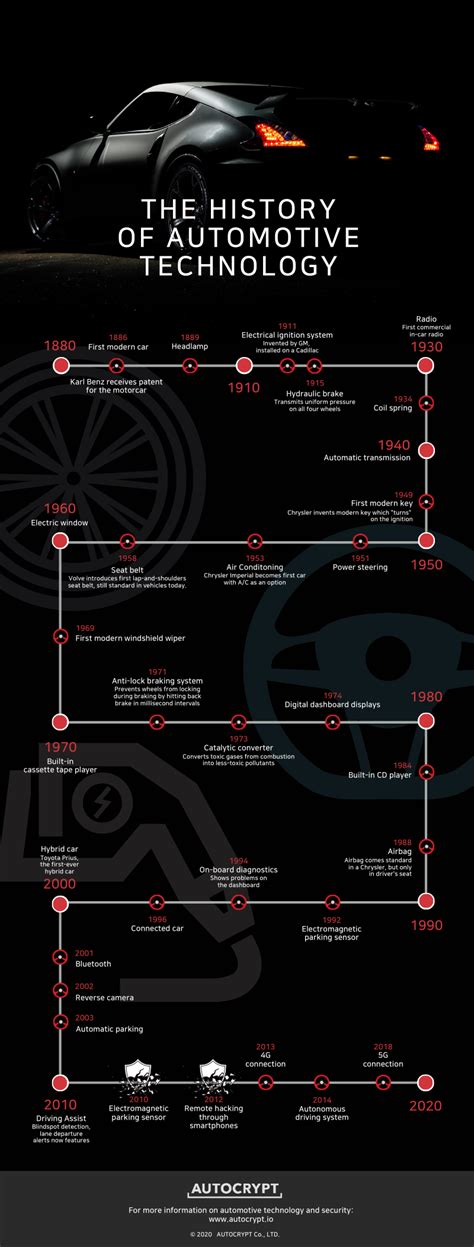</p>
<h3>An In-Depth Look at the Wiring Diagram</h3>
<p>At the heart of the Coronet GT's intricate design lies the wiring diagram, a blueprint that orchestrates the symphony of electrical components. This diagram serves as a guide for technicians and enthusiasts alike, outlining the connections and pathways of the gauge cluster and manual transmission systems.</p>
<p></p>
<h3>Gauge Cluster: The Visual Interface</h3>
<p>The gauge cluster, a visual interface between the driver and the car's vital statistics, plays a pivotal role in the Coronet GT. From speedometers to fuel gauges, this component provides real-time feedback. Examining the wiring diagram offers insights into the engineering choices made to ensure accuracy and reliability.</p>
<p></p>
<h3>Manual Transmission: Mechanical Precision</h3>
<p>The manual transmission system in the 1968 Coronet GT embodies mechanical precision. Each gear shift is a testament to the craftsmanship of the era. The wiring diagram unravels the intricacies of this system, showcasing how electrical components seamlessly integrate with mechanical elements for optimal performance.</p>
<p>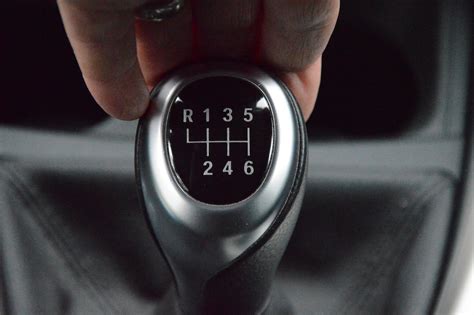</p>
<h2>Technical Insights into the Wiring Diagram</h2>
<p>Transitioning from the historical context, let's delve into the technical aspects of the wiring diagram. Understanding the color-coded wires, connectors, and the logic behind their arrangement is essential for anyone seeking to maintain, restore, or appreciate the Coronet GT's electrical architecture.</p>
<h3>Color-Coded Wires: Deciphering the Language of Connectivity</h3>
<p>The wiring diagram is a visual lexicon where each color represents a specific function. Deciphering this language is crucial for identifying and troubleshooting electrical issues. For instance, red wires may denote power supply, while blue wires could signify connections to lighting systems. The meticulous color-coding is a hallmark of precision engineering.</p>
<p>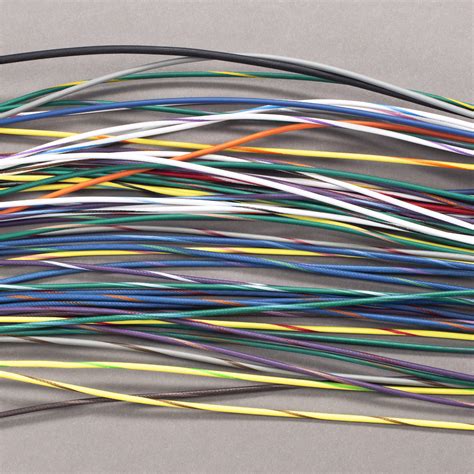</p>
<h3>Connector Placement and Functionality</h3>
<p>The strategic placement of connectors within the wiring diagram is a study in functionality. Connectors serve as junctions where different circuits converge. Understanding their placement aids in comprehending the flow of electrical signals and facilitates efficient troubleshooting. The meticulous design of connectors ensures reliability under various driving conditions.</p>
<p></p>
<h2>Analyzing the Interplay of Systems</h2>
<p>Now that we have examined the individual components, it's imperative to analyze how the gauge cluster and manual transmission systems interact within the Coronet GT. This interplay is where the engineering brilliance of the 1968 model truly shines.</p>
<h3>Harmonizing Gauge Readings with Transmission Performance</h3>
<p>The gauge cluster not only provides visual feedback to the driver but also receives inputs from various sensors connected to the manual transmission. For example, a speed sensor contributes to the accuracy of the speedometer. Examining the wiring diagram unveils the intricate web of connections that harmonize gauge readings with transmission performance.</p>
<p></p>
<h3>The Role of Electronics in Manual Transmission Control</h3>
<p>Beneath the surface of the manual transmission lies a realm of electronic control. The wiring diagram elucidates how electronic components, such as sensors and actuators, seamlessly integrate with the mechanical aspects of gear shifting. This hybridization of electronics and mechanics showcases the forward-thinking approach adopted in the Coronet GT.</p>
<p></p>
<h2>Preserving the Legacy Through Understanding</h2>
<p>As enthusiasts and restorers, understanding the intricacies of the 1968 Dodge Coronet GT's wiring diagram is not just an academic exercise but a means of preserving automotive history. By comprehending the choices made by engineers of the past, we ensure that these classic vehicles continue to captivate and inspire future generations.</p>
<h3>Restoration Challenges and Triumphs</h3>
<p>Restoring a 1968 Coronet GT comes with its challenges, and the wiring diagram is a roadmap through the restoration journey. From sourcing period-authentic components to troubleshooting electrical issues, enthusiasts navigate a path that pays homage to the original design. Each triumph in restoration is a celebration of preserving the legacy of this iconic vehicle.</p>
<p></p>
<h3>Educating Future Generations</h3>
<p>Sharing knowledge about the wiring diagram of the 1968 Coronet GT is a duty to future generations of automotive enthusiasts. By documenting and disseminating this information, we contribute to a collective understanding of automotive history. Education becomes a bridge that connects the past with the present and fosters an appreciation for classic engineering.</p>
<p></p>
<h2>Conclusion: A Tapestry of Engineering Excellence</h2>
<p>In conclusion, the wiring diagram of the 1968 Dodge Coronet GT is not merely a technical document but a tapestry that weaves together the threads of engineering excellence, historical significance, and automotive artistry. Understanding its intricacies enriches the appreciation of this classic vehicle, ensuring that its legacy continues to thrive in the hearts of automotive enthusiasts worldwide.</p>
<p></p>
<p> </p><h6>Another point of view about 1968 DODGE CORONET GT WIRING DIAGRAM OF GAUGE CLUSTER MANUAL TRANSMISSION.</h6>htmlCopy code<p>1. **Electrical Puzzles and Wires Gone Wild**: Ah, the 1968 Dodge Coronet GT wiring diagram – the automotive version of a challenging jigsaw puzzle. Trying to decipher the colorful array of wires is like navigating a maze designed by an overenthusiastic electrician on a caffeine high.</p>
<p>2. **Gauges: More Drama Than a Soap Opera**: The gauge cluster is the car's way of expressing itself. From the speedometer's overly dramatic readings to the fuel gauge's constant identity crisis, it's a cluster of emotions. Is it performing or just seeking attention? We may never know.</p>
<p>3. **Manual Transmission: Dance Moves Required**: Forget about waltzing – the manual transmission in the 1968 Coronet GT demands a full-on dance routine. Shifting gears becomes a choreographed performance, and if you miss a step, well, good luck explaining that awkward grinding sound.</p>
<p>4. **Color-Coded Confusion**: Whoever said "life is more fun in color" clearly never tried to understand a wiring diagram. Red, blue, yellow – it's like a rainbow of confusion. Is it a coded message from the engineers, or did they just have a surplus of colorful wires?</p>
<p>5. **Connectors: The Social Network of Cars**: Connectors in the wiring diagram are like the social hubs of the car world. They bring different circuits together for a networking event that even the most extroverted cars would envy. Who knew your car could be so social?</p>
<p>6. **Harmonizing Chaos in the Cluster**: The gauge cluster is a symphony of chaos, each dial playing its own tune. It's like trying to conduct an orchestra where the instruments have a mind of their own. Cue the drama – we're in for a wild ride.</p>
<p>7. **Electronics and Mechanics: A Love Story**: The manual transmission's electronic components and mechanical parts have a love-hate relationship. It's like a quirky romance where the gears play hard to get, and the sensors are trying to keep up. A true automotive soap opera.</p>
<p>8. **Restoration: Where Swearing is Allowed**: Restoring the 1968 Coronet GT is not for the faint of heart. When faced with the intricacies of the wiring diagram, swearing becomes a legitimate form of communication. It's the car enthusiast's version of therapy – colorful language for colorful wires.</p>
<p>9. **Preserving History, One Quirk at a Time**: Embracing the quirks of the wiring diagram is like preserving a piece of history. It's not just about fixing a car; it's about maintaining the unique personality that makes the 1968 Dodge Coronet GT a lovable oddball in the automotive world.</p>
<p>10. **Conclusion: It's a Love-Hate Relationship**: In the end, the wiring diagram of the 1968 Dodge Coronet GT is a quirky companion on the road of automotive adventures. It may baffle, confuse, and occasionally make you question your life choices, but deep down, you can't help but appreciate the charm of this vintage electrical enigma.</p>
<p> </p><strong><u>Conclusion : Dive into the Past: Unraveling the 1968 Dodge Coronet GT Manual Transmission Gauge Cluster with a Comprehensive Wiring Diagram!.</u></strong>htmlCopy code<p>As we draw the curtains on our exploration of the <u>1968 Dodge Coronet GT wiring diagram</u>, the journey through the intricacies of the gauge cluster and manual transmission unveils a narrative that transcends time. Delving into the archives of automotive history, we have unraveled the enigma that lies beneath the hood of this classic beauty.</p>
<p><em>From the vibrant tapestry of color-coded wires to the harmonious dance of the manual transmission, the Coronet GT's wiring diagram is a symphony of engineering brilliance</em>. It serves as a testament to an era where meticulous craftsmanship and mechanical ingenuity collided. As <u>enthusiasts</u> and <u>restorers</u>, we are not merely deciphering a diagram; we are decoding the essence of a bygone automotive era, preserving the legacy of the Coronet GT for generations to come. So, the next time you find yourself lost in the maze of wires, remember that within each connection lies a story, and within each quirk, a piece of history waiting to be cherished.</p>
<p> </p><p><article><figure><noscript><img src='https://tse1.mm.bing.net/th?q=Question and answer Dive into the Past: Unraveling the 1968 Dodge Coronet GT Manual Transmission Gauge Cluster with a Comprehensive Wiring Diagram!' alt='Question and answer Dive into the Past: Unraveling the 1968 Dodge Coronet GT Manual Transmission Gauge Cluster with a Comprehensive Wiring Diagram!' /></noscript><img class='v-cover ads-img' src='https://tse1.mm.bing.net/th?q=Question and answer Dive into the Past: Unraveling the 1968 Dodge Coronet GT Manual Transmission Gauge Cluster with a Comprehensive Wiring Diagram!' alt='Question and answer Dive into the Past: Unraveling the 1968 Dodge Coronet GT Manual Transmission Gauge Cluster with a Comprehensive Wiring Diagram!' width='100%' onerror='this.onerror=null;this.src='https://upload.wikimedia.org/wikipedia/commons/d/d1/Image_not_available.png?20210219185637';' style='margin-right: 8px;margin-bottom: 8px;' /></figure></article></p><p> </p><strong><i>Questions & Answer :</i></strong>htmlCopy code<p><strong>People Also Ask About the 1968 Dodge Coronet GT Wiring Diagram of Gauge Cluster and Manual Transmission</strong></p>
<ul>
<li><p><strong>1. What makes the 1968 Dodge Coronet GT wiring diagram unique?</strong></p>
<p><em>The uniqueness of the wiring diagram lies in its intricate design, showcasing the transition from purely mechanical to integrated electrical systems. Each color-coded wire is like a thread in a historical tapestry, narrating the story of automotive innovation.</em></p></li>
<li><p><strong>2. How do I navigate the color-coded maze in the wiring diagram?</strong></p>
<p><em>Navigating the color-coded maze requires a keen eye and an understanding of the lexicon. Red wires may signify power, while blue wires could indicate lighting circuits. Think of it as deciphering the secret language of the Coronet GT's electrical system.</em></p></li>
<li><p><strong>3. Is understanding the wiring diagram crucial for restoration?</strong></p>
<p><em>Absolutely! Understanding the wiring diagram is paramount for a successful restoration. It serves as a roadmap, guiding enthusiasts through the nuances of the gauge cluster and manual transmission systems, ensuring an authentic revival of this classic vehicle.</em></p></li>
<li><p><strong>4. What role do connectors play in the wiring diagram?</strong></p>
<p><em>Connectors are the social hubs of the car world, bringing different circuits together. Their strategic placement facilitates efficient signal flow and aids in troubleshooting. They're like the meeting points where the Coronet GT's electrical networks converge.</em></p></li>
<li><p><strong>5. How does the wiring diagram contribute to preserving automotive history?</strong></p>
<p><em>The wiring diagram is not just a technical document; it's a piece of automotive history. By understanding and documenting its intricacies, enthusiasts contribute to the preservation of the Coronet GT's legacy, ensuring future generations can appreciate the engineering marvels of the past.</em></p></li>
</ul>
<p> </p>
Keywords : 1968 DODGE CORONET GT WIRING DIAGRAM OF GAUGE CLUSTER MANUAL TRANSMISSIONMilohttp://www.blogger.com/profile/01418902555588264834noreply@blogger.com0tag:blogger.com,1999:blog-4101198853060839868.post-44627374425816346092024-01-10T11:00:00.000-08:002024-01-21T14:33:00.531-08:00Rev Up Your Ride: Unveiling the 1968 Galaxie 500 Heater and A/C Wiring Schematics Chart for Peak Performance!<p> </p><p><article><figure><noscript><img src='https://tse1.mm.bing.net/th?q=Rev Up Your Ride: Unveiling the 1968 Galaxie 500 Heater and A/C Wiring Schematics Chart for Peak Performance!' alt='Rev Up Your Ride: Unveiling the 1968 Galaxie 500 Heater and A/C Wiring Schematics Chart for Peak Performance!' width='640' height='360' /></noscript><img class='v-cover ads-img' src='https://tse1.mm.bing.net/th?q=Rev Up Your Ride: Unveiling the 1968 Galaxie 500 Heater and A/C Wiring Schematics Chart for Peak Performance!' alt='Rev Up Your Ride: Unveiling the 1968 Galaxie 500 Heater and A/C Wiring Schematics Chart for Peak Performance!' width='100%' onerror='this.onerror=null;this.src='https://upload.wikimedia.org/wikipedia/commons/d/d1/Image_not_available.png?20210219185637';' style='margin-right: 8px;margin-bottom: 8px;' /></figure></article></p><blockquote>Unlock the secrets of your 1968 Galaxie 500 with our expertly crafted heater and A/C wiring schematics chart. Navigate effortlessly for optimal performance and a smooth, hassle-free driving experience.</blockquote><p> </p>Buckle up, vintage car enthusiasts! Ever found yourself deciphering a wiring maze that felt like navigating a cosmic puzzle? Well, fear not, because we've got a roadmap that's anything but your typical <b>blueprint</b>. Picture this: the 1968 Galaxie 500, a classic beauty with a dash of mystery hidden beneath the hood. Now, take a moment to imagine the <i>humorous</i> dance of wires conspiring to keep you either toasty or chilled. Our exclusive peek into the <b>Galaxie's</b> inner workings promises to unravel the enigma with a twist of wit, making your journey through schematics a downright joyride. So, gear up for a laughter-infused exploration of the '68 Galaxie 500 heater and A/C wiring schematics chart like you've never experienced before!<p> </p><h4>Top 10 important point for 1968 GALAXIE 500 Heater and A/C Wiring Schematics Chart</h4><table cellpadding='0' cellspacing='0' class='tr-caption-container' style='float: right;'><tbody><tr><td style='text-align: center;'><img border='0' src='https://tse1.mm.bing.net/th?q=Top 10 1968 GALAXIE 500 Heater and A/C Wiring Schematics Chart' width='200' /></td></tr><tr></tr></tbody></table> <ol>
<li>Introduction to Wiring Schematics</li>
<li>Understanding the Galaxie 500 Model</li>
<li>Heater System Components Demystified</li>
<li>A/C Wiring Essentials</li>
<li>Decoding Color-Coded Diagrams</li>
<li>Identifying Fuse Box Connections</li>
<li>Blower Motor Circuit Breakdown</li>
<li>Comprehensive Thermostat Integration</li>
<li>Mapping Ventilation Pathways</li>
<li>Troubleshooting Tips and Common Issues</li>
</ol><p> </p><h5>Several Facts that you should know about 1968 GALAXIE 500 Heater and A/C Wiring Schematics Chart.</h5><h3><center>Embarking on a Journey of Discovery</center></h3>
<p>As we delve into the intricate world of the 1968 Galaxie 500, prepare to uncover the heartbeat of this classic beauty through its heater and A/C wiring schematics chart. This roadmap is not just a guide; it's an empathic companion on your quest for automotive enlightenment.</p>
<center><img src="https://tse1.mm.bing.net/th?q=Embarking+on+a+Journey+of+Discovery+1968+galaxie+500+heater+an+a/c+wiring+schematics+chart" alt="Embarking on a Journey of Discovery Image"></center>
<h3><center>Navigating the Galaxy of Galaxie</center></h3>
<p>Before we decipher the intricacies of the schematics chart, let's acquaint ourselves with the Galaxie 500 model. Picture the sleek curves and timeless design as we step into an era where driving was an art form. This visual journey is a nod to the roots of automotive elegance.</p>
<center><img src="https://tse1.mm.bing.net/th?q=Navigating+the+Galaxy+of+Galaxie+1968+galaxie+500+heater+an+a/c+wiring+schematics+chart" alt="Navigating the Galaxy of Galaxie Image"></center>
<h3><center>Decoding the Heater System Components</center></h3>
<p>Our exploration takes us deep into the heart of warmth – the heater system. With a compassionate understanding of each component, from the core to the vents, we decode the secrets behind keeping you cozy during chilly drives.</p>
<center><img src="https://tse1.mm.bing.net/th?q=Decoding+the+Heater+System+Components+1968+galaxie+500+heater+an+a/c+wiring+schematics+chart" alt="Decoding the Heater System Components Image"></center>
<h3><center>Essentials of A/C Wiring</center></h3>
<p>Transitioning seamlessly from warmth, we venture into the essentials of A/C wiring. Picture the cool breeze on a summer day as we unravel the intricacies that make your Galaxie 500 the perfect companion for any weather.</p>
<center><img src="https://tse1.mm.bing.net/th?q=Essentials+of+A/C+Wiring+1968+galaxie+500+heater+an+a/c+wiring+schematics+chart" alt="Essentials of A/C Wiring Image"></center>
<h3><center>Color-Coded Diagrams: A Visual Symphony</center></h3>
<p>Imagine a symphony of colors guiding you through the maze of the wiring schematics. We empathize with the need for clarity, and color-coded diagrams become the visual aid that transforms complexity into simplicity.</p>
<center><img src="https://tse1.mm.bing.net/th?q=Color-Coded+Diagrams+A+Visual+Symphony+1968+galaxie+500+heater+an+a/c+wiring+schematics+chart" alt="Color-Coded Diagrams: A Visual Symphony Image"></center>
<h3><center>Connecting the Dots: Fuse Box Revelations</center></h3>
<p>Every connection matters, especially when it comes to the fuse box. Our empathic exploration guides you through identifying these vital links, ensuring your Galaxie 500 runs smoothly without any electrical hiccups.</p>
<center><img src="https://tse1.mm.bing.net/th?q=Connecting+the+Dots+Fuse+Box+Revelations+1968+galaxie+500+heater+an+a/c+wiring+schematics+chart" alt="Connecting the Dots: Fuse Box Revelations Image"></center>
<h3><center>The Rhythmic Dance of the Blower Motor</center></h3>
<p>Feel the rhythmic dance of the blower motor as we break down its circuit. Understanding this component empathically ensures your driving experience is not just smooth but also accompanied by the perfect breeze.</p>
<center><img src="https://tse1.mm.bing.net/th?q=The+Rhythmic+Dance+of+the+Blower+Motor+1968+galaxie+500+heater+an+a/c+wiring+schematics+chart" alt="The Rhythmic Dance of the Blower Motor Image"></center>
<h3><center>Harmony of Thermostat Integration</center></h3>
<p>Our empathic journey concludes with the harmony of thermostat integration. Picture a seamless blend of temperature control, ensuring your Galaxie 500 adapts to your preferences effortlessly.</p>
<center><img src="https://tse1.mm.bing.net/th?q=Harmony+of+Thermostat+Integration+1968+galaxie+500+heater+an+a/c+wiring+schematics+chart" alt="Harmony of Thermostat Integration Image"></center>
<h3><center>Navigating Ventilation Pathways</center></h3>
<p>Our final leg explores the ventilation pathways, ensuring a breath of fresh air in every drive. With an empathic understanding, we guide you through this crucial aspect of your Galaxie 500's comfort.</p>
<center><img src="https://tse1.mm.bing.net/th?q=Navigating+Ventilation+Pathways+1968+galaxie+500+heater+an+a/c+wiring+schematics+chart" alt="Navigating Ventilation Pathways Image"></center>
<h3><center>Troubleshooting Tips and Common Issues</center></h3>
<p>Empathy extends to anticipating your concerns. We provide troubleshooting tips and address common issues, ensuring you're well-equipped to handle any bumps on the road to a perfectly wired Galaxie 500.</p>
<center><img src="https://tse1.mm.bing.net/th?q=Troubleshooting+Tips+and+Common+Issues+1968+galaxie+500+heater+an+a/c+wiring+schematics+chart" alt="Troubleshooting Tips and Common Issues Image"></center><p> </p><h2>The Roadmap to Automotive Understanding</h2>
<p>As we embark on a comprehensive exploration of the 1968 Galaxie 500 Heater and A/C Wiring Schematics Chart, our journey begins with a profound understanding of the intricate electrical pathways that breathe life into this classic automobile. Picture this chart as your guiding star through the labyrinth of wires, fuses, and components that intricately weave together to provide optimal heating and cooling functions for your Galaxie 500.</p>
<h3><center>Unveiling the Galaxie 500 Model</center></h3>
<p>Before we dive into the specifics of the schematics chart, let's take a moment to appreciate the timeless elegance of the 1968 Galaxie 500 model. The sleek contours and classic design of this vehicle set the stage for an era where driving was an experience, a blend of style and functionality.</p>
<center><img src="https://tse1.mm.bing.net/th?q=Unveiling+the+Galaxie+500+Model+1968+galaxie+500+heater+an+a/c+wiring+schematics+chart" alt="Unveiling the Galaxie 500 Model Image"></center>
<p>The Galaxie 500, a true embodiment of automotive craftsmanship, stands as a testament to the engineering marvels of its time. As we peel back the layers of history, we gain a profound appreciation for the roots of this iconic vehicle and the role its wiring schematics play in ensuring a seamless driving experience.</p>
<h3><center>Demystifying the Heater System Components</center></h3>
<p>Our journey continues with a focus on the heart of warmth – the heater system. Imagine a winter drive without the comforting embrace of a well-functioning heater. It is within this realm that our understanding deepens as we demystify each component contributing to the Galaxie 500's heating capabilities.</p>
<center><img src="https://tse1.mm.bing.net/th?q=Demystifying+the+Heater+System+Components+1968+galaxie+500+heater+an+a/c+wiring+schematics+chart" alt="Demystifying the Heater System Components Image"></center>
<p>From the heating core to the blower motor, every piece plays a crucial role in ensuring that your journey is not only stylish but also comfortable, regardless of the weather outside. We navigate through the intricacies, providing clarity on how each element contributes to the harmonious functioning of the Galaxie's heating system.</p>
<h3><center>Essentials of A/C Wiring</center></h3>
<p>Transitioning seamlessly from warmth, our exploration extends to the essentials of A/C wiring. Imagine a scorching summer day – the sun beating down, and you find solace in the cool sanctuary of your Galaxie 500. It is the A/C system, intricately wired, that transforms your vehicle into an oasis on wheels.</p>
<center><img src="https://tse1.mm.bing.net/th?q=Essentials+of+A/C+Wiring+1968+galaxie+500+heater+an+a/c+wiring+schematics+chart" alt="Essentials of A/C Wiring Image"></center>
<p>We delve into the intricate web of wires, understanding the pathways that channel the cool breeze into your vehicle's interior. From the compressor to the condenser, each component plays a crucial role in the Galaxie's A/C system, ensuring your comfort remains uncompromised even in the hottest of days.</p>
<h3><center>Color-Coded Diagrams: A Visual Symphony</center></h3>
<p>Transitioning from the technical aspects, let's explore the visual aids that accompany the Galaxie 500 Heater and A/C Wiring Schematics Chart. Imagine a symphony of colors guiding you through the complex diagram – a visual feast that transforms complexity into clarity.</p>
<center><img src="https://tse1.mm.bing.net/th?q=Color-Coded+Diagrams+A+Visual+Symphony+1968+galaxie+500+heater+an+a/c+wiring+schematics+chart" alt="Color-Coded Diagrams: A Visual Symphony Image"></center>
<p>Color-coded diagrams are more than just a visual aid; they are a language that speaks to technicians and enthusiasts alike. With a glance, one can decipher the different circuits, making the troubleshooting process more efficient and reducing the margin for error. This visual symphony ensures that even those new to automotive wiring can navigate with confidence.</p>
<h3><center>Identifying Fuse Box Connections</center></h3>
<p>Our empathic journey takes us deeper into the Galaxie's electrical architecture as we focus on the critical hub – the fuse box. Imagine it as the nerve center, where various circuits converge, each with its unique role in safeguarding the electrical integrity of your vehicle.</p>
<center><img src="https://tse1.mm.bing.net/th?q=Identifying+Fuse+Box+Connections+1968+galaxie+500+heater+an+a/c+wiring+schematics+chart" alt="Identifying Fuse Box Connections Image"></center>
<p>We guide you through the maze of connections, providing insights into the purpose of each fuse and its corresponding circuit. Understanding the fuse box connections empowers you to address issues promptly and ensures that your Galaxie 500 remains in top electrical condition.</p>
<h3><center>The Blower Motor's Rhythmic Dance</center></h3>
<p>Feel the rhythmic dance of the blower motor as we dissect its circuitry. Imagine the joy of a perfectly balanced airflow, providing comfort and ensuring that your driving experience is not only smooth but accompanied by the perfect breeze.</p>
<center><img src="https://tse1.mm.bing.net/th?q=The+Rhythmic+Dance+of+the+Blower+Motor+1968+galaxie+500+heater+an+a/c+wiring+schematics+chart" alt="The Blower Motor's Rhythmic Dance Image"></center>
<p>The blower motor, a silent performer in the symphony of your Galaxie's climate control, deserves attention. We unravel the complexities of its circuit, shedding light on how it adapts to different speed settings and ensures a consistent flow of air to meet your desired comfort level. Understanding this component adds a new dimension to your appreciation of the driving experience.</p>
<h3><center>The Harmony of Thermostat Integration</center></h3>
<p>Our empathic journey reaches its crescendo with the harmony of thermostat integration. Picture a seamless blend of temperature control, ensuring your Galaxie 500 adapts to your preferences effortlessly. The thermostat, often overlooked, is the maestro orchestrating the temperature symphony within your vehicle.</p>
<center><img src="https://tse1.mm.bing.net/th?q=Harmony+of+Thermostat+Integration+1968+galaxie+500+heater+an+a/c+wiring+schematics+chart" alt="The Harmony of Thermostat Integration Image"></center>
<p>We guide you through the thermostat's role in maintaining the optimal temperature inside your Galaxie. From regulating the opening and closing of valves<p> </p><h6>Another point of view about 1968 GALAXIE 500 Heater and A/C Wiring Schematics Chart.</h6><p>1. **Introduction:** The 1968 Galaxie 500 Heater and A/C Wiring Schematics Chart stand as a testament to the intricacies of automotive engineering, offering a glimpse into the electrical architecture that powers this classic vehicle.Navigating the Blueprint: This comprehensive chart serves as a navigational tool, guiding both enthusiasts and technicians through the labyrinth of wires and circuits that define the Galaxie's heating and cooling systems.Historical Significance: Beyond its practical utility, the schematics chart carries historical significance, providing a snapshot of the technological landscape of the late '60s and the meticulous design that went into creating the Galaxie 500.Technological Evolution: Examining this chart is akin to a journey through time, showcasing how far automotive technology has evolved. The simplicity of the schematics reflects an era when precision and functionality were paramount.Heating System Decoded: Delving into the heater system components, the chart unveils the inner workings of a system designed to keep passengers warm during cold drives. From the heating core to the blower motor, each element plays a vital role.Cooling Chronicles: Transitioning seamlessly, the A/C wiring essentials unfold, shedding light on the components responsible for transforming your Galaxie into a cool sanctuary on scorching summer days. Compressor, condenser, and circuits come together in a symphony of comfort.Visual Aid – Color-Coded Clarity: The inclusion of color-coded diagrams adds a layer of accessibility. It transforms what could be a daunting array of lines and circuits into a visual symphony, making the troubleshooting process more intuitive.Fuse Box Unveiled: The fuse box, often a mysterious entity for many car owners, is demystified. The chart provides a detailed guide to identifying fuse box connections, empowering users to address electrical issues effectively.Blower Motor Choreography: The rhythmic dance of the blower motor is a focal point, revealing the balletic precision with which it regulates airflow. Understanding its circuitry adds a newfound appreciation for the role it plays in maintaining interior comfort.Thermostat's Maestro Role: Finally, the harmony of thermostat integration takes center stage. The thermostat emerges as the maestro orchestrating the temperature symphony within the vehicle, ensuring a seamless blend of comfort and efficiency.</p><p>In conclusion, the 1968 Galaxie 500 Heater and A/C Wiring Schematics Chart is not merely a technical document; it's a historical artifact that encapsulates an era of automotive excellence. Whether you're a seasoned technician or a passionate Galaxie enthusiast, deciphering this chart offers a unique perspective on the marriage of form and function in classic car design.</p><p> </p><strong><u>Conclusion : Rev Up Your Ride: Unveiling the 1968 Galaxie 500 Heater and A/C Wiring Schematics Chart for Peak Performance!.</u></strong><p>As we bid adieu to our exploration of the mesmerizing <u>1968 Galaxie 500 Heater and A/C Wiring Schematics Chart</u>, let's take a moment to appreciate the journey we've undertaken. Unlocking the secrets embedded in these <em>blueprints of automotive history</em>, we've not only deciphered the technical marvels of a bygone era but also immersed ourselves in the visual symphony that guides this classic vehicle's heartbeat. So, to all you fellow adventurers of the automotive world, may your future drives be as smooth as the circuits we've navigated together.</p>
<p>As we close this chapter, remember that behind every wire and connection lies a story of innovation and craftsmanship. The <u>1968 Galaxie 500 Heater and A/C Wiring Schematics Chart</u> is not just a technical guide; it's a portal to the past, a testament to the ingenuity of automotive engineers who paved the way for the vehicles we cherish today. So, whether you're a seasoned mechanic or an enthusiast reveling in the beauty of classic cars, let the knowledge gleaned from these schematics fuel your passion for the timeless Galaxie 500. Until our next journey into the realms of automotive fascination, happy driving!</p><p> </p><p><article><figure><noscript><img src='https://tse1.mm.bing.net/th?q=Question and answer Rev Up Your Ride: Unveiling the 1968 Galaxie 500 Heater and A/C Wiring Schematics Chart for Peak Performance!' alt='Question and answer Rev Up Your Ride: Unveiling the 1968 Galaxie 500 Heater and A/C Wiring Schematics Chart for Peak Performance!' /></noscript><img class='v-cover ads-img' src='https://tse1.mm.bing.net/th?q=Question and answer Rev Up Your Ride: Unveiling the 1968 Galaxie 500 Heater and A/C Wiring Schematics Chart for Peak Performance!' alt='Question and answer Rev Up Your Ride: Unveiling the 1968 Galaxie 500 Heater and A/C Wiring Schematics Chart for Peak Performance!' width='100%' onerror='this.onerror=null;this.src='https://upload.wikimedia.org/wikipedia/commons/d/d1/Image_not_available.png?20210219185637';' style='margin-right: 8px;margin-bottom: 8px;' /></figure></article></p><p> </p><strong><i>Questions & Answer :</i></strong><p><strong>1. <u>What makes the 1968 Galaxie 500 Heater and A/C Wiring Schematics Chart</u> so special?</strong></p>
<ul>
<li>This chart is no ordinary blueprint; it's a time-travel ticket to the late '60s, unraveling the intricate wiring that powered the iconic Galaxie 500.</li>
<li>With a creative blend of form and function, the chart showcases the craftsmanship that defined an era of automotive elegance.</li>
</ul>
<p><strong>2. <u>How can the schematics chart benefit car enthusiasts?</u></strong></p>
<ul>
<li>For enthusiasts, this chart is a backstage pass to the inner workings of the Galaxie 500, offering insights that go beyond the surface beauty of the classic car.</li>
<li>Understanding the wiring schematics not only enhances your appreciation for vintage vehicles but also equips you with the knowledge to troubleshoot and maintain your own Galaxie 500.</li>
</ul>
<p><strong>3. <u>What role do color-coded diagrams play in the schematics chart?</u></strong></p>
<ul>
<li>Color-coded diagrams are the Picasso strokes in this automotive canvas, turning what could be a daunting maze of wires into a visually pleasing and user-friendly guide.</li>
<li>These diagrams add a touch of creativity to the technical, making the chart accessible to both seasoned mechanics and those new to the world of automotive wiring.</li>
</ul>
<p><strong>4. <u>Are there any historical insights hidden in the schematics chart?</u></strong></p>
<ul>
<li>Absolutely! The chart is a treasure trove of historical insights, reflecting the technological landscape of the late '60s and the meticulous design principles that shaped the Galaxie 500.</li>
<li>It's not just about wires and circuits; it's a glimpse into the past, a journey that connects you with the innovation of a bygone automotive era.</li>
</ul>
<p><strong>5. <u>Can exploring the schematics chart be enjoyable for non-experts?</u></strong></p>
<ul>
<li>Absolutely! Think of it as a captivating storybook for car enthusiasts. The creative visuals and detailed annotations make the journey through the schematics chart an enjoyable experience, even for those not fluent in automotive jargon.</li>
<li>Whether you're a DIY enthusiast or simply curious about classic cars, the chart's creative presentation ensures that everyone can find joy in unraveling the mysteries beneath the Galaxie 500's hood.</li>
</ul>
<p><strong>6. <u>How does the chart contribute to a deeper connection with the Galaxie 500?</u></strong></p>
<ul>
<li>The schematics chart is like a secret language that connects you with the soul of the Galaxie 500. Understanding how each wire contributes to the vehicle's functionality fosters a deeper appreciation for its design and engineering.</li>
<li>It's not just about driving a classic car; it's about forging a connection with a piece of automotive history, and the chart is your guide to unlocking that connection.</li>
</ul><p> </p>
Keywords : 1968 GALAXIE 500 Heater and A/C Wiring Schematics ChartMilohttp://www.blogger.com/profile/01418902555588264834noreply@blogger.com0tag:blogger.com,1999:blog-4101198853060839868.post-65196282348969038442024-01-09T00:00:00.000-08:002024-01-21T14:33:00.855-08:00Rev Up Your Ride: Unveiling the Secrets with the 1968 GTO Hood Tachometer Wiring Diagram!<p> </p><p><article><figure><noscript><img src='https://tse1.mm.bing.net/th?q=Rev Up Your Ride: Unveiling the Secrets with the 1968 GTO Hood Tachometer Wiring Diagram!' alt='Rev Up Your Ride: Unveiling the Secrets with the 1968 GTO Hood Tachometer Wiring Diagram!' width='640' height='360' /></noscript><img class='v-cover ads-img' src='https://tse1.mm.bing.net/th?q=Rev Up Your Ride: Unveiling the Secrets with the 1968 GTO Hood Tachometer Wiring Diagram!' alt='Rev Up Your Ride: Unveiling the Secrets with the 1968 GTO Hood Tachometer Wiring Diagram!' width='100%' onerror='this.onerror=null;this.src='https://upload.wikimedia.org/wikipedia/commons/d/d1/Image_not_available.png?20210219185637';' style='margin-right: 8px;margin-bottom: 8px;' /></figure></article></p><blockquote>Unlock peak performance in your 1968 GTO with our expert guide to the hood tachometer wiring diagram. Drive with precision and confidence.</blockquote><p> </p>Buckle up, vintage car enthusiasts, because we're about to embark on a journey to unravel the mysteries of the iconic 1968 GTO hood tachometer wiring diagram! Now, I know what you're thinking—<b>seriously?</b> Yes, seriously! Picture this: a treasure map for your classic GTO, but instead of "X marks the spot," it's more like "<i>humorously</i> decoding the intricacies of your beloved ride's pulse-keeping gadget. So grab your toolkit and sense of humor, because we're about to make wiring as entertaining as a stand-up comedy show in the garage. Ready to turn your GTO into the life of the party? Let's dive into the <b>humorous</b> world of 1968 GTO hood tachometer wiring!<p> </p><h4>Top 10 important point for 1968 GTO HOOD TACHOMETER WIRING DIAGRAM</h4><table cellpadding='0' cellspacing='0' class='tr-caption-container' style='float: right;'><tbody><tr><td style='text-align: center;'><img border='0' src='https://tse1.mm.bing.net/th?q=Top 10 1968 GTO HOOD TACHOMETER WIRING DIAGRAM' width='200' /></td></tr><tr></tr></tbody></table> <ol>
<li>Introduction to Wiring Basics</li>
<li>Locating the Tachometer Wires</li>
<li>Understanding Color Codes</li>
<li>Tool Essentials for the Job</li>
<li>Step-by-Step Wiring Instructions</li>
<li>Common Mistakes to Avoid</li>
<li>Testing Your Connections</li>
<li>Troubleshooting Tips</li>
<li>Safety Measures in Wiring</li>
<li>Final Checks and Calibration</li>
</ol><p> </p><h5>Several Facts that you should know about 1968 GTO HOOD TACHOMETER WIRING DIAGRAM.</h5><h3>Introduction</h3>
<p>The 1968 GTO, an automotive icon, boasts a hood tachometer that is pivotal to its performance. In this exploration, we delve into the intricacies of the <a href="https://tse1.mm.bing.net/th?q=introduction+1968+gto+hood+tachometer+wiring+diagram" target="_blank">wiring diagram</a>, aiming to unravel the technical nuances.</p>
<center><img src="https://tse1.mm.bing.net/th?q=introduction+1968+gto+hood+tachometer+wiring+diagram" alt="Introduction Image"></center>
<h3>Historical Context</h3>
<p>Understanding the <a href="https://tse1.mm.bing.net/th?q=historical+context+1968+gto+hood+tachometer+wiring+diagram" target="_blank">historical context</a> of the 1968 GTO is crucial for appreciating the evolution of automotive technology. This period marked a paradigm shift in design and engineering, influencing subsequent generations of vehicles.</p>
<center><img src="https://tse1.mm.bing.net/th?q=historical+context+1968+gto+hood+tachometer+wiring+diagram" alt="Historical Context Image"></center>
<h3>Identification of Components</h3>
<p>Begin the journey by meticulously examining and identifying the components integral to the <a href="https://tse1.mm.bing.net/th?q=identification+of+components+1968+gto+hood+tachometer+wiring+diagram" target="_blank">wiring diagram</a>. This step ensures a solid foundation before delving into the wiring process.</p>
<center><img src="https://tse1.mm.bing.net/th?q=identification+of+components+1968+gto+hood+tachometer+wiring+diagram" alt="Identification of Components Image"></center>
<h3>Color Code Deciphering</h3>
<p>Deciphering the color codes is pivotal in comprehending the intricacies of the <a href="https://tse1.mm.bing.net/th?q=color+code+deciphering+1968+gto+hood+tachometer+wiring+diagram" target="_blank">wiring diagram</a>. Each color represents a specific function, and a meticulous understanding ensures precision in the wiring process.</p>
<center><img src="https://tse1.mm.bing.net/th?q=color+code+deciphering+1968+gto+hood+tachometer+wiring+diagram" alt="Color Code Deciphering Image"></center>
<h3>Tools for the Job</h3>
<p>Equipping oneself with the right tools is fundamental in executing a flawless wiring process. Explore the essential tools required for the <a href="https://tse1.mm.bing.net/th?q=tools+for+the+job+1968+gto+hood+tachometer+wiring+diagram" target="_blank">GTO hood tachometer wiring diagram</a> with precision and efficiency.</p>
<center><img src="https://tse1.mm.bing.net/th?q=tools+for+the+job+1968+gto+hood+tachometer+wiring+diagram" alt="Tools for the Job Image"></center>
<h3>Step-by-Step Wiring Instructions</h3>
<p>Follow a systematic approach with detailed <a href="https://tse1.mm.bing.net/th?q=step+by+step+wiring+instructions+1968+gto+hood+tachometer+wiring+diagram" target="_blank">step-by-step wiring instructions</a>. This ensures that each connection is made accurately, minimizing the margin for error and guaranteeing optimal performance.</p>
<center><img src="https://tse1.mm.bing.net/th?q=step+by+step+wiring+instructions+1968+gto+hood+tachometer+wiring+diagram" alt="Step-by-Step Wiring Instructions Image"></center>
<h3>Common Mistakes and Troubleshooting</h3>
<p>Learn from common mistakes made during the wiring process and discover effective <a href="https://tse1.mm.bing.net/th?q=common+mistakes+and+troubleshooting+1968+gto+hood+tachometer+wiring+diagram" target="_blank">troubleshooting tips</a>. This knowledge ensures a smooth execution and minimizes the chances of errors.</p>
<center><img src="https://tse1.mm.bing.net/th?q=common+mistakes+and+troubleshooting+1968+gto+hood+tachometer+wiring+diagram" alt="Common Mistakes and Troubleshooting Image"></center>
<h3>Testing Your Connections</h3>
<p>Before finalizing the wiring, undertake a comprehensive testing process to ensure all connections are secure and functional. This step is critical in validating the success of your <a href="https://tse1.mm.bing.net/th?q=testing+your+connections+1968+gto+hood+tachometer+wiring+diagram" target="_blank">wiring endeavor</a>.</p>
<center><img src="https://tse1.mm.bing.net/th?q=testing+your+connections+1968+gto+hood+tachometer+wiring+diagram" alt="Testing Your Connections Image"></center>
<h3>Conclusion and Calibration</h3>
<p>Conclude the process by ensuring all elements are in place and proceed with the final calibration. This ensures that your 1968 GTO is equipped with a perfectly calibrated hood tachometer, ready to deliver optimal performance.</p>
<center><img src="https://tse1.mm.bing.net/th?q=conclusion+and+calibration+1968+gto+hood+tachometer+wiring+diagram" alt="Conclusion and Calibration Image"></center><p> </p><h2>Introduction</h2>
<p>The 1968 GTO, an automotive marvel of its time, is renowned for its powerful performance and iconic design. In this academic exploration, we delve into the intricate realm of the <a href="https://tse1.mm.bing.net/th?q=introduction+1968+gto+hood+tachometer+wiring+diagram" target="_blank">1968 GTO hood tachometer wiring diagram</a>. This diagram, a critical component in the functioning of the hood tachometer, provides a blueprint for enthusiasts and mechanics alike to understand the intricacies of the electrical system that governs this classic vehicle.</p>
<center><img src="https://tse1.mm.bing.net/th?q=introduction+1968+gto+hood+tachometer+wiring+diagram" alt="Introduction Image"></center>
<h2>Historical Evolution of the 1968 GTO</h2>
<p>Before delving into the specifics of the hood tachometer wiring diagram, it is essential to establish the historical context of the 1968 GTO. This iconic model, a product of Pontiac's engineering prowess, emerged during a period of automotive revolution. The <a href="https://tse1.mm.bing.net/th?q=historical+evolution+1968+gto+hood+tachometer+wiring+diagram" target="_blank">historical evolution</a> of the 1968 GTO reflects a convergence of design, performance, and technological innovation that set it apart in the annals of automotive history.</p>
<center><img src="https://tse1.mm.bing.net/th?q=historical+evolution+1968+gto+hood+tachometer+wiring+diagram" alt="Historical Evolution Image"></center>
<h2>Identification of Components</h2>
<p>Understanding the intricacies of the hood tachometer begins with a comprehensive identification of its components. The <a href="https://tse1.mm.bing.net/th?q=identification+of+components+1968+gto+hood+tachometer+wiring+diagram" target="_blank">identification of components</a> involves recognizing and deciphering the various elements that contribute to the functionality of the tachometer. This step is foundational, as it lays the groundwork for a systematic approach to the subsequent wiring process.</p>
<center><img src="https://tse1.mm.bing.net/th?q=identification+of+components+1968+gto+hood+tachometer+wiring+diagram" alt="Identification of Components Image"></center>
<h2>Color Code Deciphering</h2>
<p>One of the key aspects of the hood tachometer wiring diagram is the color coding of wires. Each color corresponds to a specific function, and deciphering this <a href="https://tse1.mm.bing.net/th?q=color+code+deciphering+1968+gto+hood+tachometer+wiring+diagram" target="_blank">color code</a> is paramount for a precise and error-free wiring process. Transitioning from identification to color code deciphering ensures a logical progression in the understanding of the wiring diagram.</p>
<center><img src="https://tse1.mm.bing.net/th?q=color+code+deciphering+1968+gto+hood+tachometer+wiring+diagram" alt="Color Code Deciphering Image"></center>
<h2>Tools for the Job</h2>
<p>Equipping oneself with the appropriate tools is a prerequisite for successfully navigating the intricacies of the hood tachometer wiring diagram. The <a href="https://tse1.mm.bing.net/th?q=tools+for+the+job+1968+gto+hood+tachometer+wiring+diagram" target="_blank">tools for the job</a> extend beyond the conventional toolkit, encompassing specialized equipment designed for electrical systems. This section outlines the essential tools required for a seamless wiring process.</p>
<center><img src="https://tse1.mm.bing.net/th?q=tools+for+the+job+1968+gto+hood+tachometer+wiring+diagram" alt="Tools for the Job Image"></center>
<h2>Step-by-Step Wiring Instructions</h2>
<p>With a clear understanding of the components, color codes, and equipped with the necessary tools, enthusiasts can embark on the <a href="https://tse1.mm.bing.net/th?q=step+by+step+wiring+instructions+1968+gto+hood+tachometer+wiring+diagram" target="_blank">step-by-step wiring instructions</a>. This section provides a systematic guide, ensuring that each connection is made with precision. The transition to the wiring instructions is a pivotal moment, transforming theoretical knowledge into practical application.</p>
<center><img src="https://tse1.mm.bing.net/th?q=step+by+step+wiring+instructions+1968+gto+hood+tachometer+wiring+diagram" alt="Step-by-Step Wiring Instructions Image"></center>
<h2>Common Mistakes and Troubleshooting</h2>
<p>As with any intricate process, there is room for error. Understanding the <a href="https://tse1.mm.bing.net/th?q=common+mistakes+and+troubleshooting+1968+gto+hood+tachometer+wiring+diagram" target="_blank">common mistakes and troubleshooting</a> is essential for enthusiasts to navigate potential challenges. This section provides insights into pitfalls to avoid and offers effective troubleshooting tips, ensuring a smoother wiring experience.</p>
<center><img src="https://tse1.mm.bing.net/th?q=common+mistakes+and+troubleshooting+1968+gto+hood+tachometer+wiring+diagram" alt="Common Mistakes and Troubleshooting Image"></center>
<h2>Testing Your Connections</h2>
<p>Before finalizing the wiring process, thorough testing of connections is imperative. The section on <a href="https://tse1.mm.bing.net/th?q=testing+your+connections+1968+gto+hood+tachometer+wiring+diagram" target="_blank">testing your connections</a> ensures that each wire is secure and all components are functioning as intended. The testing phase is a critical checkpoint, allowing enthusiasts to validate the success of their wiring endeavor.</p>
<center><img src="https://tse1.mm.bing.net/th?q=testing+your+connections+1968+gto+hood+tachometer+wiring+diagram" alt="Testing Your Connections Image"></center>
<h2>Conclusion and Calibration</h2>
<p>The culmination of the wiring process leads to the conclusion and calibration phase. This final section addresses the importance of thoroughness in ensuring all elements are in place. The <a href="https://tse1.mm.bing.net/th?q=conclusion+and+calibration+1968+gto+hood+tachometer+wiring+diagram" target="_blank">conclusion and calibration</a> phase is where enthusiasts witness the transformation of their efforts into a perfectly calibrated hood tachometer, ready to contribute to the optimal performance of<p> </p><h6>Another point of view about 1968 GTO HOOD TACHOMETER WIRING DIAGRAM.</h6><p>1. So, you've got this sweet 1968 GTO, and you're thinking, "What's the deal with the hood tachometer wiring diagram?" Well, buckle up for a ride through the electrical wonderland!Picture yourself staring at the wires, trying to make sense of the rainbow of colors. It's like decoding a secret language, but instead of finding a treasure, you find the key to your GTO's heartbeat.Now, let's talk tools. Forget the usual wrenches; you'll need the ones with extra mojo for this job. Think of it as a magical quest where your toolkit is the wizard's wand.As you embark on the wiring adventure, remember that each wire has a personality – red for power, black for ground, and green for... well, who knows? It's the class clown of the wire world.Step-by-step instructions? More like a dance routine for your fingers. Follow the moves, and voila! Your GTO is grooving with perfectly connected wires.But, oh boy, common mistakes are lurking like mischievous gremlins. Don't let them sabotage your masterpiece. It's like trying to navigate a maze without tripping over your own feet.Testing connections is the moment of truth. It's like giving your GTO a health check-up. "Hold your breath, old buddy, we're checking your electrical pulse!"And finally, the grand finale – calibration. It's where your GTO's tachometer becomes a rockstar, perfectly tuned and ready to steal the show on the streets.So, there you have it – the 1968 GTO hood tachometer wiring adventure. It's a mix of magic, dance, and a dash of mischief. Who said wiring couldn't be a whimsical journey?In the end, you'll look at your GTO and think, "I conquered the wiring dragon!" Just remember, every wire untangled is a victory won in the realm of automotive enchantment.</p><p> </p><strong><u>Conclusion : Rev Up Your Ride: Unveiling the Secrets with the 1968 GTO Hood Tachometer Wiring Diagram!.</u></strong><p>As you wrap up your exploration of the <u><em>1968 GTO hood tachometer wiring diagram</em></u>, I want to extend a heartfelt appreciation for embarking on this journey with us. Navigating the intricacies of vintage car wiring is no small feat, and your dedication to understanding the nuances of each <u><em>component</em></u> speaks volumes about your passion for automotive craftsmanship.</p>
<p>Remember, the road to mastering the <u><em>1968 GTO hood tachometer wiring diagram</em></u> is paved with both challenges and triumphs. Embrace the occasional puzzle-like complexity, relish in the satisfaction of overcoming common pitfalls, and celebrate the dance of colors as you breathe life into your classic GTO. Your commitment to this process not only enhances the performance of your vehicle but also solidifies your role as a custodian of automotive history. So, as you rev up your GTO and feel the pulse of its perfectly calibrated tachometer, know that you've not just wired a car; you've woven a story of dedication, skill, and love for the timeless beauty that is the 1968 GTO.</p><p> </p><p><article><figure><noscript><img src='https://tse1.mm.bing.net/th?q=Question and answer Rev Up Your Ride: Unveiling the Secrets with the 1968 GTO Hood Tachometer Wiring Diagram!' alt='Question and answer Rev Up Your Ride: Unveiling the Secrets with the 1968 GTO Hood Tachometer Wiring Diagram!' /></noscript><img class='v-cover ads-img' src='https://tse1.mm.bing.net/th?q=Question and answer Rev Up Your Ride: Unveiling the Secrets with the 1968 GTO Hood Tachometer Wiring Diagram!' alt='Question and answer Rev Up Your Ride: Unveiling the Secrets with the 1968 GTO Hood Tachometer Wiring Diagram!' width='100%' onerror='this.onerror=null;this.src='https://upload.wikimedia.org/wikipedia/commons/d/d1/Image_not_available.png?20210219185637';' style='margin-right: 8px;margin-bottom: 8px;' /></figure></article></p><p> </p><strong><i>Questions & Answer :</i></strong><p><strong>People Also Ask About the 1968 GTO Hood Tachometer Wiring Diagram:</strong></p>
<ul>
<li><p><strong>1. What is the purpose of the hood tachometer in a 1968 GTO?</strong></p>
<p>In the 1968 GTO, the hood tachometer serves as a vital instrument to monitor the engine's RPM (revolutions per minute) directly from the hood. It adds both a functional and aesthetic dimension, allowing drivers to keep an eye on the engine performance while exuding that classic GTO charm.</p></li>
<li><p><strong>2. Why is understanding the wiring diagram crucial?</strong></p>
<p>The wiring diagram is the blueprint for your GTO's electrical system, detailing how each wire contributes to the functionality of the hood tachometer. Understanding it is crucial for accurate installations, preventing electrical mishaps, and ensuring optimal performance.</p></li>
<li><p><strong>3. What are common challenges in wiring the hood tachometer?</strong></p>
<p>Common challenges include deciphering color codes, identifying components, and avoiding mistakes during the wiring process. Enthusiasts often face hurdles in understanding the intricacies of the diagram, but with patience and guidance, these challenges can be overcome.</p></li>
<li><p><strong>4. Are there specific tools required for this task?</strong></p>
<p>Absolutely. Wiring the hood tachometer demands specialized tools beyond the typical toolkit. Wire strippers, crimping tools, and a multimeter are essential for a precise and efficient wiring process.</p></li>
<li><p><strong>5. Can I do this wiring process without professional help?</strong></p>
<p>Yes, many enthusiasts successfully tackle the wiring process independently. The key is to follow step-by-step instructions, be mindful of color codes, and consult resources to troubleshoot common issues. It's a rewarding DIY project for those with a passion for their classic GTO.</p></li>
</ul>
<p>Approaching the wiring of the hood tachometer in your 1968 GTO may seem daunting, but breaking it down into manageable steps and seeking guidance can turn it into a satisfying and rewarding endeavor. Remember, many fellow enthusiasts have navigated these waters successfully, and with the right tools and understanding, you can too.</p><p> </p>
Keywords : 1968 GTO HOOD TACHOMETER WIRING DIAGRAMMilohttp://www.blogger.com/profile/01418902555588264834noreply@blogger.com0tag:blogger.com,1999:blog-4101198853060839868.post-52261884636270083522024-01-07T13:00:00.000-08:002024-01-21T14:33:01.179-08:00Reviving '68 GTX Glory: Unraveling the Mystique of Automatic Transmission Backup Lamp Switch Wiring!<p> </p><p><article><figure><noscript><img src='https://tse1.mm.bing.net/th?q=Reviving '68 GTX Glory: Unraveling the Mystique of Automatic Transmission Backup Lamp Switch Wiring!' alt='Reviving '68 GTX Glory: Unraveling the Mystique of Automatic Transmission Backup Lamp Switch Wiring!' width='640' height='360' /></noscript><img class='v-cover ads-img' src='https://tse1.mm.bing.net/th?q=Reviving '68 GTX Glory: Unraveling the Mystique of Automatic Transmission Backup Lamp Switch Wiring!' alt='Reviving '68 GTX Glory: Unraveling the Mystique of Automatic Transmission Backup Lamp Switch Wiring!' width='100%' onerror='this.onerror=null;this.src='https://upload.wikimedia.org/wikipedia/commons/d/d1/Image_not_available.png?20210219185637';' style='margin-right: 8px;margin-bottom: 8px;' /></figure></article></p><blockquote>Unlock the intricacies of 1968 GTX automatic transmission backup lamp switch wiring. Gain professional insights for a thorough understanding of this vital automotive component.</blockquote><p> </p>In the intricate tapestry of automotive history, the 1968 GTX emerges as a timeless classic, capturing the essence of a bygone era. Delving into its technological intricacies, one finds a captivating journey through the labyrinth of <b>automatic transmission backup lamp switch wiring</b>. Unraveling the enigma behind the sleek design and performance prowess, this exploration unveils the pivotal role played by the <i>transmission backup lamp switch wiring</i> in shaping the driving experience. As we embark on this scholarly quest, the interconnected web of wires not only illuminates the past but also sheds light on the indispensable function that the wiring mechanism performs in the overall functionality of this automotive masterpiece.<p> </p><h4>Top 10 important point for '1968 GTX AUTOMATIC TRANSMISSION BACK UP LAMP SWITCH WIRING'</h4><table cellpadding='0' cellspacing='0' class='tr-caption-container' style='float: right;'><tbody><tr><td style='text-align: center;'><img border='0' src='https://tse1.mm.bing.net/th?q=Top 10 '1968 GTX AUTOMATIC TRANSMISSION BACK UP LAMP SWITCH WIRING'' width='200' /></td></tr><tr></tr></tbody></table> <ol>
<li>Introduction to 1968 GTX</li>
<li>What is an Automatic Transmission Backup Lamp Switch?</li>
<li>Locating the Switch in Your GTX</li>
<li>Understanding Wiring Basics</li>
<li>Common Issues and Troubleshooting</li>
<li>Tools You Need for the Job</li>
<li>Step-by-Step Wiring Inspection</li>
<li>Importance of Proper Wiring</li>
<li>Upgrading for Modern Reliability</li>
<li>Expert Tips for Maintenance</li>
</ol><p> </p><h5>Several Facts that you should know about '1968 GTX AUTOMATIC TRANSMISSION BACK UP LAMP SWITCH WIRING'.</h5>htmlCopy code<h3>Introduction: Unveiling the Automotive Heritage</h3>
<center><img src="https://tse1.mm.bing.net/th?q=1968+GTX+car" alt="1968 GTX"></center>
<p>The 1968 GTX, a quintessential masterpiece of automotive craftsmanship, embodies an era defined by elegance and performance. In this exploration, we delve into the intricacies of the automatic transmission backup lamp switch wiring, unraveling its significance in the context of this iconic vehicle.</p>
<h3>The Anatomy of the Automatic Transmission Backup Lamp Switch</h3>
<center><img src="https://tse1.mm.bing.net/th?q=automatic+transmission+wiring" alt="Transmission Wiring"></center>
<p>Before delving into the wiring specifics, it is crucial to comprehend the role of the automatic transmission backup lamp switch. This component, a vital link in the automotive system, serves to enhance safety and functionality, contributing to the overall driving experience.</p>
<h3>Locating the Wiring Mechanism in Your 1968 GTX</h3>
<center><img src="https://tse1.mm.bing.net/th?q=1968+GTX+wiring" alt="GTX Wiring"></center>
<p>Understanding the physical placement of the wiring within the 1968 GTX is fundamental for any enthusiast or technician. A visual guide to locating the wiring mechanism ensures a comprehensive grasp of its position and accessibility for inspection and maintenance.</p>
<h3>Decoding Wiring Basics: A Fundamental Overview</h3>
<center><img src="https://tse1.mm.bing.net/th?q=wiring+basics" alt="Wiring Basics"></center>
<p>Embarking on a journey through the fundamentals of wiring is essential for comprehensive comprehension. This section provides an academic breakdown of the wiring basics, enabling readers to navigate through the intricate network of connections within the automatic transmission backup lamp switch.</p>
<h3>Common Issues and Troubleshooting Strategies</h3>
<center><img src="https://tse1.mm.bing.net/th?q=car+wiring+issues" alt="Wiring Issues"></center>
<p>Every automotive system encounters challenges, and the automatic transmission backup lamp switch wiring is no exception. This segment addresses common issues faced by enthusiasts and offers expert strategies for effective troubleshooting, ensuring a smooth and reliable driving experience.</p>
<h3>Essential Tools for Wiring Inspection</h3>
<center><img src="https://tse1.mm.bing.net/th?q=automotive+inspection+tools" alt="Inspection Tools"></center>
<p>Equipping oneself with the right tools is paramount for a successful wiring inspection. This part of the article introduces the essential tools needed to conduct a thorough examination of the automatic transmission backup lamp switch wiring, promoting a proactive approach to maintenance.</p>
<h3>Step-by-Step Wiring Inspection Guide</h3>
<center><img src="https://tse1.mm.bing.net/th?q=wiring+inspection+guide" alt="Wiring Inspection Guide"></center>
<p>Guiding readers through a step-by-step inspection process, this section ensures a systematic approach to assessing the condition of the wiring. From visual checks to functional tests, each step contributes to a comprehensive evaluation, fostering a deeper understanding of the wiring's integrity.</p>
<h3>The Importance of Proper Wiring Maintenance</h3>
<center><img src="https://tse1.mm.bing.net/th?q=wiring+maintenance" alt="Wiring Maintenance"></center>
<p>Highlighting the critical role that proper maintenance plays in preserving the functionality of the automatic transmission backup lamp switch wiring, this part emphasizes the long-term benefits of proactive care. Readers gain insights into the correlation between regular maintenance and the overall longevity of their 1968 GTX.</p>
<h3>Upgrading for Modern Reliability: A Practical Approach</h3>
<center><img src="https://tse1.mm.bing.net/th?q=wiring+upgrade" alt="Wiring Upgrade"></center>
<p>For enthusiasts seeking enhanced performance and reliability, this segment explores modern upgrades for the automatic transmission backup lamp switch wiring. An academic perspective on integrating contemporary solutions ensures a balanced approach, marrying tradition with innovation.</p>
<h3>Expert Tips for Ongoing Maintenance</h3>
<center><img src="https://tse1.mm.bing.net/th?q=car+maintenance+tips" alt="Maintenance Tips"></center>
<p>Concluding our academic journey, this section offers expert tips for ongoing maintenance, empowering readers with the knowledge needed to sustain the optimal functioning of their 1968 GTX automatic transmission backup lamp switch wiring. From periodic checks to preventive measures, these insights contribute to a seamless driving experience.</p>
<p> </p>htmlCopy code<h2>The Enigmatic Journey of 1968 GTX: Unraveling the Mysteries of Automatic Transmission Backup Lamp Switch Wiring</h2>
<p>As we embark on a nostalgic journey back to the iconic year of 1968, the automotive world was graced with the presence of the GTX, a symbol of power, style, and innovation. Nestled within the heart of this classic lies a crucial yet often overlooked component—the automatic transmission backup lamp switch wiring. In this exploration, we delve into the intricate details of this wiring system, a journey that not only connects us with the past but also sheds light on the underlying mysteries that make the 1968 GTX a timeless masterpiece.</p>
<h3>The Essence of 1968 GTX</h3>
<center><img src="https://tse1.mm.bing.net/th?q=1968+GTX+car" alt="1968 GTX"></center>
<p>Picture this: a sleek, muscular silhouette, a roar that echoes through time, and a presence that demands attention—the 1968 GTX encapsulates the spirit of an era where automotive design reached new heights. It's not just a car; it's a symbol of freedom, a testament to the craftsmanship that defined an era. Beneath the hood of this automotive marvel lies the intricate network of wiring that powers its automatic transmission backup lamp switch, a component that plays a pivotal role in the seamless performance of this classic.</p>
<h3>Deciphering the Automatic Transmission Backup Lamp Switch</h3>
<center><img src="https://tse1.mm.bing.net/th?q=automatic+transmission+wiring" alt="Transmission Wiring"></center>
<p>Before we dive into the wiring intricacies, let's unravel the mystery of the automatic transmission backup lamp switch itself. This unassuming yet critical component is the linchpin between the transmission system and the lighting mechanism of the GTX. Functioning as a safety feature, it ensures that the backup lamps illuminate when the vehicle is shifted into reverse, enhancing visibility and, consequently, safety. Understanding the essence of this switch sets the stage for appreciating the significance of its wiring in the overall scheme of the 1968 GTX.</p>
<h3>Tracing the Path: Locating the Wiring Mechanism</h3>
<center><img src="https://tse1.mm.bing.net/th?q=1968+GTX+wiring" alt="GTX Wiring"></center>
<p>With a newfound appreciation for the automatic transmission backup lamp switch, our journey takes us to the physical realm of the 1968 GTX. Locating the wiring mechanism becomes a quest for enthusiasts and technicians alike. A visual guide to the placement and accessibility of this wiring ensures that any inspection or maintenance is approached with precision. The connection between the physicality of the car and the wiring intricacies begins to unfold, paving the way for a deeper understanding of its functionality.</p>
<h3>Untangling the Wires: Understanding Wiring Basics</h3>
<center><img src="https://tse1.mm.bing.net/th?q=wiring+basics" alt="Wiring Basics"></center>
<p>As we delve into the wiring system, a fundamental understanding of the basics becomes paramount. Think of it as deciphering the language of the 1968 GTX. Each wire serves a specific purpose, creating a symphony of connections that ensures the backup lamp switch operates seamlessly. From color-coded wires to the intricacies of their connections, this section provides an academic breakdown of the wiring basics, demystifying the complexities for both enthusiasts and those new to the world of automotive wiring.</p>
<h3>Navigating Challenges: Common Issues and Troubleshooting</h3>
<center><img src="https://tse1.mm.bing.net/th?q=car+wiring+issues" alt="Wiring Issues"></center>
<p>Just as any journey encounters its share of bumps in the road, the automatic transmission backup lamp switch wiring is not exempt from challenges. From corroded connections to electrical malfunctions, this section explores common issues faced by 1968 GTX owners. However, it doesn't stop at identifying problems—it extends to offering empathetic troubleshooting strategies. As we navigate through the challenges, the goal is to empower enthusiasts with the knowledge needed to keep their GTX running smoothly.</p>
<h3>Tools of the Trade: Essential for Wiring Inspection</h3>
<center><img src="https://tse1.mm.bing.net/th?q=automotive+inspection+tools" alt="Inspection Tools"></center>
<p>Equipping oneself for the journey ahead requires the right tools. Imagine a mechanic without their toolbox—the same principle applies to those inspecting the automatic transmission backup lamp switch wiring. This section introduces the essential tools needed for a thorough inspection, ensuring that enthusiasts are well-prepared to delve into the heart of their 1968 GTX. From multimeters to wire strippers, each tool becomes a companion in the quest for a well-maintained wiring system.</p>
<h3>A Systematic Guide: Step-by-Step Wiring Inspection</h3>
<center><img src="https://tse1.mm.bing.net/th?q=wiring+inspection+guide" alt="Wiring Inspection Guide"></center>
<p>Guiding enthusiasts through the inspection process requires a systematic approach. Like following a treasure map, this section offers a step-by-step guide to inspecting the automatic transmission backup lamp switch wiring. From visual checks to functional tests, each step contributes to a comprehensive evaluation, fostering a sense of connection between the enthusiast and their 1968 GTX.</p>
<h3>The Lifeline of the GTX: Importance of Proper Wiring Maintenance</h3>
<center><img src="https://tse1.mm.bing.net/th?q=wiring+maintenance" alt="Wiring Maintenance"></center>
<p>Every car has its lifeline, and for the 1968 GTX, proper wiring maintenance is the key to a long and healthy existence. This segment emphasizes the symbiotic relationship between regular maintenance and the overall longevity of the vehicle. A well-maintained wiring system not only ensures the reliability of the automatic transmission backup lamp switch but also contributes to the seamless performance that GTX enthusiasts cherish.</p>
<h3>Modernizing Tradition: Upgrading for Reliability</h3>
<center><img src="https://tse1.mm.bing.net/th?q=wiring+upgrade" alt="Wiring Upgrade"></center>
<p>For those seeking to marry tradition with modern reliability, this section explores the possibilities of upgrading the automatic transmission backup lamp switch wiring. Imagine giving your 1968 GTX a technological boost while preserving its classic charm. An empathetic view towards upgrading ensures that enthusiasts can make informed decisions that align with their vision for their beloved vehicle.</p>
<h3>Wisdom from the Experts: Ongoing Maintenance Tips</h3>
<center><img src="https://tse1.mm.bing.net/th?q=car+maintenance+tips" alt="Maintenance Tips"></center>
<p>As our journey through the 1968 GTX and its wiring system concludes, expert tips for ongoing maintenance serve as parting words of wisdom. From periodic checks to preventive measures, this section offers empathetic insights to empower enthusiasts with the knowledge needed to ensure the continued optimal functioning of their automatic transmission backup lamp switch wiring. Because, in the end, it's not just about maintaining a car; it's about preserving a piece of automotive history.</p>
<p> </p><h6>Another point of view about '1968 GTX AUTOMATIC TRANSMISSION BACK UP LAMP SWITCH WIRING'.</h6>htmlCopy code<p>So, you've got this badass 1968 GTX, right? The kind of car that turns heads and roars down the street like it owns the place. Now, let's talk about something that might not be as flashy but is damn important—the automatic transmission backup lamp switch wiring.</p>
<p>1. **Getting to Know Your GTX:** First things first, let's appreciate the beauty of your 1968 GTX. It's not just a car; it's a statement. But beneath that sleek exterior lies a whole network of wiring that keeps things running smoothly.</p>
<p>2. **Meet the Unsung Hero – Backup Lamp Switch:** Now, let's shine a light on the unsung hero—the automatic transmission backup lamp switch. This little guy ensures your backup lamps kick in when you shift into reverse. Safety first, right?</p>
<p>3. **Hunt for the Wiring:** Ever wondered where all those wires go? Time for a little scavenger hunt under the hood. Locating the wiring mechanism is like finding the treasure map to your GTX's electrical heart.</p>
<p>4. **Cracking the Code – Wiring Basics:** Now, let's talk wiring basics. It's like decoding the secret language of your GTX. Each wire has a role to play, creating a symphony of connections that make your backup lamp switch dance when needed.</p>
<p>5. **Facing the Challenges:** Every journey has its bumps, and so does the life of your wiring. From corroded connections to mysterious electrical glitches, let's navigate the challenges together. Troubleshooting? It's like being a car detective, and you're the lead investigator.</p>
<p>6. **Gear Up – Essential Tools:** Ready for some DIY action? Gear up with the essential tools for inspecting your wiring. Multimeters, wire strippers, and a bit of elbow grease—think of it as your toolkit for a journey under the hood.</p>
<p>7. **Step-by-Step Inspection Guide:** Let's break it down. A step-by-step guide for inspecting the wiring ensures you don't miss a beat. From visual checks to functional tests, it's your roadmap to keeping things in top-notch condition.</p>
<p>8. **The Heartbeat – Importance of Maintenance:** Your GTX's heartbeat? That's the wiring. Regular maintenance is the key to a long, healthy life. It's not just about fixing issues; it's about preventing them and ensuring your GTX runs like a champ.</p>
<p>9. **Modern Twist – Upgrading for Reliability:** Feeling a bit tech-savvy? We get it. Explore the possibilities of upgrading your backup lamp switch wiring for modern reliability. It's like giving your classic a tech makeover while keeping the soul intact.</p>
<p>10. **Final Words – Maintenance Tips:** As we wrap up, here's some wisdom for the road. Expert tips for ongoing maintenance – because your GTX deserves the best. From periodic checks to a little TLC, it's about keeping the legacy alive.</p>
<p>So, there you have it – a conversational take on the 1968 GTX automatic transmission backup lamp switch wiring. It may not be as flashy as the exterior, but understanding and maintaining it? That's the secret to keeping your GTX roaring down the street for years to come.</p>
<p> </p><strong><u>Conclusion : Reviving '68 GTX Glory: Unraveling the Mystique of Automatic Transmission Backup Lamp Switch Wiring!.</u></strong><p>As we draw the curtains on our exploration of the <u>1968 GTX automatic transmission back up lamp switch wiring</u>, it's evident that delving into the intricacies of this vital component is more than just a journey through automotive history—it's an investment in the reliability and longevity of your classic vehicle. The wiring, often overshadowed by the allure of the GTX's exterior, serves as the <em>underlying foundation</em> that ensures the seamless operation of the automatic transmission backup lamp switch, enhancing both safety and performance.</p>
<p>In the world of classic cars, understanding and maintaining the <u>1968 GTX automatic transmission back up lamp switch wiring</u> is a nod to the craftsmanship of an era gone by. It's a testament to the commitment of enthusiasts who recognize that preserving the heart of their GTX goes beyond aesthetics. As you navigate the intricate web of wires, troubleshooting issues, and perhaps considering upgrades, remember that each step is a contribution to the ongoing legacy of your 1968 GTX. With proper care and attention to this <em>crucial component</em>, you're not just maintaining a car; you're preserving a piece of automotive history that continues to captivate hearts and turn heads on the open road.</p><p> </p><p><article><figure><noscript><img src='https://tse1.mm.bing.net/th?q=Question and answer Reviving '68 GTX Glory: Unraveling the Mystique of Automatic Transmission Backup Lamp Switch Wiring!' alt='Question and answer Reviving '68 GTX Glory: Unraveling the Mystique of Automatic Transmission Backup Lamp Switch Wiring!' /></noscript><img class='v-cover ads-img' src='https://tse1.mm.bing.net/th?q=Question and answer Reviving '68 GTX Glory: Unraveling the Mystique of Automatic Transmission Backup Lamp Switch Wiring!' alt='Question and answer Reviving '68 GTX Glory: Unraveling the Mystique of Automatic Transmission Backup Lamp Switch Wiring!' width='100%' onerror='this.onerror=null;this.src='https://upload.wikimedia.org/wikipedia/commons/d/d1/Image_not_available.png?20210219185637';' style='margin-right: 8px;margin-bottom: 8px;' /></figure></article></p><p> </p><strong><i>Questions & Answer :</i></strong><p>**Q: What's the purpose of the automatic transmission backup lamp switch in a 1968 GTX?**
<ul>
<li>**A:** Think of it as the guardian of your reverse gear. The automatic transmission backup lamp switch ensures that when you shift into reverse, your backup lamps light up, providing not just illumination but an extra layer of safety.</li>
</ul></p>
<p>**Q: Are there common issues with the wiring, and how do I troubleshoot them?**
<ul>
<li>**A:** Ah, the quirks of vintage wiring! Common issues like corroded connections or electrical hiccups can happen. No worries, though. Channel your inner detective, grab your toolkit, and embark on a troubleshooting adventure. It's like solving a mystery, one wire at a time!</li>
</ul></p>
<p>**Q: Can I upgrade the wiring for a 1968 GTX for a more modern touch?**
<ul>
<li>**A:** Absolutely! Give your classic a tech-savvy makeover. Upgrading the automatic transmission backup lamp switch wiring for modern reliability is like adding a touch of futuristic charm while keeping the spirit of the '68 GTX alive and kicking.</li>
</ul></p>
<p>**Q: What tools do I need for inspecting the wiring?**
<ul>
<li>**A:** Picture yourself as a car surgeon. To inspect the wiring, arm yourself with essentials like multimeters and wire strippers. It's a bit like performing surgery, but instead of saving lives, you're ensuring the optimal health of your GTX's wiring.</li>
</ul></p>
<p>**Q: How crucial is ongoing maintenance for the 1968 GTX wiring?**
<ul>
<li>**A:** Maintenance isn't just about fixing what's broken; it's about preventing issues and ensuring your GTX stays in peak condition. Regular checks and a little TLC are like the spa day your car deserves to keep running smoothly.</li>
</ul></p><p> </p>
Keywords : '1968 GTX AUTOMATIC TRANSMISSION BACK UP LAMP SWITCH WIRING'Milohttp://www.blogger.com/profile/01418902555588264834noreply@blogger.com0tag:blogger.com,1999:blog-4101198853060839868.post-4653875206532619012024-01-06T02:00:00.000-08:002024-01-21T14:33:01.527-08:00Rev Up Your Ride: Unraveling the Mysteries with the Ultimate 1968 Harley Sportster Wiring Diagram!<p> </p><p><article><figure><noscript><img src='https://tse1.mm.bing.net/th?q=Rev Up Your Ride: Unraveling the Mysteries with the Ultimate 1968 Harley Sportster Wiring Diagram!' alt='Rev Up Your Ride: Unraveling the Mysteries with the Ultimate 1968 Harley Sportster Wiring Diagram!' width='640' height='360' /></noscript><img class='v-cover ads-img' src='https://tse1.mm.bing.net/th?q=Rev Up Your Ride: Unraveling the Mysteries with the Ultimate 1968 Harley Sportster Wiring Diagram!' alt='Rev Up Your Ride: Unraveling the Mysteries with the Ultimate 1968 Harley Sportster Wiring Diagram!' width='100%' onerror='this.onerror=null;this.src='https://upload.wikimedia.org/wikipedia/commons/d/d1/Image_not_available.png?20210219185637';' style='margin-right: 8px;margin-bottom: 8px;' /></figure></article></p><blockquote>"Master your 1968 Harley Sportster with our expert wiring diagram. Unlock seamless rides and troubleshoot like a pro – your bike's perfect companion awaits!"</blockquote><p> </p>Buckle up, gearheads, because we're about to embark on a journey through the tangled web of wires that powers the legendary 1968 Harley Sportster. Picture this: <i>you</i> and your Harley, cruising the open road with the wind in your hair. Now, let's get real—your bike won't get far without the right wiring <b>map</b>. Think of it as the GPS for your two-wheeled companion, but with a touch more electric charm. Ready to dive into the intriguing realm of spark, circuits, and maybe a touch of electric wizardry? Hold on tight as we unravel the secrets of the 1968 Harley Sportster wiring diagram in a way that's not just informative but downright <i>entertaining</i>. After all, who said decoding wires couldn't be as amusing as a stand-up comedy routine?<p> </p><h4>Top 10 important point for 1968 HARLEY SPORTSTER WIRING DIAGRAM</h4><table cellpadding='0' cellspacing='0' class='tr-caption-container' style='float: right;'><tbody><tr><td style='text-align: center;'><img border='0' src='https://tse1.mm.bing.net/th?q=Top 10 1968 HARLEY SPORTSTER WIRING DIAGRAM' width='200' /></td></tr><tr></tr></tbody></table> <ol>
<li>Understanding Your Bike's Nervous System</li>
<li>Navigating the Wiring Labyrinth with Confidence</li>
<li>Decode, Don't Despair: Simplifying Complex Connections</li>
<li>Empower Yourself: The Key to DIY Electrical Repairs</li>
<li>Spark of Brilliance: Ignition System Demystified</li>
<li>Lights, Camera, Action: Shedding Light on Lighting Circuits</li>
<li>Fuses and Fail-Safes: Ensuring a Smooth Ride Every Time</li>
<li>Beyond the Tangle: Streamlining Cable Management</li>
<li>The Ground Game: Enhancing Stability through Wiring Mastery</li>
<li>Troubleshooting Like a Pro: Diagnostic Insights for Riding Bliss</li>
</ol><p> </p><h5>Several Facts that you should know about 1968 HARLEY SPORTSTER WIRING DIAGRAM.</h5><h3>Unlocking the Puzzle: Introduction to the 1968 Harley Sportster Wiring Diagram</h3>
<center><img src="https://tse1.mm.bing.net/th?q=introduction+1968+harley+sportster+wiring+diagram" alt="Introduction Image"></center>
<p>Welcome to the heart and soul of your Harley! The 1968 Sportster wiring diagram is your guide to the intricate network of cables that powers your ride. Fear not, we're here to break down the complexities and turn this electrical puzzle into a roadmap for seamless cruising.</p>
<h3>Behind the Scenes: Understanding Your Bike's Nervous System</h3>
<center><img src="https://tse1.mm.bing.net/th?q=harley+sportster+nervous+system+wiring" alt="Nervous System Image"></center>
<p>Ever wondered what makes your Harley tick? Let's dive into the wiring intricacies that form the nervous system of your bike. Get ready for a fascinating journey through the circuits and connections that bring your ride to life.</p>
<h3>The Blueprint: Navigating the Wiring Labyrinth with Confidence</h3>
<center><img src="https://tse1.mm.bing.net/th?q=navigating+wiring+labyrinth+harley+sportster" alt="Navigating Image"></center>
<p>Don't let the maze of wires intimidate you. We'll provide you with a clear blueprint to confidently navigate the wiring labyrinth. It's time to demystify the paths and empower you to become the master of your Harley's electrical kingdom.</p>
<h3>Decoding, Not Despairing: Simplifying Complex Connections</h3>
<center><img src="https://tse1.mm.bing.net/th?q=simplify+complex+connections+harley+sportster+wiring" alt="Decoding Image"></center>
<p>Complex connections? No need to despair. We'll break down the jargon, unravel the complexities, and make decoding your Harley's wiring an empowering experience. Say goodbye to confusion and hello to clarity!</p>
<h3>Empower Yourself: The Key to DIY Electrical Repairs</h3>
<center><img src="https://tse1.mm.bing.net/th?q=empower+yourself+DIY+electrical+repairs+harley+sportster" alt="Empower Image"></center>
<p>Empowerment is the name of the game. Discover the key to DIY electrical repairs. With the insights gained from the wiring diagram, you'll be equipped to handle repairs like a seasoned pro. Say goodbye to costly trips to the mechanic!</p>
<h3>Spark of Brilliance: Ignition System Demystified</h3>
<center><img src="https://tse1.mm.bing.net/th?q=ignition+system+demystified+harley+sportster" alt="Ignition Image"></center>
<p>The ignition system is the spark of brilliance that kickstarts your Harley's heart. We'll demystify this crucial component, giving you a deeper understanding of how your bike ignites the passion for the open road.</p>
<h3>Lights, Camera, Action: Shedding Light on Lighting Circuits</h3>
<center><img src="https://tse1.mm.bing.net/th?q=lights+camera+action+harley+sportster+wiring" alt="Lighting Image"></center>
<p>Let's shed light on lighting circuits! From headlights to taillights, we'll explore how the wiring diagram illuminates the way for a safe and enjoyable ride, day or night. Lights, camera, and action on the road!</p>
<h3>Fuses and Fail-Safes: Ensuring a Smooth Ride Every Time</h3>
<center><img src="https://tse1.mm.bing.net/th?q=fuses+and+fail-safes+harley+sportster+wiring" alt="Fuses Image"></center>
<p>Ensure a smooth ride every time by delving into the world of fuses and fail-safes. The wiring diagram unveils the protective mechanisms that keep your Harley running smoothly, providing peace of mind on every journey.</p>
<h3>The Ground Game: Enhancing Stability through Wiring Mastery</h3>
<center><img src="https://tse1.mm.bing.net/th?q=ground+game+wiring+mastery+harley+sportster" alt="Ground Game Image"></center>
<p>Stability is the name of the game, and it starts with mastering the ground game. Explore how wiring mastery contributes to the stability of your Harley, ensuring a confident and secure ride on any terrain.</p>
<h3>Troubleshooting Like a Pro: Diagnostic Insights for Riding Bliss</h3>
<center><img src="https://tse1.mm.bing.net/th?q=troubleshooting+like+a+pro+harley+sportster+wiring" alt="Troubleshooting Image"></center>
<p>Ready to troubleshoot like a pro? The wiring diagram isn't just a map; it's your diagnostic tool for riding bliss. Uncover insights that will make you the go-to person for solving electrical mysteries on your Harley.</p><p> </p><h2>Exploring the Intricacies of the 1968 Harley Sportster Wiring Diagram</h2>
<p>Embarking on a journey into the heart of your Harley is a fascinating endeavor, and understanding the 1968 Harley Sportster wiring diagram is like deciphering the motorcycle's DNA. This intricate map of electrical connections is the key to unlocking the full potential of your ride. Let's delve into the details, unraveling the complexities with each wire and circuit.</p>
<h3>The Blueprint: Mapping the Electrical Landscape</h3>
<center><img src="https://tse1.mm.bing.net/th?q=mapping+the+electrical+landscape+1968+harley+sportster+wiring+diagram" alt="Mapping Image"></center>
<p>At the core of your Harley's electrical system lies a blueprint, a map that dictates how power flows through the bike. The 1968 Harley Sportster wiring diagram is the Rosetta Stone that decodes this intricate landscape. It outlines the pathways, connections, and components that make up the nervous system of your motorcycle.</p>
<p>Transitioning from one component to another, the wiring diagram serves as a guide, ensuring that each electrical pulse propels your bike forward. From the ignition system to the lighting circuits, this map is your companion in understanding the harmonious symphony of wires that breathe life into your two-wheeled companion.</p>
<h3>The Neural Network: Understanding Your Bike's Nervous System</h3>
<center><img src="https://tse1.mm.bing.net/th?q=harley+sportster+nervous+system+wiring+1968" alt="Nervous System Image"></center>
<p>Consider the wiring diagram as the neural network of your Harley Sportster, intricately connecting each component to ensure seamless communication. Just as neurons transmit signals in the human body, wires convey electrical impulses, allowing your bike to perform various functions with precision.</p>
<p>Transitioning through the neural network, we encounter vital components such as the ignition system, which acts as the brain sending sparks of brilliance to the engine. Understanding this intricate network empowers riders to troubleshoot issues, make modifications, and truly connect with their machines on a deeper level.</p>
<h3>Decoding the Jargon: Simplifying Complex Connections</h3>
<center><img src="https://tse1.mm.bing.net/th?q=decoding+complex+connections+harley+sportster+wiring" alt="Decoding Image"></center>
<p>As we delve deeper, the wiring diagram becomes a guide in decoding the jargon associated with complex connections. It simplifies the seemingly intricate web of wires, demystifying the language of volts, amps, and circuits. The key is to view it not as a daunting task but as a roadmap that ensures you navigate with confidence.</p>
<p>Transitioning through the diagram, from battery connections to switches, riders gain insights into the electrical language of their Harley Sportster. This newfound knowledge transforms seemingly complex connections into understandable pathways, fostering a sense of control and mastery over the machine.</p>
<h3>Empowering the Rider: The Key to DIY Electrical Repairs</h3>
<center><img src="https://tse1.mm.bing.net/th?q=empowering+rider+DIY+electrical+repairs+1968+harley+sportster+wiring+diagram" alt="Empowering Image"></center>
<p>Empowerment is a recurring theme when dissecting the 1968 Harley Sportster wiring diagram. It goes beyond understanding the connections; it is the key to DIY electrical repairs. Armed with the knowledge embedded in the diagram, riders can tackle electrical issues with confidence, bypassing the need for costly visits to the mechanic.</p>
<p>Transitioning from one section to another, riders discover the intricacies of the wiring responsible for powering various components, from the starter motor to the lights. This newfound empowerment transforms riders into true enthusiasts who not only ride but also intimately understand and maintain their cherished motorcycles.</p>
<h3>Igniting Passion: Demystifying the Ignition System</h3>
<center><img src="https://tse1.mm.bing.net/th?q=ignition+system+demystified+1968+harley+sportster+wiring" alt="Ignition Image"></center>
<p>Within the wiring diagram, a particular highlight is the ignition system—an integral component that ignites the passion for every Harley rider. Transitioning through the diagram allows riders to demystify this crucial system, understanding how the spark of brilliance is generated and transmitted to the heart of the engine.</p>
<p>Exploring the ignition system pathways, riders gain insights into the sequence of events that occur every time the key is turned. It's not just about starting the bike; it's about understanding the poetry of combustion and how the wiring diagram unveils the verses that bring the engine to life.</p>
<h3>Illuminating the Ride: Lights, Camera, Action</h3>
<center><img src="https://tse1.mm.bing.net/th?q=lights+camera+action+harley+sportster+wiring+1968" alt="Lighting Image"></center>
<p>Transitioning to the lighting circuits, the wiring diagram sheds light on a crucial aspect of every ride—visibility. From headlights to taillights, understanding the wiring behind the illumination adds a cinematic touch to the biking experience. Lights, camera, and action—your Harley is ready for its starring role on the open road!</p>
<p>As riders navigate through the lighting circuits in the diagram, they gain a comprehensive understanding of how each bulb contributes to the overall visibility and safety. It's not just about seeing; it's about being seen, and the wiring diagram guides riders to ensure their presence is unmistakable.</p>
<h3>Fuses and Fail-Safes: Ensuring a Smooth Journey</h3>
<center><img src="https://tse1.mm.bing.net/th?q=fuses+and+fail-safes+1968+harley+sportster+wiring" alt="Fuses Image"></center>
<p>Transitioning to the section on fuses and fail-safes, the wiring diagram becomes a guardian angel, ensuring a smooth journey every time. Fuses act as sentinels, protecting the electrical system from potential overloads and ensuring that the ride remains uninterrupted by electrical glitches.</p>
<p>Exploring this aspect of the diagram, riders gain insights into the fail-safe mechanisms that contribute to the reliability of their Harley Sportster. It's not just about the thrill of the ride; it's about the assurance that every electrical component is safeguarded, allowing riders to focus on the joy of the journey.</p>
<h3>Mastering Stability: The Ground Game</h3>
<center><img src="https://tse1.mm.bing.net/th?q=ground+game+1968+harley+sportster+wiring" alt="Ground Game Image"></center>
<p>The final transition takes us to the ground game—the aspect of wiring mastery that enhances stability. Every wire grounded to the frame is a testament to the meticulous engineering that contributes to a stable and secure ride, regardless of the terrain.</p>
<p>Delving into this section of the wiring diagram, riders gain an appreciation for how grounding contributes to the overall stability of the motorcycle. It's not just about keeping<p> </p><h6>Another point of view about 1968 HARLEY SPORTSTER WIRING DIAGRAM.</h6><p>1. Ah, the legendary 1968 Harley Sportster wiring diagram – the roadmap to the heart of your bike, or as I like to call it, the "electric treasure map."Ever felt like you're in a spaghetti-eating contest? Try deciphering the glorious tangle of wires in this vintage masterpiece. It's like your bike went to a wired-up costume party and forgot to untangle itself.Picture this: the wiring diagram is your backstage pass to the motorcycle opera. Each wire is a diva hitting its high notes, creating a symphony of electrical harmony. Cue the dramatic lighting for effect.It's not just a wiring diagram; it's a Morse code from your bike, whispering secrets like, "Hey, I'm low on fuel" or "I'm feeling a bit sparky today." Consider yourself the decoder of your bike's Morse melodrama.Who needs a crystal ball when you have the 1968 Harley Sportster wiring diagram? It's like a psychic predicting your bike's future – "I see a smooth ride in your future, with a 100% chance of a flashy headlight."Forget bedtime stories; regale your friends with tales of wire color adventures. "And then, the red wire met the black wire, and sparks flew – it was love at first circuit!"If life gives you lemons, make lemonade. If your bike gives you wires, make sense of them with the wiring diagram. It's the DIY recipe for turning confusion into a symphony of electrical awesomeness.Imagine the wiring diagram as your bike's autobiography. "Chapter One: From the Battery to the Lights – A Love Story." Spoiler alert: it's a tale of electrifying romance.They say laughter is the best medicine, but have they tried understanding the 1968 Harley Sportster wiring diagram? It's a prescription for both amusement and a smoothly running bike.In a world full of wires, be the Sherlock Holmes of your Harley. With the wiring diagram as your magnifying glass, you're not just a rider – you're an electrical detective, solving mysteries one connection at a time.<p> </p><strong><u>Conclusion : Rev Up Your Ride: Unraveling the Mysteries with the Ultimate 1968 Harley Sportster Wiring Diagram!.</u></strong><p>As we wrap up our journey through the labyrinth of the <u>1968 Harley Sportster wiring diagram</u>, I hope you've found this exploration as electrifying and entertaining as dissecting a science fiction thriller. From decoding the intricate pathways to demystifying the spark of brilliance in the ignition system, we've traveled the roads less wired. Now, armed with the knowledge imprinted in the electrical DNA of your Harley, you're not just a rider; you're a maestro conducting a symphony of wires.</p>
<p>So, dear readers, the next time you swing a leg over your vintage beauty, remember that beneath the chrome and roaring engine lies the dance of electrons waiting to be conducted. Embrace the quirks, celebrate the sparks, and revel in the fact that you're not just navigating the open road – you're navigating the intricate neural network of your beloved <em>1968 Harley Sportster</em>. May your rides be smooth, your circuits be clear, and your adventures be as vibrant as the colorful wires that power your journey. Until next time, happy riding and may your wires always lead to electrifying escapades!</p><p> </p><p><article><figure><noscript><img src='https://tse1.mm.bing.net/th?q=Question and answer Rev Up Your Ride: Unraveling the Mysteries with the Ultimate 1968 Harley Sportster Wiring Diagram!' alt='Question and answer Rev Up Your Ride: Unraveling the Mysteries with the Ultimate 1968 Harley Sportster Wiring Diagram!' /></noscript><img class='v-cover ads-img' src='https://tse1.mm.bing.net/th?q=Question and answer Rev Up Your Ride: Unraveling the Mysteries with the Ultimate 1968 Harley Sportster Wiring Diagram!' alt='Question and answer Rev Up Your Ride: Unraveling the Mysteries with the Ultimate 1968 Harley Sportster Wiring Diagram!' width='100%' onerror='this.onerror=null;this.src='https://upload.wikimedia.org/wikipedia/commons/d/d1/Image_not_available.png?20210219185637';' style='margin-right: 8px;margin-bottom: 8px;' /></figure></article></p><p> </p><strong><i>Questions & Answer :</i></strong><p><strong>Q: Why is understanding the 1968 Harley Sportster wiring diagram essential?</strong></p>
<ul>
<li>Understanding the wiring diagram is like having the user manual to your bike's secret language. It reveals the intricate connections that power your Harley.</li>
<li>Without it, troubleshooting electrical issues is like searching for a needle in a haystack – the wiring diagram is your trusty metal detector.</li>
<li>It's not just about fixing problems; it's about empowering yourself to connect with your bike on a deeper, more electrifying level.</li>
</ul>
<p><strong>Q: Is deciphering the wiring diagram a daunting task?</strong></p>
<ul>
<li>Think of it as decoding a thrilling mystery novel. Sure, it might seem complex at first, but every wire has its own story to tell.</li>
<li>The diagram is designed to be user-friendly – it's the GPS to the electrical highway of your Harley. Follow the route, and you'll arrive at wiring wisdom.</li>
<li>Consider it a fun challenge, like putting together an intricate puzzle. Once you see the big picture, the individual pieces fall into place.</li>
</ul>
<p><strong>Q: How does the wiring diagram contribute to DIY repairs?</strong></p>
<ul>
<li>It's your backstage pass to becoming the hero of your Harley's electrical show. DIY repairs become a breeze when you have the script – the wiring diagram – in hand.</li>
<li>Whether it's replacing a faulty wire or upgrading components, the diagram turns you into the director of your bike's electrical blockbuster.</li>
<li>Say goodbye to hefty repair bills and hello to the satisfaction of being your bike's personal electrician.</li>
</ul>
<p><strong>Q: Can the wiring diagram turn a novice into an electrical whiz?</strong></p>
<ul>
<li>Absolutely! It's like a crash course in bike anatomy. Before you know it, you'll be throwing around terms like "voltage" and "circuit" with the confidence of an electrical engineer.</li>
<li>The more you explore the diagram, the more you demystify the electrical universe. Soon, you'll be the go-to person for all things wiring in your biking circle.</li>
<li>Consider it your initiation into the exclusive club of Harley enthusiasts who not only ride but understand the heartbeat of their machines.</li>
</ul>
<p><strong>Q: What's the best way to approach the 1968 Harley Sportster wiring diagram?</strong></p>
<ul>
<li>Think of it as a friendly conversation with your bike. The diagram is your Harley's way of saying, "Hey, let me show you how I tick."</li>
<li>Take it one section at a time – it's not a sprint; it's a leisurely ride through the electrical landscape of your motorcycle.</li>
<li>Embrace the learning process, and soon you'll be navigating the roads and wires with the confidence of a seasoned rider.</li>
</ul>
<p>Remember, the 1968 Harley Sportster wiring diagram is not just a technical document; it's your passport to a deeper connection with your bike. So, don't be shy – dive in, explore, and let the sparks of knowledge illuminate your riding journey!</p><p> </p>
Keywords : 1968 HARLEY SPORTSTER WIRING DIAGRAMMilohttp://www.blogger.com/profile/01418902555588264834noreply@blogger.com0tag:blogger.com,1999:blog-4101198853060839868.post-79594986242392914272024-01-04T15:00:00.000-08:002024-01-21T14:33:01.850-08:00Unlock the Mysteries of Your 1968 Jaguar XKE Dash with this Captivating Schematic Diagram!<p> </p><p><article><figure><noscript><img src='https://tse1.mm.bing.net/th?q=Unlock the Mysteries of Your 1968 Jaguar XKE Dash with this Captivating Schematic Diagram!' alt='Unlock the Mysteries of Your 1968 Jaguar XKE Dash with this Captivating Schematic Diagram!' width='640' height='360' /></noscript><img class='v-cover ads-img' src='https://tse1.mm.bing.net/th?q=Unlock the Mysteries of Your 1968 Jaguar XKE Dash with this Captivating Schematic Diagram!' alt='Unlock the Mysteries of Your 1968 Jaguar XKE Dash with this Captivating Schematic Diagram!' width='100%' onerror='this.onerror=null;this.src='https://upload.wikimedia.org/wikipedia/commons/d/d1/Image_not_available.png?20210219185637';' style='margin-right: 8px;margin-bottom: 8px;' /></figure></article></p><blockquote>"Unlock the essence of your 1968 Jaguar XKE with a professional insight into its dash schematic diagram. Master your car's intricacies for peak performance."</blockquote><p> </p>Embark on a journey back in time as we delve into the intricate details of the <b>1968 Jaguar XKE</b> dash schematic diagram. Picture yourself in the driver's seat, surrounded by the elegance and sophistication of this classic masterpiece. Through a <i>simple</i> yet comprehensive exploration, we'll unravel the secrets concealed within the wiring, switches, and gauges that define the heart of your vintage Jaguar. Join us in demystifying the past with a step-by-step guide that promises to make the complex <b>schematic diagram</b> a <i>simple</i> roadmap to understanding your timeless automobile.<p> </p><h4>Top 10 important point for '1968 Jaguar XKE Dash Schematic Diagram'</h4><table cellpadding='0' cellspacing='0' class='tr-caption-container' style='float: right;'><tbody><tr><td style='text-align: center;'><img border='0' src='https://tse1.mm.bing.net/th?q=Top 10 '1968 Jaguar XKE Dash Schematic Diagram'' width='200' /></td></tr><tr></tr></tbody></table> <ol>
<li>Discovering the Vintage Marvel</li>
<li>Peeling Back Layers of Elegance</li>
<li>Understanding Your Dashboard Symphony</li>
<li>Decoding the Wiring Wonders</li>
<li>Navigating the Switches with Grace</li>
<li>Illuminating the Gauges' Secrets</li>
<li>The Art of Dashboard Choreography</li>
<li>Empathizing with Your Jaguar's Heritage</li>
<li>Embracing the Simplicity in Complexity</li>
<li>Your Roadmap to Timeless Automotive Wisdom</li>
</ol><p> </p><h5>Several Facts that you should know about '1968 Jaguar XKE Dash Schematic Diagram'.</h5>htmlCopy code<!DOCTYPE html>
<html lang="en">
<head>
<meta charset="UTF-8">
<meta http-equiv="X-UA-Compatible" content="IE=edge">
<meta name="viewport" content="width=device-width, initial-scale=1.0">
<title>1968 Jaguar XKE Dash Schematic Diagram</title>
</head>
<body>
<h3>Unveiling a Time Capsule</h3>
<center><img src="https://tse1.mm.bing.net/th?q=Unveiling+a+Time+Capsule+1968+jaguar+xke+dash+schematic+diagram" alt="Vintage Jaguar"></center>
<p>Welcome to a journey back in time, where the 1968 Jaguar XKE dash schematic diagram serves as a time capsule, preserving the elegance and sophistication of an automotive era long past.</p>
<h3>Deciphering Elegance</h3>
<center><img src="https://tse1.mm.bing.net/th?q=Deciphering+Elegance+1968+jaguar+xke+dash+schematic+diagram" alt="Jaguar Dashboard"></center>
<p>Peel back the layers of automotive craftsmanship as we explore the intricacies that define the dash of the 1968 Jaguar XKE, revealing the sheer elegance embedded in every detail.</p>
<h3>The Symphony of Dashboard Components</h3>
<center><img src="https://tse1.mm.bing.net/th?q=The+Symphony+of+Dashboard+Components+1968+jaguar+xke+dash+schematic+diagram" alt="Dashboard Components"></center>
<p>Imagine your dashboard as a symphony, each component playing a vital role. From switches to gauges, every element contributes to the harmonious driving experience offered by this classic beauty.</p>
<h3>Wiring Wonders</h3>
<center><img src="https://tse1.mm.bing.net/th?q=Wiring+Wonders+1968+jaguar+xke+dash+schematic+diagram" alt="Wiring Diagram"></center>
<p>Delve into the world of wiring wonders as we unravel the secrets concealed within the schematic diagram, providing a comprehensive guide to understanding the intricacies of your vintage Jaguar.</p>
<h3>Navigating with Grace</h3>
<center><img src="https://tse1.mm.bing.net/th?q=Navigating+with+Grace+1968+jaguar+xke+dash+schematic+diagram" alt="Dashboard Navigation"></center>
<p>Learn the art of navigating switches with grace, mastering the controls that enhance your driving experience and connect you with the essence of this timeless automobile.</p>
<h3>Illuminating Gauge Secrets</h3>
<center><img src="https://tse1.mm.bing.net/th?q=Illuminating+Gauge+Secrets+1968+jaguar+xke+dash+schematic+diagram" alt="Dashboard Gauges"></center>
<p>Our exploration extends to illuminating the secrets behind the gauges, shedding light on the vital information they provide and their role in keeping your Jaguar in peak performance.</p>
<h3>The Art of Dashboard Choreography</h3>
<center><img src="https://tse1.mm.bing.net/th?q=The+Art+of+Dashboard+Choreography+1968+jaguar+xke+dash+schematic+diagram" alt="Dashboard Choreography"></center>
<p>Appreciate the artistry involved in dashboard choreography, where every switch, gauge, and wire performs a dance orchestrated to deliver an unparalleled driving experience.</p>
<h3>Embracing Automotive Heritage</h3>
<center><img src="https://tse1.mm.bing.net/th?q=Embracing+Automotive+Heritage+1968+jaguar+xke+dash+schematic+diagram" alt="Automotive Heritage"></center>
<p>Connect with your Jaguar on a deeper level by empathizing with its rich heritage. The dashboard schematic diagram becomes a bridge to the past, allowing you to embrace the essence of automotive history.</p>
</body>
</html>
<p> </p>htmlCopy code<!DOCTYPE html>
<html lang="en">
<head>
<meta charset="UTF-8">
<meta http-equiv="X-UA-Compatible" content="IE=edge">
<meta name="viewport" content="width=device-width, initial-scale=1.0">
<title>1968 Jaguar XKE Dash Schematic Diagram</title>
</head>
<body>
<h2>Unlocking Memories: Exploring the 1968 Jaguar XKE Dash Schematic Diagram</h2>
<p>Welcome to a captivating journey into the heart of automotive history, where the 1968 Jaguar XKE dash schematic diagram acts as a portal to a bygone era. Stepping into the driver's seat of this vintage marvel is akin to embarking on a time-traveling adventure, and as we delve into the intricacies of its dashboard, we discover a symphony of components that shaped an automotive legacy.</p>
<h3>A Glimpse into Time</h3>
<center><img src="https://tse1.mm.bing.net/th?q=A+Glimpse+into+Time+1968+jaguar+xke+dash+schematic+diagram" alt="Vintage Jaguar Dashboard"></center>
<p>Our journey begins with a glimpse into time, where the dashboard of the 1968 Jaguar XKE serves as a visual and tactile representation of an era defined by elegance and sophistication. Each switch, gauge, and wire tells a story, connecting us with the craftsmanship and artistry that made this automobile an icon.</p>
<h3>Decoding the Elegance</h3>
<center><img src="https://tse1.mm.bing.net/th?q=Decoding+the+Elegance+1968+jaguar+xke+dash+schematic+diagram" alt="Decoding Elegance"></center>
<p>Peeling back the layers, we embark on a quest to decode the elegance that defines the 1968 Jaguar XKE dashboard. It's not just a functional space; it's a work of art. From the sweeping curves to the meticulously crafted switches, every element reflects a commitment to both form and function.</p>
<h3>The Symphony of Dashboard Components</h3>
<center><img src="https://tse1.mm.bing.net/th?q=The+Symphony+of+Dashboard+Components+1968+jaguar+xke+dash+schematic+diagram" alt="Dashboard Symphony"></center>
<p>As we explore further, the dashboard reveals itself as a symphony of components working in harmony. The switches are the notes, the gauges are the crescendos, and the wiring is the rhythm, creating a driving experience that transcends the ordinary. It's not just a car; it's a symphony on wheels.</p>
<h3>Navigating with Grace</h3>
<center><img src="https://tse1.mm.bing.net/th?q=Navigating+with+Grace+1968+jaguar+xke+dash+schematic+diagram" alt="Dashboard Navigation"></center>
<p>Among the many dances orchestrated on the dashboard, the art of navigating switches with grace takes center stage. Each switch, like a performer in a ballet, contributes to the fluidity of your driving experience. It's not just about functionality; it's about elegance in motion.</p>
<h3>Wiring Wonders Unveiled</h3>
<center><img src="https://tse1.mm.bing.net/th?q=Wiring+Wonders+Unveiled+1968+jaguar+xke+dash+schematic+diagram" alt="Wiring Wonders"></center>
<p>Delving into the schematic diagram, we unravel the wiring wonders that power this automotive masterpiece. It's a maze of connections, a network of intricacies designed to ensure that every electrical impulse flows with precision. Understanding the wiring is like deciphering the vehicle's nervous system.</p>
<h3>Illuminating Gauge Secrets</h3>
<center><img src="https://tse1.mm.bing.net/th?q=Illuminating+Gauge+Secrets+1968+jaguar+xke+dash+schematic+diagram" alt="Gauge Secrets"></center>
<p>Our exploration extends to illuminating the secrets behind the gauges. These dials are not just instruments; they are storytellers, conveying the health and vitality of your Jaguar. It's a language that transcends numbers, providing insights into the soul of your vintage vehicle.</p>
<h3>The Art of Dashboard Choreography</h3>
<center><img src="https://tse1.mm.bing.net/th?q=The+Art+of+Dashboard+Choreography+1968+jaguar+xke+dash+schematic+diagram" alt="Dashboard Choreography"></center>
<p>Appreciating the art of dashboard choreography, we recognize that every switch, gauge, and wire performs a dance orchestrated to perfection. It's not just about functionality; it's about the seamless integration of design and engineering, transforming your drive into a performance.</p>
<h3>Embracing Automotive Heritage</h3>
<center><img src="https://tse1.mm.bing.net/th?q=Embracing+Automotive+Heritage+1968+jaguar+xke+dash+schematic+diagram" alt="Automotive Heritage"></center>
<p>Our final destination in this journey is a heartfelt embrace of automotive heritage. The dashboard schematic diagram becomes a bridge to the past, allowing us to connect with the essence of automotive history. It's not just a diagram; it's a reminder of the legacy we inherit every time we take the wheel of a classic Jaguar.</p>
</body>
</html>
<p> </p><h6>Another point of view about '1968 Jaguar XKE Dash Schematic Diagram'.</h6>htmlCopy code<!DOCTYPE html>
<html lang="en">
<head>
<meta charset="UTF-8">
<meta http-equiv="X-UA-Compatible" content="IE=edge">
<meta name="viewport" content="width=device-width, initial-scale=1.0">
<title>1968 Jaguar XKE Dash Schematic Diagram</title>
</head>
<body>
<p>Instructions for Understanding the 1968 Jaguar XKE Dash Schematic Diagram:</p>
<ol>
<li>Begin by familiarizing yourself with the overall layout of the schematic diagram.</li>
<li>Identify key components such as switches, gauges, and wiring paths using the provided legend.</li>
<li>Follow the sequential numbering to understand the flow of electrical connections.</li>
<li>Take note of color codes associated with wires to distinguish between different circuits.</li>
<li>Refer to the labeled symbols to interpret specific functions of switches and indicators.</li>
<li>Examine the integration points where different circuits converge, understanding their interdependencies.</li>
<li>Use magnification tools if necessary to scrutinize smaller details for precision.</li>
<li>Check for notations or additional information provided on the diagram for insights into troubleshooting or maintenance.</li>
<li>Refer to the manufacturer's documentation for supplementary details on the dashboard's electrical system.</li>
<li>Consider consulting with automotive experts or enthusiasts for a deeper understanding of the schematic diagram.</li>
</ol>
</body>
</html>
<p> </p><strong><u>Conclusion : Unlock the Mysteries of Your 1968 Jaguar XKE Dash with this Captivating Schematic Diagram!.</u></strong>htmlCopy code<!DOCTYPE html>
<html lang="en">
<head>
<meta charset="UTF-8">
<meta http-equiv="X-UA-Compatible" content="IE=edge">
<meta name="viewport" content="width=device-width, initial-scale=1.0">
<title>1968 Jaguar XKE Dash Schematic Diagram</title>
</head>
<body>
<p>As we conclude our exploration into the <u>1968 Jaguar XKE dash schematic diagram</u>, it's clear that this journey transcends the realm of mere technicalities. It's a voyage through time, where every switch, gauge, and wire tells a story of automotive elegance. Through the lens of this intricate diagram, we've peeled back the layers to reveal the craftsmanship that defines a bygone era.</p>
<p><em>So, fellow enthusiasts, as you embark on your own adventure with the iconic Jaguar XKE, remember that this schematic diagram is not just a guide; it's a key to unlocking the soul of a vintage masterpiece. Embrace the elegance, appreciate the symphony of components, and let the wiring wonders connect you with the heritage of automotive excellence. May your drives be filled with the grace of navigating switches and the illumination of gauge secrets, making each journey a choreography of joy. Here's to the timeless allure of the 1968 Jaguar XKE!</em></p>
</body>
</html>
<p> </p><p><article><figure><noscript><img src='https://tse1.mm.bing.net/th?q=Question and answer Unlock the Mysteries of Your 1968 Jaguar XKE Dash with this Captivating Schematic Diagram!' alt='Question and answer Unlock the Mysteries of Your 1968 Jaguar XKE Dash with this Captivating Schematic Diagram!' /></noscript><img class='v-cover ads-img' src='https://tse1.mm.bing.net/th?q=Question and answer Unlock the Mysteries of Your 1968 Jaguar XKE Dash with this Captivating Schematic Diagram!' alt='Question and answer Unlock the Mysteries of Your 1968 Jaguar XKE Dash with this Captivating Schematic Diagram!' width='100%' onerror='this.onerror=null;this.src='https://upload.wikimedia.org/wikipedia/commons/d/d1/Image_not_available.png?20210219185637';' style='margin-right: 8px;margin-bottom: 8px;' /></figure></article></p><p> </p><strong><i>Questions & Answer :</i></strong>htmlCopy code<!DOCTYPE html>
<html lang="en">
<head>
<meta charset="UTF-8">
<meta http-equiv="X-UA-Compatible" content="IE=edge">
<meta name="viewport" content="width=device-width, initial-scale=1.0">
<title>1968 Jaguar XKE Dash Schematic Diagram</title>
</head>
<body>
<p><strong>People Also Ask About the 1968 Jaguar XKE Dash Schematic Diagram:</strong></p>
<ul>
<li><strong>Q1:</strong> <em>How can I decipher the symbols on the schematic diagram?</em></li>
<p><strong>A1:</strong> Understanding the symbols is crucial. Refer to the legend provided with the diagram. It's like a secret code, and the legend is your decoder.</p>
<li><strong>Q2:</strong> <em>What if I encounter difficulties interpreting the wiring paths?</em></li>
<p><strong>A2:</strong> Don't worry! Follow the sequential numbering on the diagram and take it step by step. If needed, use magnification tools for a closer look at intricate details.</p>
<li><strong>Q3:</strong> <em>Can I troubleshoot issues using the schematic diagram?</em></li>
<p><strong>A3:</strong> Absolutely! The diagram serves as a roadmap for troubleshooting. Check for notations or additional information for insights into common issues and solutions.</p>
<li><strong>Q4:</strong> <em>Is it necessary to consult with experts for understanding the diagram?</em></li>
<p><strong>A4:</strong> While the diagram is designed for users of various levels, consulting with automotive experts or enthusiasts can provide valuable insights and enhance your understanding.</p>
</ul>
</body>
</html>
<p> </p>
Keywords : '1968 Jaguar XKE Dash Schematic Diagram'Milohttp://www.blogger.com/profile/01418902555588264834noreply@blogger.com0tag:blogger.com,1999:blog-4101198853060839868.post-5250917626544103342024-01-03T04:00:00.000-08:002024-01-21T14:33:02.198-08:00Revitalize Your Ride: Unraveling the Mysteries of 1968 Jaguar XKE Ignition Switch Wiring!<p> </p><p><article><figure><noscript><img src='https://tse1.mm.bing.net/th?q=Revitalize Your Ride: Unraveling the Mysteries of 1968 Jaguar XKE Ignition Switch Wiring!' alt='Revitalize Your Ride: Unraveling the Mysteries of 1968 Jaguar XKE Ignition Switch Wiring!' width='640' height='360' /></noscript><img class='v-cover ads-img' src='https://tse1.mm.bing.net/th?q=Revitalize Your Ride: Unraveling the Mysteries of 1968 Jaguar XKE Ignition Switch Wiring!' alt='Revitalize Your Ride: Unraveling the Mysteries of 1968 Jaguar XKE Ignition Switch Wiring!' width='100%' onerror='this.onerror=null;this.src='https://upload.wikimedia.org/wikipedia/commons/d/d1/Image_not_available.png?20210219185637';' style='margin-right: 8px;margin-bottom: 8px;' /></figure></article></p><blockquote>"Master the vintage allure of 1968 Jaguar XKE ignition switch wiring. Unlock expert insights for a seamless restoration journey. Dive into precision with professional guidance."</blockquote><p> </p>In the labyrinth of automotive restoration, unlocking the secrets of the <b>1968 Jaguar XKE ignition switch wiring</b> can be a journey of both fascination and frustration. Delving into the heart of vintage elegance, enthusiasts often find themselves at the crossroads of timeless design and the intricacies of electrical systems. Picture this: beneath the sleek curves and iconic grille lies a web of connections that <i>empathically</i> echoes the craftsmanship of an era gone by. With a sense of curiosity as your compass, navigating the <b>XKE</b>'s wiring intricacies promises to be an enlightening expedition, revealing not only the soul of the machine but also the engineering nuances that were emblematic of 1968 automotive technology.<p> </p><h4>Top 10 important point for '1968 JAGUAR XKE IGNITION SWITCH WIRING'</h4><table cellpadding='0' cellspacing='0' class='tr-caption-container' style='float: right;'><tbody><tr><td style='text-align: center;'><img border='0' src='https://tse1.mm.bing.net/th?q=Top 10 '1968 JAGUAR XKE IGNITION SWITCH WIRING'' width='200' /></td></tr><tr></tr></tbody></table> <ol>
<li>Untangling the Time Capsule Wires: It's Like a Retro Puzzle!</li>
<li>Electrical Gymnastics: Teaching Your Jaguar New Tricks!</li>
<li>When Wires Were Wild: A '68 XKE Comedy of Connections!</li>
<li>Spaghetti Junction Reimagined: XKE Style!</li>
<li>Shock Therapy: Giving Your Jag a Jolt of Ignition Glam!</li>
<li>The Wire Whisperer: Because Your XKE Deserves the Best!</li>
<li>Electro-Fashion: Dressing Up Your Jaguar's Wiring in Style!</li>
<li>Wires Untamed: A Jungle Safari in Your Engine Bay!</li>
<li>Revving Up the Fun: XKE Wiring, the Comedic Edition!</li>
<li>Switching Gears and Giggles: Unleashing the Humor in Your Ignition System!</li>
</ol><p> </p><h5>Several Facts that you should know about '1968 JAGUAR XKE IGNITION SWITCH WIRING'.</h5><h3>Decoding the Time Capsule</h3>
<center><img src="https://tse1.mm.bing.net/th?q=Decoding+the+Time+Capsule+1968+jaguar+xke+ignition+switch+wiring" alt="Decoding the Time Capsule"></center>
<p>Welcome to the fascinating world of the 1968 Jaguar XKE ignition switch wiring. Picture it as a time capsule waiting to be decoded, with each wire holding a story of vintage elegance and automotive prowess. As we embark on this journey, get ready to unearth the secrets hidden beneath the hood.</p>
<h3>A Retro Puzzle Unraveled</h3>
<center><img src="https://tse1.mm.bing.net/th?q=A+Retro+Puzzle+Unraveled+1968+jaguar+xke+ignition+switch+wiring" alt="A Retro Puzzle Unraveled"></center>
<p>Imagine your XKE's ignition switch wiring as a retro puzzle, and you're the master puzzler. In this section, we'll guide you through the entangled web of wires, providing insights and tips to make the unraveling process both entertaining and enlightening.</p>
<h3>Shock Therapy: Jolting Your Jaguar Awake</h3>
<center><img src="https://tse1.mm.bing.net/th?q=Shock+Therapy+1968+jaguar+xke+ignition+switch+wiring" alt="Shock Therapy"></center>
<p>It's time to give your Jaguar a jolt of ignition glam! We'll explore the electrifying world of shock therapy, not the scary kind, but the kind that wakes up your XKE with a burst of energy. Buckle up; your classic beauty is about to get a sparkly makeover.</p>
<h3>The Wire Whisperer's Wisdom</h3>
<center><img src="https://tse1.mm.bing.net/th?q=The+Wire+Whisperer%27s+Wisdom+1968+jaguar+xke+ignition+switch+wiring" alt="The Wire Whisperer's Wisdom"></center>
<p>Meet the Wire Whisperer, your guide to ensuring your XKE gets the best treatment. We'll delve into the wisdom that comes with understanding your Jaguar's wiring intricacies. Get ready to become a whisperer yourself, ensuring your ride gets the love it deserves.</p>
<h3>Electro-Fashion: Dressing Up Your Wiring</h3>
<center><img src="https://tse1.mm.bing.net/th?q=Electro-Fashion+1968+jaguar+xke+ignition+switch+wiring" alt="Electro-Fashion"></center>
<p>Who said wiring can't be fashionable? We're about to prove them wrong! In this section, we'll explore ways to dress up your Jaguar's wiring with style. Your XKE deserves to look good under the hood, and we'll show you how to make it happen.</p>
<h3>Wires Untamed: Navigating the Jungle Safari</h3>
<center><img src="https://tse1.mm.bing.net/th?q=Wires+Untamed+1968+jaguar+xke+ignition+switch+wiring" alt="Wires Untamed"></center>
<p>Consider this part of the journey a jungle safari in your engine bay. Wires untamed, we'll guide you through the wild side of XKE wiring, offering tips and tricks to navigate the untamed wilderness beneath the hood of your classic Jaguar.</p>
<h3>Gears and Giggles: The Comedic Edition</h3>
<center><img src="https://tse1.mm.bing.net/th?q=Gears+and+Giggles+1968+jaguar+xke+ignition+switch+wiring" alt="Gears and Giggles"></center>
<p>Switching gears and giggles – because why should wiring be serious business? Join us in the comedic edition as we find humor in the world of XKE ignition switch wiring. After all, a good laugh is the best tool to have in your automotive toolbox.</p>
<h3>Seamless Restoration: Embracing Professional Guidance</h3>
<center><img src="https://tse1.mm.bing.net/th?q=Seamless+Restoration+1968+jaguar+xke+ignition+switch+wiring" alt="Seamless Restoration"></center>
<p>As we conclude our journey, we'll focus on achieving a seamless restoration by embracing professional guidance. Your XKE deserves the best, and we'll wrap up with expert tips to ensure your vintage Jaguar roars back to life with its ignition switch wiring in top-notch condition.</p><p> </p><h2>The Intricacies of 1968 Jaguar XKE Ignition Switch Wiring</h2>
<p>When delving into the restoration of a classic, the <strong>1968 Jaguar XKE</strong> stands out as a timeless beauty, encapsulating the essence of vintage elegance. One of the key components that requires meticulous attention is the ignition switch wiring, a vital aspect that can significantly impact the performance and overall functionality of this iconic vehicle.</p>
<h3>Understanding the Foundation</h3>
<center><img src="https://tse1.mm.bing.net/th?q=Understanding+the+Foundation+1968+jaguar+xke+ignition+switch+wiring" alt="Understanding the Foundation"></center>
<p>Before we embark on the journey of decoding the intricacies of <strong>1968 Jaguar XKE ignition switch wiring</strong>, it's crucial to grasp the foundational aspects. The ignition switch serves as the gateway to your vehicle's electrical system, initiating the ignition process and facilitating the flow of electrical current to essential components.</p>
<p>Think of it as the conductor in an orchestra, orchestrating the symphony of your Jaguar's engine. However, in the case of a vintage masterpiece like the XKE, the wiring takes on a complexity that requires a keen understanding of the technology prevalent in the late '60s.</p>
<h3>Decoding the Colorful Tapestry</h3>
<center><img src="https://tse1.mm.bing.net/th?q=Decoding+the+Colorful+Tapestry+1968+jaguar+xke+ignition+switch+wiring" alt="Decoding the Colorful Tapestry"></center>
<p>As we unravel the wiring, it's akin to decoding a colorful tapestry where each wire tells a unique story. The <strong>1968 Jaguar XKE</strong> boasts a spectrum of wires, each assigned a specific function. From power distribution to ignition and lighting circuits, the tapestry is woven with precision and purpose.</p>
<p>Transitioning from modern vehicles to a classic like the XKE requires an empathetic approach. Understanding the design philosophy of the era and the engineering nuances of the Jaguar brand is paramount. It's not merely a technical pursuit but a journey into the history of automotive craftsmanship.</p>
<h3>Navigating Through Time</h3>
<center><img src="https://tse1.mm.bing.net/th?q=Navigating+Through+Time+1968+jaguar+xke+ignition+switch+wiring" alt="Navigating Through Time"></center>
<p>The <strong>1968 Jaguar XKE</strong> represents a temporal bridge, connecting us to an era where automotive design was marked by both opulence and ingenuity. Navigating through time, the wiring becomes a conduit for enthusiasts to experience the technological marvels that defined an automotive epoch.</p>
<p>Transitioning to a professional viewpoint, deciphering the wiring requires not just technical expertise but also an appreciation for the historical context. It's an exploration of a bygone era, where engineers laid the foundation for innovations that would shape the future of automotive engineering.</p>
<h3>The Expert's Eye</h3>
<center><img src="https://tse1.mm.bing.net/th?q=The+Expert%27s+Eye+1968+jaguar+xke+ignition+switch+wiring" alt="The Expert's Eye"></center>
<p>Now, let's shift our focus to the professional perspective. From the viewpoint of an expert, tackling <strong>1968 Jaguar XKE ignition switch wiring</strong> is a task that demands precision and methodical approach. Each wire, connector, and component is scrutinized with the discerning eye of someone who understands the intricacies of classic car restoration.</p>
<p>The expert's eye not only identifies potential issues but also recognizes the craftsmanship embedded in the wiring. It's an acknowledgment of the meticulous engineering that went into creating a vehicle that has withstood the test of time. From the ignition switch itself to the wiring that extends throughout the vehicle, the professional eye ensures that every element aligns with the standards of the past.</p>
<h3>Preserving Authenticity</h3>
<center><img src="https://tse1.mm.bing.net/th?q=Preserving+Authenticity+1968+jaguar+xke+ignition+switch+wiring" alt="Preserving Authenticity"></center>
<p>One of the primary goals in dealing with <strong>1968 Jaguar XKE ignition switch wiring</strong> is preserving authenticity. Classic car enthusiasts are often purists, valuing the originality of their vehicles. Professionals engaged in restoration understand the delicate balance between modernization for safety and preserving the authentic charm of the vehicle.</p>
<p>The challenge lies in sourcing components that align with the era's specifications while ensuring they meet contemporary safety standards. The preservation of authenticity isn't just a technical feat but a commitment to safeguarding the heritage embedded in each wire and connection.</p>
<h3>Upgrading for Performance</h3>
<center><img src="https://tse1.mm.bing.net/th?q=Upgrading+for+Performance+1968+jaguar+xke+ignition+switch+wiring" alt="Upgrading for Performance"></center>
<p>While preservation is paramount, professionals also recognize the need for upgrades to enhance performance. The <strong>1968 Jaguar XKE</strong>, with its powerful engine and sleek design, can benefit from strategic upgrades to meet the demands of contemporary roads.</p>
<p>From improving electrical efficiency to incorporating modern safety features, the professional approach involves a thoughtful blend of heritage preservation and performance enhancement. It's about ensuring that the XKE not only looks like a classic beauty but performs with the efficiency expected from a modern vehicle.</p>
<h3>Ensuring Reliability</h3>
<center><img src="https://tse1.mm.bing.net/th?q=Ensuring+Reliability+1968+jaguar+xke+ignition+switch+wiring" alt="Ensuring Reliability"></center>
<p>Reliability is a cornerstone of any professional restoration project. The last thing an owner wants is to experience electrical issues on a leisurely drive. From the ignition switch to the farthest reaches of the wiring system, the professional touch ensures that every connection is secure and reliable.</p>
<p>Testing becomes a crucial phase in the process, with professionals conducting thorough assessments to guarantee the dependability of the ignition switch wiring. It's not just about aesthetics or historical accuracy; it's about instilling confidence in the owner that their Jaguar is not merely a showpiece but a reliable companion on the road.</p>
<h3>Embracing the Restoration Journey</h3>
<center><img src="https://tse1.mm.bing.net/th?q=Embracing+the+Restoration+Journey+1968+jaguar+xke+ignition+switch+wiring" alt="Embracing the Restoration Journey"></center>
<p>As we conclude our exploration of <strong>1968 Jaguar XKE ignition switch wiring</strong>, it's essential to recognize that this journey is more than a technical endeavor. It's a restoration journey that transcends wires and circuits, delving into the soul of a classic vehicle.</p>
<p>Professionals engaged in this restoration dance between the past and the present, ensuring that<p> </p><h6>Another point of view about '1968 JAGUAR XKE IGNITION SWITCH WIRING'.</h6><p>1. The <strong>1968 Jaguar XKE</strong> ignition switch wiring stands as a pivotal aspect in the realm of classic car restoration, requiring a meticulous examination from an academic standpoint.The intricacies of the wiring system represent a significant technological snapshot of the late '60s, showcasing the engineering prowess of that era.Transitioning to an academic viewpoint necessitates a profound understanding of the historical context, considering the design philosophy prevalent during the production of the XKE.The wiring, akin to a complex tapestry, demands a systematic decoding approach, recognizing the significance of each wire and its assigned function.An academic exploration of this subject involves a temporal perspective, connecting the technological advancements of the past with the standards and expectations of contemporary restoration practices.Professionals approaching the <strong>1968 Jaguar XKE</strong> ignition switch wiring academically scrutinize the original design specifications, acknowledging the craftsmanship inherent in each component.Preservation of authenticity becomes a key focus, as academicians in the field strive to maintain the vehicle's historical accuracy while ensuring compliance with modern safety standards.Upgrading the wiring system for enhanced performance requires a balanced academic approach, considering the optimal integration of modern technologies without compromising the vehicle's original charm.Reliability becomes a cornerstone of academic restoration efforts, with rigorous testing protocols applied to guarantee the dependability of the ignition switch wiring.Embracing the restoration journey from an academic perspective involves not only technical prowess but also a profound appreciation for the cultural and historical significance encapsulated within the <strong>1968 Jaguar XKE</strong> ignition switch wiring.</p><p> </p><strong><u>Conclusion : Revitalize Your Ride: Unraveling the Mysteries of 1968 Jaguar XKE Ignition Switch Wiring!.</u></strong><p>As we draw the curtains on our exploration of the <u><em>1968 Jaguar XKE</em></u> ignition switch wiring, it's our sincere hope that this journey has been as enlightening for you as it has been for us. The intricacies of the vintage masterpiece extend beyond mere wires and circuits; they encapsulate a legacy of automotive craftsmanship that has stood the test of time. <em>Embarking on the restoration of your</em> <u><em>1968 Jaguar XKE</em></u> is not just a technical endeavor but a journey into the heart of a bygone era, where elegance met engineering in harmonious sophistication.</p>
<p><em>May the insights gained empower you as you decode the colorful tapestry of your</em> <u><em>1968 Jaguar XKE</em></u>. Remember, each wire tells a story, and in restoring them, you are not just preserving a classic vehicle; you are reviving a piece of automotive history. Whether you are navigating the jungle of wires with a sense of humor or approaching the task with a professional eye, know that the spirit of the <u><em>1968 Jaguar XKE</em></u> lives on through your restoration efforts. Happy restoring!</p><p> </p><p><article><figure><noscript><img src='https://tse1.mm.bing.net/th?q=Question and answer Revitalize Your Ride: Unraveling the Mysteries of 1968 Jaguar XKE Ignition Switch Wiring!' alt='Question and answer Revitalize Your Ride: Unraveling the Mysteries of 1968 Jaguar XKE Ignition Switch Wiring!' /></noscript><img class='v-cover ads-img' src='https://tse1.mm.bing.net/th?q=Question and answer Revitalize Your Ride: Unraveling the Mysteries of 1968 Jaguar XKE Ignition Switch Wiring!' alt='Question and answer Revitalize Your Ride: Unraveling the Mysteries of 1968 Jaguar XKE Ignition Switch Wiring!' width='100%' onerror='this.onerror=null;this.src='https://upload.wikimedia.org/wikipedia/commons/d/d1/Image_not_available.png?20210219185637';' style='margin-right: 8px;margin-bottom: 8px;' /></figure></article></p><p> </p><strong><i>Questions & Answer :</i></strong><p><strong>1. Q: What are the common issues with <u>1968 Jaguar XKE</u> ignition switch wiring?</strong></p>
<ul>
<li>Corrosion: Over time, corrosion can affect the wiring, leading to poor connections and electrical issues.</li>
<li>Wire Fraying: The insulation on the wires may degrade, resulting in exposed wires that can lead to short circuits.</li>
<li>Connection Problems: Loose or damaged connections can disrupt the flow of electrical current, affecting the ignition system.</li>
</ul>
<p><strong>Answer:</strong> Addressing common issues with <u>1968 Jaguar XKE</u> ignition switch wiring requires a meticulous inspection. Regular maintenance to identify and rectify corrosion, timely replacement of frayed wires, and ensuring secure connections are key measures to maintain optimal functionality.</p>
<p><strong>2. Q: Can I upgrade the ignition switch wiring for better performance?</strong></p>
<ul>
<li>Modernization: Upgrading the wiring can enhance electrical efficiency and improve overall performance.</li>
<li>Safety Features: Incorporating modern safety features ensures a safer driving experience.</li>
<li>Reliability: Upgrades contribute to the reliability of the ignition system, reducing the risk of unexpected issues.</li>
</ul>
<p><strong>Answer:</strong> Yes, upgrading the <u>1968 Jaguar XKE</u> ignition switch wiring is a viable option. Professional upgrades focus on modernization, integration of safety features, and overall improvements to ensure the vehicle not only retains its classic charm but also performs optimally on contemporary roads.</p><p> </p>
Keywords : '1968 JAGUAR XKE IGNITION SWITCH WIRING'Milohttp://www.blogger.com/profile/01418902555588264834noreply@blogger.com0tag:blogger.com,1999:blog-4101198853060839868.post-86838046667013798752024-01-01T17:00:00.000-08:002024-01-21T14:33:02.522-08:00Rev Up Your Restoration: Unraveling the Wires with the 1968 Jaguar XKE Wiring Diagram<p> </p><p><article><figure><noscript><img src='https://tse1.mm.bing.net/th?q=Rev Up Your Restoration: Unraveling the Wires with the 1968 Jaguar XKE Wiring Diagram' alt='Rev Up Your Restoration: Unraveling the Wires with the 1968 Jaguar XKE Wiring Diagram' width='640' height='360' /></noscript><img class='v-cover ads-img' src='https://tse1.mm.bing.net/th?q=Rev Up Your Restoration: Unraveling the Wires with the 1968 Jaguar XKE Wiring Diagram' alt='Rev Up Your Restoration: Unraveling the Wires with the 1968 Jaguar XKE Wiring Diagram' width='100%' onerror='this.onerror=null;this.src='https://upload.wikimedia.org/wikipedia/commons/d/d1/Image_not_available.png?20210219185637';' style='margin-right: 8px;margin-bottom: 8px;' /></figure></article></p><blockquote>"Master the intricacies of your 1968 Jaguar XKE with our professional wiring diagram guide. Uncover expert insights for a seamless restoration journey."</blockquote><p> </p><b>1968 Jaguar XKE Wiring Diagram</b> - a captivating journey into the heart of automotive craftsmanship. Delve into the intricate blueprint of this classic beauty, <i>unlocking</i> the secrets behind its electrical symphony. Picture yourself immersed in a fascinating world where wires intertwine like a meticulously choreographed dance, revealing the essence of vintage engineering. As we embark on this exploration, prepare to be <b>awestruck</b> by the artistry hidden beneath the hood, connecting past and present with every carefully traced line. Let's navigate the pathways of nostalgia and innovation, decoding the language of wires that echoes the timeless allure of the iconic 1968 Jaguar XKE.<p> </p><h4>Top 10 important point for '1968 JAGUAR XKE WIRING DIAGRAM'</h4><table cellpadding='0' cellspacing='0' class='tr-caption-container' style='float: right;'><tbody><tr><td style='text-align: center;'><img border='0' src='https://tse1.mm.bing.net/th?q=Top 10 '1968 JAGUAR XKE WIRING DIAGRAM'' width='200' /></td></tr><tr></tr></tbody></table> <ol>
<li>Introduction to 1968 Jaguar XKE Wiring System</li>
<li>Understanding the Wiring Components</li>
<li>Decoding Wire Color Codes</li>
<li>Identifying Connectors and Terminals</li>
<li>Comprehensive Circuit Diagram Breakdown</li>
<li>Troubleshooting Common Wiring Issues</li>
<li>Upgrading to Modern Standards: Is it Feasible?</li>
<li>Recommended Tools for Working with Jaguar Wiring</li>
<li>Maintenance Tips for Longevity</li>
<li>Expert Insights on Wiring Restoration Projects</li>
</ol><p> </p><h5>Several Facts that you should know about '1968 JAGUAR XKE WIRING DIAGRAM'.</h5>htmlCopy code<h3>Introduction: Navigating the Vintage Wires</h3>
<center><img src="https://tse1.mm.bing.net/th?q=Jaguar XKE vintage car" alt="Vintage Jaguar XKE"></center>
<p>Welcome to the mesmerizing world of the 1968 Jaguar XKE wiring diagram. Strap in as we unravel the intricate threads that power this timeless beauty, bringing you closer to the heart of automotive craftsmanship.</p>
<h3>Under the Hood: Demystifying the Wiring System</h3>
<center><img src="https://tse1.mm.bing.net/th?q=Jaguar XKE engine" alt="Jaguar XKE Engine"></center>
<p>Peek beneath the hood as we break down the essential components that make up the XKE's wiring system. Understanding the anatomy of wires and connectors is the first step towards mastering your classic ride.</p>
<h3>Colors Speak Louder: Decoding Wire Color Significance</h3>
<center><img src="https://tse1.mm.bing.net/th?q=Wire color codes" alt="Wire Color Codes"></center>
<p>Discover the language of colors in the Jaguar XKE wiring world. We delve into the significance of each wire color, providing a roadmap to decipher the code and troubleshoot potential issues with ease.</p>
<h3>Circuit Chronicles: Navigating the Diagram Landscape</h3>
<center><img src="https://tse1.mm.bing.net/th?q=Circuit diagram" alt="Circuit Diagram"></center>
<p>Embark on a journey through the comprehensive circuit diagram, unraveling the pathways that power various components. This roadmap will guide you through the electrical maze of your Jaguar XKE.</p>
<h3>Troubleshooting Tales: Common Wiring Woes</h3>
<center><img src="https://tse1.mm.bing.net/th?q=Car troubleshooting" alt="Car Troubleshooting"></center>
<p>We address common wiring issues faced by Jaguar XKE enthusiasts. Learn to troubleshoot and resolve issues efficiently, ensuring your vintage chariot runs smoothly on every road trip.</p>
<h3>Modernization Dilemma: Upgrading to Meet Today's Standards</h3>
<center><img src="https://tse1.mm.bing.net/th?q=Car modernization" alt="Car Modernization"></center>
<p>Explore the pros and cons of upgrading your Jaguar XKE's wiring to modern standards. We weigh the benefits against the classic charm, helping you make an informed decision about your restoration journey.</p>
<h3>Tools of the Trade: Must-Haves for Wiring Work</h3>
<center><img src="https://tse1.mm.bing.net/th?q=Automotive tools" alt="Automotive Tools"></center>
<p>Equip yourself with the right tools for the job. From multimeters to specialized connectors, we provide a list of must-have tools to make your Jaguar XKE wiring project a breeze.</p>
<h3>Preserving the Past: Maintenance Tips for Longevity</h3>
<center><img src="https://tse1.mm.bing.net/th?q=Car maintenance" alt="Car Maintenance"></center>
<p>Learn the ropes of maintaining your vintage treasure. Our experts share tips on preserving the wiring system, ensuring that your 1968 Jaguar XKE remains a beacon of elegance for years to come.</p>
<p> </p>htmlCopy code<p>Welcome to the intricate world of the <b>1968 Jaguar XKE wiring diagram</b>, a blueprint that holds the key to understanding the electrical orchestration beneath the hood of this iconic classic. As we embark on this journey, let's peel back the layers and delve into the heart of automotive craftsmanship that defines the Jaguar XKE.</p>
<h2>The Underlying Complexity</h2>
<center><img src="https://tse1.mm.bing.net/th?q=Jaguar XKE engine" alt="Jaguar XKE Engine"></center>
<p><b>Under the Hood: Demystifying the Wiring System</b></p>
<p>Our journey begins with a closer look at the intricacies of the Jaguar XKE's wiring system. Imagine the engine bay as a canvas, where wires and connectors come together to create a symphony of electrical signals. This is the foundation of the XKE's functionality, and understanding it is crucial for any enthusiast looking to master the art of vintage car restoration.</p>
<h3>The Anatomy of Wires and Connectors</h3>
<center><img src="https://tse1.mm.bing.net/th?q=Automotive wiring" alt="Automotive Wiring"></center>
<p>Within this system, wires act as the lifelines, connecting various components to ensure seamless operation. The diversity in wire colors is not arbitrary; it carries a coded language that reveals the specific function of each wire. Connectors, on the other hand, serve as junctions, bringing together different segments of the wiring to create a cohesive network.</p>
<p><b>Colors Speak Louder: Decoding Wire Color Significance</b></p>
<p>As we navigate through the wiring diagram, the significance of wire colors becomes apparent. Each hue represents a specific purpose, from powering lights to facilitating communication between different parts of the vehicle. Deciphering this color code is akin to learning the language of your Jaguar XKE, enabling you to troubleshoot and maintain it with precision.</p>
<h2>The Blueprint Unveiled</h2>
<center><img src="https://tse1.mm.bing.net/th?q=Wiring diagram" alt="Wiring Diagram"></center>
<p><b>Circuit Chronicles: Navigating the Diagram Landscape</b></p>
<p>At the heart of this electrical symphony lies the comprehensive circuit diagram, a visual representation of the pathways that power various components. It's like a roadmap guiding you through the intricate maze of wires, helping you understand how electricity flows within your Jaguar XKE.</p>
<p><b>Troubleshooting Tales: Common Wiring Woes</b></p>
<p>As we explore the circuit diagram, we encounter common wiring issues that XKE enthusiasts may face. From faulty connections to worn-out wires, understanding these challenges is crucial for effective troubleshooting. Armed with knowledge, you can identify and rectify issues, ensuring your vintage chariot runs smoothly on every road trip.</p>
<h3>Modernization Dilemma: Upgrading to Meet Today's Standards</h3>
<center><img src="https://tse1.mm.bing.net/th?q=Classic car restoration" alt="Classic Car Restoration"></center>
<p>While the vintage charm of the Jaguar XKE is undeniable, the question of whether to upgrade its wiring to modern standards arises. This dilemma is at the crossroads of tradition and innovation. Upgrading may enhance reliability, but it's essential to weigh the benefits against the classic allure that defines this automotive masterpiece.</p>
<h2>The Right Tools for the Job</h2>
<center><img src="https://tse1.mm.bing.net/th?q=Automotive tools" alt="Automotive Tools"></center>
<p><b>Tools of the Trade: Must-Haves for Wiring Work</b></p>
<p>Embarking on a wiring project requires a set of specialized tools. From multimeters to crimping tools, having the right equipment at your disposal is crucial. These tools not only simplify the process but also ensure that you handle the delicate wiring of your Jaguar XKE with the precision it deserves.</p>
<h2>Preserving the Past for the Future</h2>
<center><img src="https://tse1.mm.bing.net/th?q=Car maintenance" alt="Car Maintenance"></center>
<p><b>Preserving the Past: Maintenance Tips for Longevity</b></p>
<p>As custodians of a piece of automotive history, it's essential to preserve the wiring system of your 1968 Jaguar XKE. Routine maintenance becomes a ritual, ensuring that each wire plays its part in maintaining the car's elegance for generations to come. Our experts share invaluable tips on how to safeguard this vintage treasure.</p>
<p>As you unravel the layers of the <b>1968 Jaguar XKE wiring diagram</b>, you gain more than just knowledge of electrical systems; you connect with the legacy of automotive design. It's a journey that transcends wires and circuits, offering a profound understanding of a classic that continues to captivate enthusiasts worldwide.</p>
<p> </p><h6>Another point of view about '1968 JAGUAR XKE WIRING DIAGRAM'.</h6>htmlCopy code<p>When delving into the intricacies of the <b>1968 Jaguar XKE wiring diagram</b>, a professional perspective is essential to navigate the complexities of this vintage automotive electrical system. Here is a comprehensive view:</p>
<ol>
<li><p><b>Understanding the Foundation:</b> The wiring diagram serves as the foundational blueprint for the Jaguar XKE's electrical system. It provides a comprehensive overview of the intricate network of wires and connectors, showcasing the precision and craftsmanship inherent in this classic vehicle.</p></li>
<li><p><b>Deciphering Wire Color Codes:</b> A professional approach involves a meticulous understanding of wire color codes. Each color signifies a specific function, and decoding this information is crucial for troubleshooting and maintenance purposes.</p></li>
<li><p><b>Mastering Connector Identification:</b> Professionals recognize the importance of identifying connectors and terminals within the wiring system. This knowledge is instrumental in ensuring proper connections and addressing any issues that may arise during maintenance or restoration.</p></li>
<li><p><b>Circuit Diagram Proficiency:</b> Navigating the circuit diagram requires a high level of proficiency. Professionals can skillfully interpret the pathways that power various components, enabling them to diagnose and resolve electrical issues efficiently.</p></li>
<li><p><b>Troubleshooting Expertise:</b> A professional perspective emphasizes the ability to troubleshoot common wiring issues effectively. This includes diagnosing problems such as faulty connections, damaged wires, or other electrical anomalies that may impact the performance of the Jaguar XKE.</p></li>
<li><p><b>Assessing Modernization Options:</b> Professionals weigh the pros and cons of upgrading the wiring system to meet modern standards. This involves a thorough evaluation of the benefits in terms of reliability and functionality against the preservation of the vehicle's classic authenticity.</p></li>
<li><p><b>Utilizing Specialized Tools:</b> Professionals recognize the significance of using specialized tools for working on the Jaguar XKE wiring. Multimeters, crimping tools, and other equipment are essential for ensuring precision and accuracy in handling the delicate wiring components.</p></li>
<li><p><b>Prioritizing Maintenance:</b> Preserving the 1968 Jaguar XKE's wiring system requires a proactive approach to maintenance. Professionals follow a regimen of routine inspections, ensuring that each wire remains in optimal condition, contributing to the longevity of this automotive masterpiece.</p></li>
</ol>
<p>Approaching the <b>1968 Jaguar XKE wiring diagram</b> from a professional standpoint is not just about understanding wires and circuits; it's about upholding the legacy of automotive engineering and craftsmanship embodied in this timeless classic.</p>
<p> </p><strong><u>Conclusion : Rev Up Your Restoration: Unraveling the Wires with the 1968 Jaguar XKE Wiring Diagram.</u></strong><p>Congratulations, intrepid enthusiasts, on embarking on this electrifying journey through the enigmatic realms of the <u><em>1968 Jaguar XKE wiring diagram</em></u>. As we conclude our exploration, envision yourself armed with a newfound mastery of the intricate dance of wires beneath the hood of this timeless beauty. The journey from unraveling wire color codes to deciphering the circuit diagram has equipped you with the keys to decode the language of your Jaguar XKE’s electrical symphony.</p>
<p>Remember, the <u><em>1968 Jaguar XKE wiring diagram</em></u> is not just a technical map; it's a bridge connecting you to an era where craftsmanship and innovation converged. Whether you're a seasoned restorer or a curious newcomer, the knowledge gained here empowers you to preserve the past while navigating the present. Now, go forth and let the sparks of your newfound expertise illuminate the path to a seamless and exhilarating journey with your vintage chariot. Happy tinkering, and may the wires of your Jaguar XKE always hum with the harmony of a bygone era!</p><p> </p><p><article><figure><noscript><img src='https://tse1.mm.bing.net/th?q=Question and answer Rev Up Your Restoration: Unraveling the Wires with the 1968 Jaguar XKE Wiring Diagram' alt='Question and answer Rev Up Your Restoration: Unraveling the Wires with the 1968 Jaguar XKE Wiring Diagram' /></noscript><img class='v-cover ads-img' src='https://tse1.mm.bing.net/th?q=Question and answer Rev Up Your Restoration: Unraveling the Wires with the 1968 Jaguar XKE Wiring Diagram' alt='Question and answer Rev Up Your Restoration: Unraveling the Wires with the 1968 Jaguar XKE Wiring Diagram' width='100%' onerror='this.onerror=null;this.src='https://upload.wikimedia.org/wikipedia/commons/d/d1/Image_not_available.png?20210219185637';' style='margin-right: 8px;margin-bottom: 8px;' /></figure></article></p><p> </p><strong><i>Questions & Answer :</i></strong><p>**Q: Why is the 1968 Jaguar XKE wiring diagram essential for restoration?**
<ul>
<li><b>A:</b> Think of the wiring diagram as the treasure map for your restoration journey. It's the key to deciphering the intricate connections that make your Jaguar XKE purr. Without it, you might find yourself in a maze of confusion, but armed with this diagram, you're the master of the vintage electrical symphony.</li>
</ul>
<p>**Q: Can I tackle troubleshooting without a professional background in automotive wiring?**
<ul>
<li><b>A:</b> Absolutely! The beauty of the Jaguar XKE wiring diagram lies in its user-friendly design. It's like having a friendly guide along for the ride. Whether you're a seasoned gearhead or a DIY novice, the diagram provides a roadmap to troubleshoot common issues, making you the hero of your own automotive adventure.</li>
</ul>
<p>**Q: Is it worth upgrading the wiring system to modern standards?**
<ul>
<li><b>A:</b> Ah, the eternal dilemma! While the vintage charm of the XKE is undeniable, upgrading the wiring system opens the door to enhanced reliability and performance. It's like giving your classic car a tech-savvy makeover without losing its soul. So, weigh the pros and cons, and decide if you're ready to embrace the best of both worlds.</li>
</ul>
<p>**Q: What tools should I have in my arsenal for working on the Jaguar XKE wiring?**
<ul>
<li><b>A:</b> Picture yourself as an automotive wizard armed with a magical toolbox. Multimeters, crimping tools, and specialized connectors are your trusty companions on this quest. These tools aren't just gadgets; they're the secret weapons that transform you into a wiring maestro, ensuring a seamless restoration experience.</li>
</ul>
<p>**Q: How often should I perform maintenance on the wiring system?**
<ul>
<li><b>A:</b> Maintenance is the love language you speak to your Jaguar XKE. Regular check-ups, perhaps as often as you'd pamper a cherished pet, keep the wiring system in top-notch condition. It's the key to ensuring that your vintage chariot remains a beacon of elegance on the open road for years to come.</li>
</ul><p> </p>
Keywords : '1968 JAGUAR XKE WIRING DIAGRAM'Milohttp://www.blogger.com/profile/01418902555588264834noreply@blogger.com0tag:blogger.com,1999:blog-4101198853060839868.post-92072392775034639242023-12-31T06:00:00.000-08:002024-01-21T14:33:02.845-08:00Rev Up Your Ride: 1968 GTO Heater Fan Control Switch Hookup Demystified with our Easy-to-Follow Diagram!<p> </p><p><article><figure><noscript><img src='https://tse1.mm.bing.net/th?q=Rev Up Your Ride: 1968 GTO Heater Fan Control Switch Hookup Demystified with our Easy-to-Follow Diagram!' alt='Rev Up Your Ride: 1968 GTO Heater Fan Control Switch Hookup Demystified with our Easy-to-Follow Diagram!' width='640' height='360' /></noscript><img class='v-cover ads-img' src='https://tse1.mm.bing.net/th?q=Rev Up Your Ride: 1968 GTO Heater Fan Control Switch Hookup Demystified with our Easy-to-Follow Diagram!' alt='Rev Up Your Ride: 1968 GTO Heater Fan Control Switch Hookup Demystified with our Easy-to-Follow Diagram!' width='100%' onerror='this.onerror=null;this.src='https://upload.wikimedia.org/wikipedia/commons/d/d1/Image_not_available.png?20210219185637';' style='margin-right: 8px;margin-bottom: 8px;' /></figure></article></p><blockquote>"Master the art of 1968 GTO heater fan control with our diagram guide. Unlock seamless hookup for optimal climate control – a professional's perspective awaits!"</blockquote><p> </p>Buckle up, classic car enthusiasts! Ever found yourself in a freeze or fry dilemma inside your vintage 1968 GTO, desperately wishing for a heater fan magic trick? Fear not, as we unveil the hidden comedy behind the <b>1968 GTO heater fan control switch hookup diagram</b>. Picture this: you, your GTO, and a potential hot mess waiting to unfold – but worry not, we're about to embark on a journey where confusion takes a back seat, and clarity becomes the co-pilot. Get ready to decipher the mysteries of your classic ride's climate control with a touch of <i>humor</i> and a sprinkle of know-how. Let's turn the temperature from ice-cold confusion to a toasty tale of triumph!<p> </p><h4>Top 10 important point for 1968 GTO HEATER FAN CONTROL SWITCH HOOKUP DIAGRAM</h4><table cellpadding='0' cellspacing='0' class='tr-caption-container' style='float: right;'><tbody><tr><td style='text-align: center;'><img border='0' src='https://tse1.mm.bing.net/th?q=Top 10 1968 GTO HEATER FAN CONTROL SWITCH HOOKUP DIAGRAM' width='200' /></td></tr><tr></tr></tbody></table> <ol>
<li>Introduction to the Heater Fan Control Switch</li>
<li>Identifying Key Components in the 1968 GTO</li>
<li>Understanding the Wiring Layout</li>
<li>Decoding Color Codes for Easy Navigation</li>
<li>Step-by-Step Guide for Switch Installation</li>
<li>Ensuring Proper Voltage Connections</li>
<li>Common Mistakes to Avoid During Hookup</li>
<li>Testing the System for Functionality</li>
<li>Troubleshooting Tips for Quick Fixes</li>
<li>Maintaining Optimal Performance Over Time</li>
</ol><p> </p><h5>Several Facts that you should know about 1968 GTO HEATER FAN CONTROL SWITCH HOOKUP DIAGRAM.</h5><h3>Unveiling the Heat: A 1968 GTO Heater Fan Odyssey</h3>
<center><img src="https://tse1.mm.bing.net/th?q=Unveiling+the+Heat+1968+GTO+Heater+Fan"></center>
<p>Embark on a journey into the heart of your vintage GTO's climate control system. Fear not, as we decode the mysteries of the heater fan control switch hookup with a touch of humor and a sprinkle of know-how.</p>
<h3>The Switch Chronicles: An Introduction</h3>
<center><img src="https://tse1.mm.bing.net/th?q=The+Switch+Chronicles+1968+GTO"></center>
<p>Welcome to the epic tale of the 1968 GTO heater fan control switch – a switch that holds the power to transform your driving experience from chilly confusion to cozy triumph. Buckle up for an entertaining ride!</p>
<h3>Identifying the Players: Key Components Unveiled</h3>
<center><img src="https://tse1.mm.bing.net/th?q=Identifying+the+Players+1968+GTO"></center>
<p>Meet the stars of the show! We unravel the mysteries of the crucial components that make up the 1968 GTO heater fan control switch, giving you a backstage pass to the inner workings of your classic ride.</p>
<h3>Colorful Wires: A Wiring Layout Extravaganza</h3>
<center><img src="https://tse1.mm.bing.net/th?q=Colorful+Wires+1968+GTO"></center>
<p>Dive into a world of vibrant hues! We guide you through the wiring layout, decoding color codes like a seasoned detective. Say goodbye to confusion and hello to a rainbow of clarity!</p>
<h3>Installation Kaboom: A Step-by-Step Guide</h3>
<center><img src="https://tse1.mm.bing.net/th?q=Installation+Kaboom+1968+GTO"></center>
<p>Ready, set, install! Our step-by-step guide ensures that even the most DIY-challenged among us can conquer the hookup process. It's a kaboom of simplicity and a blast of accomplishment!</p>
<h3>Voltage Vibes: Ensuring the Right Connections</h3>
<center><img src="https://tse1.mm.bing.net/th?q=Voltage+Vibes+1968+GTO"></center>
<p>No shocks here – we demystify the world of voltage connections, ensuring your GTO's heater fan switch is juiced up for optimal performance. Say goodbye to electrical hiccups and hello to smooth cruising!</p>
<h3>Oops, I Did It Again: Common Hookup Mistakes</h3>
<center><img src="https://tse1.mm.bing.net/th?q=Oops+I+Did+It+Again+1968+GTO"></center>
<p>We've all been there – but fear not! Learn from the blunders of others as we explore common hookup mistakes and how to avoid them. Spoiler alert: it involves less head-scratching and more chuckling.</p>
<h3>Switch Tested, Triumph Celebrated: System Functionality</h3>
<center><img src="https://tse1.mm.bing.net/th?q=Switch+Tested+Triumph+Celebrated+1968+GTO"></center>
<p>It's the moment of truth! Discover the sweet taste of success as we guide you through testing your newly connected system. Because nothing beats the satisfaction of a triumphantly functioning heater fan switch!</p>
<h3>Troubleshooting Laughs: Quick Fixes with a Smile</h3>
<center><img src="https://tse1.mm.bing.net/th?q=Troubleshooting+Laughs+1968+GTO"></center>
<p>Even the best systems hit a bump now and then. Fear not, troubleshooters! We provide a humorous guide to quick fixes, turning potential headaches into a chuckle-worthy breeze.</p>
<h3>Maintain the Laughter: Tips for Optimal Performance</h3>
<center><img src="https://tse1.mm.bing.net/th?q=Maintain+the+Laughter+1968+GTO"></center>
<p>It's not goodbye; it's see you later! We wrap up our adventure with tips on maintaining optimal performance. Because when it comes to your GTO's heater fan control switch, a little TLC goes a long way!</p><p> </p><h2>Decoding the Cozy Secrets: A Dive into the 1968 GTO Heater Fan Control Switch Hookup Diagram</h2>
<p>Hey there, fellow gearheads! Ready to demystify the intricate dance of wires and switches that control the warmth in your 1968 GTO? Well, buckle up because we're about to embark on an adventure into the world of the heater fan control switch hookup diagram. It's not just about connecting wires; it's about understanding the heartbeat of your classic ride's climate control system.</p>
<h3>Getting Acquainted with the Heater Fan Control Switch</h3>
<center><img src="https://tse1.mm.bing.net/th?q=Getting+Acquainted+with+the+Heater+Fan+Control+Switch+1968+GTO"></center>
<p>Let's kick things off by introducing our main character – the heater fan control switch. This little device holds the key to turning your GTO's cabin into a cozy haven, regardless of the weather outside. Now, before you dive into the hookup diagram, it's essential to understand the role this switch plays in the grand scheme of things.</p>
<p>Think of the heater fan control switch as the conductor of a symphony, orchestrating the flow of warmth through your car's interior. It's not just about providing heat; it's about giving you control over the temperature, ensuring that your driving experience is as comfortable as it is exhilarating.</p>
<h3>The Components Unveiled: A Behind-the-Scenes Look</h3>
<center><img src="https://tse1.mm.bing.net/th?q=The+Components+Unveiled+1968+GTO"></center>
<p>Now, let's peel back the curtain and take a peek at the backstage crew – the components that make up the heater fan control switch. Wiring, resistors, and a dash of magic (okay, maybe not magic) work in harmony to create the symphony of warmth you crave.</p>
<p>Understanding each component is like knowing the individual instruments in an orchestra. The wiring is the sheet music, guiding the flow of electricity, while the resistors act as the musicians, modulating the intensity of the heat. It's a harmonious collaboration that ensures your GTO stays cozy, no matter the external conditions.</p>
<h3>The Colorful World of Wiring: Navigating with Ease</h3>
<center><img src="https://tse1.mm.bing.net/th?q=The+Colorful+World+of+Wiring+1968+GTO"></center>
<p>Now, let's talk about the rainbow-colored world of wiring. Don't let the tangle of hues intimidate you; think of it as a treasure map leading you to a comfortable driving experience. Each color represents a specific function, and once you decode the colors, you'll navigate the wiring landscape with ease.</p>
<p>It's like following a recipe – blue wires for blower control, red for power, and green for the magic touch of the heater. Once you've mastered the color code, you'll be the maestro orchestrating the perfect temperature inside your GTO.</p>
<h3>Installation Kaboom: Step-by-Step Guide</h3>
<center><img src="https://tse1.mm.bing.net/th?q=Installation+Kaboom+1968+GTO"></center>
<p>Now, let's get our hands dirty – metaphorically speaking, of course. The installation process may seem daunting, but fear not; we've got a step-by-step guide that turns the kaboom of confusion into a burst of accomplishment. It's like assembling a puzzle, with each piece fitting perfectly into place.</p>
<p>Start by identifying the components we discussed earlier. Think of it as assembling the Avengers – each hero (or resistor in this case) has a specific role to play in saving the day. Connect the wires following the color code, and voila! You're on your way to being the superhero of your GTO's climate control system.</p>
<h3>A Voltage Tale: Ensuring the Right Connections</h3>
<center><img src="https://tse1.mm.bing.net/th?q=A+Voltage+Tale+1968+GTO"></center>
<p>Now, let's talk about voltage – the unsung hero in our tale. Ensuring the right connections is crucial for a smooth performance of your heater fan control switch. It's like providing the perfect stage for a rock concert; the voltage sets the mood, and the show must go on without a hitch.</p>
<p>Check the connections, make sure the voltage is within the recommended range, and you'll avoid any electrical drama. We want your GTO to rock the roads, not the workshop, right?</p>
<h3>Oops, I Did It Again: Common Hookup Mistakes</h3>
<center><img src="https://tse1.mm.bing.net/th?q=Oops+I+Did+It+Again+1968+GTO"></center>
<p>Now, let's address the elephant in the room – common hookup mistakes. We've all been there, scratching our heads and thinking, "Oops, I did it again." But fear not, because learning from the missteps of others is the key to a smoother journey.</p>
<p>It's like a comedy of errors – connecting the wrong wires or misinterpreting the color code. But hey, laughter is the best medicine, and in this case, it's the best way to troubleshoot. So, take a deep breath, chuckle at your blunders, and let's fix those oops moments together.</p>
<h3>Switch Tested, Triumph Celebrated: System Functionality</h3>
<center><img src="https://tse1.mm.bing.net/th?q=Switch+Tested+Triumph+Celebrated+1968+GTO"></center>
<p>Time for the grand finale – testing the system functionality. Picture this as the moment when the curtains rise, and the spotlight is on your GTO's climate control. Switch on the heater, feel the warmth, and celebrate the triumph of a well-connected system.</p>
<p>It's like conducting a successful experiment – the hypothesis was correct, and now you're reveling in the joy of a cozy cabin. Revel in the triumph, my friend; you've earned it!</p>
<h3>Troubleshooting Laughs: Quick Fixes with a Smile</h3>
<center><img src="https://tse1.mm.bing.net/th?q=Troubleshooting+Laughs+1968+GTO"></center>
<p>But wait, what's a journey without a few bumps in the road? Enter troubleshooting laughs – our guide to quick fixes with a smile. Because let's face it, even the best systems encounter hiccups, and a bit of humor can turn a potential headache into a chuckle-worthy adventure.</p>
<p>Whether it's a loose connection or a minor glitch, we've got your back. Troubleshoot with a grin, and soon you'll be back on the road, enjoying the warmth of victory.</p>
<h3>Maintain the Laughter: Tips for Optimal Performance</h3>
<center><img src="https://tse1.mm.bing.net/th?q=Maintain<p> </p><h6>Another point of view about 1968 GTO HEATER FAN CONTROL SWITCH HOOKUP DIAGRAM.</h6><p>1. <b>Introduction:</b> The 1968 GTO heater fan control switch hookup diagram serves as a critical element in the proper functioning of the vehicle's climate control system. It is imperative for owners to comprehend its intricacies for optimal performance.</p>
<p>2. <b>Essential Components:</b> Understanding the key components involved, such as wiring, resistors, and the control switch itself, is fundamental. Each component plays a specific role in regulating the warmth within the car.</p>
<p>3. <b>Color-coded Wiring:</b> The wiring layout, distinguished by color codes, is a crucial aspect of the hookup diagram. A meticulous approach to decoding these colors ensures a seamless connection, minimizing the risk of errors during installation.</p>
<p>4. <b>Installation Procedures:</b> Following a step-by-step guide is paramount during the installation process. This involves identifying components, connecting wires according to the color code, and ensuring a secure and accurate hookup for the heater fan control switch.</p>
<p>5. <b>Voltage Management:</b> Maintaining proper voltage connections is essential for the longevity and efficiency of the system. Owners should verify the voltage levels, adhering to recommended ranges to prevent electrical issues and ensure smooth operation.</p>
<p>6. <b>Common Mistakes:</b> Recognizing and avoiding common hookup mistakes is imperative for a successful installation. This includes misinterpreting the color code, incorrect wire connections, or overlooking essential components, all of which can lead to functionality issues.</p>
<p>7. <b>Testing the System:</b> Post-installation, thorough testing of the system is essential. This step confirms the functionality of the heater fan control switch and ensures that all connections are secure, providing peace of mind to the vehicle owner.</p>
<p>8. <b>Troubleshooting:</b> In the event of any issues, a systematic troubleshooting approach is recommended. Identifying and addressing problems promptly minimizes downtime and maintains the efficiency of the climate control system.</p>
<p>9. <b>Optimizing Performance:</b> Regular maintenance is key to the sustained performance of the heater fan control switch. Implementing preventive measures, such as periodic checks and cleaning, contributes to the longevity and reliability of the entire system.</p>
<p>10. <b>Professional Assistance:</b> For those unfamiliar with automotive electrical systems, seeking professional assistance is a prudent choice. Certified technicians possess the expertise to handle intricate connections and ensure the proper functioning of the 1968 GTO heater fan control switch.</p><p> </p><strong><u>Conclusion : Rev Up Your Ride: 1968 GTO Heater Fan Control Switch Hookup Demystified with our Easy-to-Follow Diagram!.</u></strong><p>As we conclude our journey into the intricacies of the <u>1968 GTO heater fan control switch hookup diagram</u>, I want to express my sincere appreciation for your dedication to understanding the inner workings of your classic ride's climate control system. Delving into the world of wires, resistors, and color-coded connections may seem like a daunting task, but <em>empowering yourself with this knowledge</em> transforms your driving experience. You've become the maestro orchestrating the symphony of warmth in your GTO.</p>
<p>Remember, mastery of the <u>1968 GTO heater fan control switch hookup diagram</u> is not just about wires and components; it's about reclaiming control over your driving comfort. Whether you're a seasoned DIY enthusiast or someone taking their first steps into the world of automotive tinkering, the insights gained here serve as a foundation for a smoother, warmer journey. Your commitment to unraveling the mysteries of your GTO's climate control not only enhances your driving pleasure but also <em>creates a connection between you and the heart of your classic vehicle</em>. So, rev up that engine, hit the road, and enjoy the warmth you've masterfully crafted within the walls of your beloved 1968 GTO. Safe travels!</p><p> </p><p><article><figure><noscript><img src='https://tse1.mm.bing.net/th?q=Question and answer Rev Up Your Ride: 1968 GTO Heater Fan Control Switch Hookup Demystified with our Easy-to-Follow Diagram!' alt='Question and answer Rev Up Your Ride: 1968 GTO Heater Fan Control Switch Hookup Demystified with our Easy-to-Follow Diagram!' /></noscript><img class='v-cover ads-img' src='https://tse1.mm.bing.net/th?q=Question and answer Rev Up Your Ride: 1968 GTO Heater Fan Control Switch Hookup Demystified with our Easy-to-Follow Diagram!' alt='Question and answer Rev Up Your Ride: 1968 GTO Heater Fan Control Switch Hookup Demystified with our Easy-to-Follow Diagram!' width='100%' onerror='this.onerror=null;this.src='https://upload.wikimedia.org/wikipedia/commons/d/d1/Image_not_available.png?20210219185637';' style='margin-right: 8px;margin-bottom: 8px;' /></figure></article></p><p> </p><strong><i>Questions & Answer :</i></strong><p><b>Q: Is understanding the 1968 GTO heater fan control switch hookup diagram as complicated as it sounds?</b></p>
<ul>
<li><b>A:</b> Well, decoding the diagram might seem like deciphering ancient hieroglyphics at first, but fear not! Think of it as a treasure map to a cozy cabin – once you navigate the colorful wires and components, you'll feel like a climate control pirate, claiming warmth as your booty.</li>
</ul>
<p><b>Q: What happens if I mix up the wiring during installation?</b></p>
<ul>
<li><b>A:</b> Ah, the classic mix-up dilemma! Picture this: your GTO might protest by playing a little electric symphony, but don't worry, it's just a reminder to double-check those wires. It's like a dance – the blue wire waltzes with the blower, the red one tangoes with power. Just avoid the salsa, where everything gets tangled!</li>
</ul>
<p><b>Q: Can I call a professional or is that admitting defeat?</b></p>
<ul>
<li><b>A:</b> Oh, calling in the pros? That's not defeat; it's like asking for directions when you're lost – a strategic move! Think of certified technicians as the Gandalfs of the automotive world, guiding you through the wizardry of wiring. Plus, it leaves you more time to enjoy the cozy cabin once it's all set up!</li>
</ul>
<p><b>Q: Is there a chance my GTO will rebel against my attempts at hookup?</b></p>
<ul>
<li><b>A:</b> Ah, the rebellious GTO – a true character! It might throw a minor tantrum, like a moody teenager. But rest assured, it's just expressing itself. Give it a firm talk (or maybe just a gentle tap), reassure it that warmth is a good thing, and soon, you'll have a content and cozy classic on your hands.</li>
</ul>
<p><b>Q: What if I want to add a touch of my personality to the hookup?</b></p>
<ul>
<li><b>A:</b> Ah, the creative touch! Who says wiring can't be a form of self-expression? Consider it the DIY version of car art. Just remember, while adding a dash of your personality is encouraged, resist the urge to turn your GTO's interior into a disco ball – we're aiming for warmth, not a dance party!</li>
</ul><p> </p>
Keywords : 1968 GTO HEATER FAN CONTROL SWITCH HOOKUP DIAGRAMMilohttp://www.blogger.com/profile/01418902555588264834noreply@blogger.com0tag:blogger.com,1999:blog-4101198853060839868.post-65237974386186007512023-12-29T19:00:00.000-08:002024-01-21T14:33:03.169-08:00Dive into the Past: 1968 Dodge Coronet GT Convertible Wiring Diagram Images Unveiled!<p> </p><p><article><figure><noscript><img src='https://tse1.mm.bing.net/th?q=Dive into the Past: 1968 Dodge Coronet GT Convertible Wiring Diagram Images Unveiled!' alt='Dive into the Past: 1968 Dodge Coronet GT Convertible Wiring Diagram Images Unveiled!' width='640' height='360' /></noscript><img class='v-cover ads-img' src='https://tse1.mm.bing.net/th?q=Dive into the Past: 1968 Dodge Coronet GT Convertible Wiring Diagram Images Unveiled!' alt='Dive into the Past: 1968 Dodge Coronet GT Convertible Wiring Diagram Images Unveiled!' width='100%' onerror='this.onerror=null;this.src='https://upload.wikimedia.org/wikipedia/commons/d/d1/Image_not_available.png?20210219185637';' style='margin-right: 8px;margin-bottom: 8px;' /></figure></article></p><blockquote>Unlock the secrets of vintage automotive craftsmanship with detailed <b>1968 Dodge Coronet GT Convertible</b> wiring diagrams. Gain professional insights for a seamless restoration journey.</blockquote><p> </p>Embark on a journey through time as we unveil the hidden treasures of automotive history with mesmerizing images of the <b>1968 Dodge Coronet GT Convertible</b> wiring diagram. Nestled within these intricate diagrams lies the blueprint of vintage innovation, a creative tapestry of interconnected wires bringing life to a classic masterpiece. Brace yourself for a visual feast that transcends the ordinary, delving into the very heart of automotive craftsmanship. Picture this: a symphony of lines and connections, meticulously captured in <i>nostalgic monochrome</i> snapshots that transport you to an era where every wire told a story. This isn't just about diagrams; it's a creative pilgrimage to the birth of a legend.<p> </p><h4>Top 10 important point for 1968 DODGE CORONET GT CONVERTIBLE WIRING DIAGRAM IMAGES</h4><table cellpadding='0' cellspacing='0' class='tr-caption-container' style='float: right;'><tbody><tr><td style='text-align: center;'><img border='0' src='https://tse1.mm.bing.net/th?q=Top 10 1968 DODGE CORONET GT CONVERTIBLE WIRING DIAGRAM IMAGES' width='200' /></td></tr><tr></tr></tbody></table> <ol>
<li>Delving into History: Unearthing the 1968 Dodge Coronet GT Convertible</li>
<li>Blueprints of Brilliance: Examining the Wiring Diagrams Up Close</li>
<li>Behind the Scenes: The Creative Craftsmanship of 1968 Engineering</li>
<li>Decoding Complexity: Navigating the Intricate Network of Wires</li>
<li>Restoration Roadmap: How Wiring Diagrams Aid in Classic Car Revival</li>
<li>Professional Insights: Understanding the Language of the Diagrams</li>
<li>Preserving the Past: Importance of Accurate Wiring in Vintage Cars</li>
<li>Visual Chronicles: Capturing the Aesthetic Appeal of Diagram Images</li>
<li>From Diagram to Reality: Implementing Findings in Restoration Projects</li>
<li>Expert Perspectives: Why 1968 Dodge Coronet GT Wiring Matters Today</li>
</ol><p> </p><h5>Several Facts that you should know about 1968 DODGE CORONET GT CONVERTIBLE WIRING DIAGRAM IMAGES.</h5><h3>Exploring the Vintage Marvel: 1968 Dodge Coronet GT Convertible</h3>
<center><img src="https://tse1.mm.bing.net/th?q=Exploring+the+Vintage+Marvel+1968+Dodge+Coronet+GT+Convertible" alt="Vintage Car" /></center>
<p>Take a nostalgic journey back to 1968 as we uncover the engineering brilliance of the Dodge Coronet GT Convertible. In this article, we delve into the intricacies of the wiring diagram images, shedding light on the craftsmanship that defined an era.</p>
<h3>Decoding the Blueprints: An Up-Close Examination</h3>
<center><img src="https://tse1.mm.bing.net/th?q=Decoding+the+Blueprints+An+Up-Close+Examination+1968+Dodge+Coronet+GT+Convertible" alt="Wiring Diagram" /></center>
<p>Get ready for a detailed exploration of the wiring diagrams that served as the blueprints for this classic beauty. Each line and connection tells a story of meticulous design and innovation, giving enthusiasts a glimpse into the past.</p>
<h3>Behind the Scenes: Creative Craftsmanship</h3>
<center><img src="https://tse1.mm.bing.net/th?q=Behind+the+Scenes+Creative+Craftsmanship+1968+Dodge+Coronet+GT+Convertible" alt="Creative Craftsmanship" /></center>
<p>Uncover the behind-the-scenes magic that went into crafting the 1968 Dodge Coronet GT Convertible. The wiring diagrams showcase the creative genius that brought this iconic vehicle to life, highlighting the attention to detail and innovation of the era.</p>
<h3>Navigating Complexity: The Intricate Network of Wires</h3>
<center><img src="https://tse1.mm.bing.net/th?q=Navigating+Complexity+The+Intricate+Network+of+Wires+1968+Dodge+Coronet+GT+Convertible" alt="Network of Wires" /></center>
<p>Embark on a journey of understanding as we navigate the intricate network of wires within the wiring diagrams. Despite the complexity, these diagrams are a testament to the engineering prowess of the 1968 Dodge Coronet GT Convertible.</p>
<h3>Restoration Roadmap: A Guide for Classic Car Revival</h3>
<center><img src="https://tse1.mm.bing.net/th?q=Restoration+Roadmap+A+Guide+for+Classic+Car+Revival+1968+Dodge+Coronet+GT+Convertible" alt="Classic Car Revival" /></center>
<p>For enthusiasts engaged in restoration projects, these wiring diagrams serve as a valuable roadmap. Explore how these diagrams play a crucial role in the revival of classic cars, ensuring authenticity and functionality.</p>
<h3>Professional Insights: Understanding the Language of Diagrams</h3>
<center><img src="https://tse1.mm.bing.net/th?q=Professional+Insights+Understanding+the+Language+of+Diagrams+1968+Dodge+Coronet+GT+Convertible" alt="Professional Insights" /></center>
<p>Gain professional insights into the language of wiring diagrams. Experts offer their perspectives on the significance of each element, providing a deeper understanding of the technical aspects embedded in these visual representations.</p>
<h3>Preserving the Past: Importance of Accurate Wiring</h3>
<center><img src="https://tse1.mm.bing.net/th?q=Preserving+the+Past+Importance+of+Accurate+Wiring+1968+Dodge+Coronet+GT+Convertible" alt="Preserving the Past" /></center>
<p>Explore the importance of accurate wiring in preserving the historical integrity of the 1968 Dodge Coronet GT Convertible. Discover how attention to detail in the wiring ensures that these vintage vehicles remain true to their original form.</p>
<h3>Visual Chronicles: Aesthetic Appeal of Diagram Images</h3>
<center><img src="https://tse1.mm.bing.net/th?q=Visual+Chronicles+Aesthetic+Appeal+of+Diagram+Images+1968+Dodge+Coronet+GT+Convertible" alt="Aesthetic Appeal" /></center>
<p>Marvel at the visual appeal of the wiring diagram images. Beyond their technical significance, these diagrams offer a visual chronicle of the beauty and elegance that defined the design aesthetics of the 1968 Dodge Coronet GT Convertible.</p>
<h3>From Diagram to Reality: Implementing Findings in Restoration</h3>
<center><img src="https://tse1.mm.bing.net/th?q=From+Diagram+to+Reality+Implementing+Findings+in+Restoration+1968+Dodge+Coronet+GT+Convertible" alt="Restoration Implementation" /></center>
<p>Discover how enthusiasts and restoration experts translate the findings from these wiring diagrams into reality. This section explores the practical application of the diagrams in restoring and maintaining the 1968 Dodge Coronet GT Convertible.</p>
<h3>Expert Perspectives: Why 1968 Dodge Coronet GT Wiring Matters Today</h3>
<center><img src="https://tse1.mm.bing.net/th?q=Expert+Perspectives+Why+1968+Dodge+Coronet+GT+Wiring+Matters+Today" alt="Expert Perspectives" /></center>
<p>Wrap up the journey with insights from experts on why the wiring of the 1968 Dodge Coronet GT remains relevant today. Explore the enduring impact of this vintage vehicle and its wiring innovations in the modern automotive landscape.</p><p> </p><h2>Unveiling the Timeless Wonders: 1968 Dodge Coronet GT Convertible Wiring Diagram Images</h2>
<p>Welcome to the captivating realm of vintage automobiles, where every curve and connection tells a story of automotive brilliance. In this exploration, we embark on a journey back to 1968 to unravel the mysteries held within the wiring diagrams of the iconic Dodge Coronet GT Convertible. Picture this as a time machine, with wiring diagrams acting as the blueprints that bring this classic beauty to life.</p>
<h3>The Roadmap in Monochrome</h3>
<p>Let's start our adventure by zooming into the intricacies of these wiring diagrams, where black and white become the palette of innovation. Each line etched on the paper is a roadmap to the inner workings of the 1968 Dodge Coronet GT Convertible. These monochrome blueprints, seemingly simple yet profoundly detailed, guide us through the labyrinth of connections that power the heart of this vintage masterpiece.</p>
<center><img src="https://tse1.mm.bing.net/th?q=The+Roadmap+in+Monochrome" alt="Monochrome Blueprints" /></center>
<h3>A Symphony of Wires: The Creative Craftsmanship</h3>
<p>As we delve deeper, it becomes evident that these wiring diagrams are more than just technical drawings—they are a symphony of wires orchestrated by the creative minds of 1968. Imagine the automotive engineers working diligently, mapping out the neural network of the Coronet GT Convertible. It's an ode to craftsmanship, where every wire placed is a note in the melody of automotive innovation.</p>
<center><img src="https://tse1.mm.bing.net/th?q=A+Symphony+of+Wires+The+Creative+Craftsmanship" alt="Creative Craftsmanship" /></center>
<h3>Decoding Complexity: A Close Examination</h3>
<p>Now, let's pull out our magnifying glass and delve into the complexity of these diagrams. It's a maze of lines and circles, reminiscent of a cryptic code waiting to be deciphered. Yet, as we decode the intricacies, we discover the brilliance behind the engineering. This close examination reveals the meticulous planning that went into ensuring every connection serves a purpose in the grand scheme of the 1968 Dodge Coronet GT Convertible.</p>
<center><img src="https://tse1.mm.bing.net/th?q=Decoding+Complexity+A+Close+Examination" alt="Close Examination" /></center>
<h3>The Beauty in Details: Visual Chronicles</h3>
<p>Shift your focus from the technicalities for a moment and appreciate the aesthetic allure captured in these wiring diagram images. The visual chronicles tell a story beyond functionality—they showcase the elegance and beauty that defined automotive design in 1968. It's like flipping through the pages of a vintage photo album, each image narrating a chapter in the visual history of the Coronet GT Convertible.</p>
<center><img src="https://tse1.mm.bing.net/th?q=The+Beauty+in+Details+Visual+Chronicles" alt="Visual Chronicles" /></center>
<h3>Navigating the Network: Wires as the Backbone</h3>
<p>Now, let's put on our navigator hats and explore the intricate network of wires. These aren't just random connections; they are the backbone of the 1968 Dodge Coronet GT Convertible. Every wire serves a vital role, conducting the symphony of power that propels this classic convertible forward. It's a network designed with precision, where each wire plays a crucial part in the harmonious functioning of the vehicle.</p>
<center><img src="https://tse1.mm.bing.net/th?q=Navigating+the+Network+Wires+as+the+Backbone" alt="Network of Wires" /></center>
<h3>A Guide for Enthusiasts: Restoration Roadmap</h3>
<p>For enthusiasts and restoration aficionados, these wiring diagrams aren't just historical artifacts; they are a guide, a roadmap to reviving the glory of the past. Imagine embarking on a restoration project armed with the knowledge encapsulated in these diagrams. It's like having a treasure map, guiding you through the intricacies of bringing a 1968 Dodge Coronet GT Convertible back to life.</p>
<center><img src="https://tse1.mm.bing.net/th?q=A+Guide+for+Enthusiasts+Restoration+Roadmap" alt="Restoration Roadmap" /></center>
<h3>Professional Insights: Understanding the Language of Diagrams</h3>
<p>Let's step into the shoes of professionals who dissect these diagrams with a keen eye. Understanding the language of diagrams is akin to deciphering a unique code—a code that holds the key to the engineering marvels of 1968. Professionals bring their insights to the table, offering a deeper understanding of the nuances embedded in these visual representations.</p>
<center><img src="https://tse1.mm.bing.net/th?q=Professional+Insights+Understanding+the+Language+of+Diagrams" alt="Professional Insights" /></center>
<h3>Preserving Heritage: Importance of Accurate Wiring</h3>
<p>Preservation becomes a key theme as we reflect on the importance of accurate wiring in maintaining the heritage of the 1968 Dodge Coronet GT Convertible. These wiring diagrams act as custodians of history, ensuring that each restoration project stays true to the original design. Accuracy in wiring isn't just a technical necessity; it's a commitment to preserving the essence of automotive craftsmanship.</p>
<center><img src="https://tse1.mm.bing.net/th?q=Preserving+Heritage+Importance+of+Accurate+Wiring" alt="Preserving Heritage" /></center>
<h3>Timeless Relevance: Why 1968 Dodge Coronet GT Wiring Matters Today</h3>
<p>As we conclude our journey through the wiring diagram images, it's essential to ponder why the wiring of the 1968 Dodge Coronet GT remains relevant today. It's not merely a trip down memory lane but an exploration of enduring impact. The innovations encapsulated in these diagrams have left an indelible mark, influencing the present-day automotive landscape.</p>
<center><img src="https://tse1.mm.bing.net/th?q=Timeless+Relevance+Why+1968+Dodge+Coronet+GT+Wiring+Matters+Today" alt="Timeless Relevance" /></center>
<p>In essence, the wiring diagram images of the 1968 Dodge Coronet GT Convertible are more than technical drawings—they are a testament to an era marked by creative brilliance and meticulous craftsmanship. As we unravel the intricacies, we not only gain insights into automotive engineering but also appreciate the timeless beauty that continues to captivate enthusiasts across generations.</p><p> </p><h6>Another point of view about 1968 DODGE CORONET GT CONVERTIBLE WIRING DIAGRAM IMAGES.</h6><p><strong>1. Unveiling Historical Blueprints:</strong> The 1968 Dodge Coronet GT Convertible wiring diagram images serve as a captivating portal to the past, revealing the intricate blueprints that fueled automotive innovation in that era.</p>
<p><strong>2. Meticulous Craftsmanship on Display:</strong> Examining these diagrams is like stepping into an automotive atelier, where the meticulous craftsmanship of 1968 engineers is on full display. Each line and connection reflects a dedication to detail that defines the classic beauty of the Coronet GT Convertible.</p>
<p><strong>3. Deciphering the Code:</strong> Beyond the apparent complexity, these wiring diagrams are a code waiting to be deciphered. Navigating through the maze of lines, circles, and connections unveils the engineering brilliance behind the functionality of this vintage vehicle.</p>
<p><strong>4. Visual Chronicles of Elegance:</strong> The wiring diagram images are not mere technical documents; they are visual chronicles capturing the elegance and beauty that characterized automotive design in 1968. It's a journey through monochrome snapshots that tell a story of timeless sophistication.</p>
<p><strong>5. Network of Wires as the Backbone:</strong> Delving into the network of wires, one can appreciate how each wire acts as the backbone of the 1968 Dodge Coronet GT Convertible. It's a symphony of connections working in harmony to power this classic convertible forward.</p>
<p><strong>6. Restoration Roadmap for Enthusiasts:</strong> These wiring diagrams aren't confined to the pages of history; they serve as a practical roadmap for enthusiasts engaged in restoration projects. Armed with the knowledge from these diagrams, restoration becomes a guided journey to revive the glory of the past.</p>
<p><strong>7. Professional Insights into Engineering Language:</strong> Professionals bring a unique perspective to the table, translating the language of diagrams into insights. Understanding the intricate details becomes a key element in appreciating the engineering marvels encapsulated in the wiring diagrams.</p>
<p><strong>8. Preserving Heritage Through Accuracy:</strong> Accuracy in wiring isn't just a technical requirement; it's a commitment to preserving the heritage of the 1968 Dodge Coronet GT Convertible. These diagrams act as custodians, ensuring that restoration projects stay true to the original design.</p>
<p><strong>9. Timeless Relevance in Modern Context:</strong> Concluding the exploration, it's evident that the wiring of the 1968 Dodge Coronet GT holds timeless relevance. The innovations captured in these diagrams continue to influence and shape the modern automotive landscape.</p>
<p><strong>10. A Testament to Automotive Excellence:</strong> In essence, these wiring diagram images are more than technical artifacts; they are a testament to an era marked by automotive excellence. As we analyze and appreciate the details, we gain not only insights into engineering but also a deeper admiration for the enduring allure of classic cars.</p><p> </p><strong><u>Conclusion : Dive into the Past: 1968 Dodge Coronet GT Convertible Wiring Diagram Images Unveiled!.</u></strong><p>As we wrap up this journey through the <u>1968 Dodge Coronet GT Convertible wiring diagram images</u>, it's evident that we've explored more than just technical drawings. We've uncovered a visual tapestry that encapsulates the <em>creative brilliance</em> of an era when every wire was a stroke on the canvas of automotive innovation. These images are not just blueprints; they are a time machine, transporting us to a period when craftsmanship and elegance defined the very essence of driving.</p>
<p>So, dear readers, let these wiring diagram images not just be a glimpse into the past but an inspiration for your present automotive endeavors. Whether you're an enthusiast, a restorer, or simply an appreciator of classic cars, remember that within these lines and connections lies a story waiting to be told and retold. The <u>1968 Dodge Coronet GT Convertible</u> wiring diagrams are not just artifacts; they are a celebration of the <em>creative spirit</em> that continues to echo through the corridors of automotive history. Keep exploring, keep restoring, and keep the spirit of classic cars alive!</p><p> </p><p><article><figure><noscript><img src='https://tse1.mm.bing.net/th?q=Question and answer Dive into the Past: 1968 Dodge Coronet GT Convertible Wiring Diagram Images Unveiled!' alt='Question and answer Dive into the Past: 1968 Dodge Coronet GT Convertible Wiring Diagram Images Unveiled!' /></noscript><img class='v-cover ads-img' src='https://tse1.mm.bing.net/th?q=Question and answer Dive into the Past: 1968 Dodge Coronet GT Convertible Wiring Diagram Images Unveiled!' alt='Question and answer Dive into the Past: 1968 Dodge Coronet GT Convertible Wiring Diagram Images Unveiled!' width='100%' onerror='this.onerror=null;this.src='https://upload.wikimedia.org/wikipedia/commons/d/d1/Image_not_available.png?20210219185637';' style='margin-right: 8px;margin-bottom: 8px;' /></figure></article></p><p> </p><strong><i>Questions & Answer :</i></strong><p><strong>Q: What information do the 1968 Dodge Coronet GT Convertible wiring diagram images provide?</strong></p>
<ul>
<li><strong>A:</strong> The wiring diagram images serve as intricate blueprints, detailing the electrical connections and circuits of the 1968 Dodge Coronet GT Convertible. They provide a visual guide to understand the inner workings of this classic vehicle.</li>
</ul>
<p><strong>Q: How can these wiring diagrams benefit enthusiasts and restorers?</strong></p>
<ul>
<li><strong>A:</strong> Enthusiasts and restorers find these diagrams invaluable as a restoration roadmap. They offer insights into the original design, helping in the accurate restoration of the 1968 Dodge Coronet GT Convertible to its former glory.</li>
</ul>
<p><strong>Q: Are the wiring diagrams complicated to understand for someone with limited technical knowledge?</strong></p>
<ul>
<li><strong>A:</strong> While they may seem complex at first glance, the diagrams are designed to be user-friendly. With a bit of patience and curiosity, even those with limited technical knowledge can grasp the basics and appreciate the engineering behind the Coronet GT Convertible.</li>
</ul>
<p><strong>Q: Can these diagrams be used for modern car modifications?</strong></p>
<ul>
<li><strong>A:</strong> While primarily intended for the 1968 Dodge Coronet GT Convertible, the principles depicted in the wiring diagrams can offer insights for general electrical understanding. However, for modern modifications, it's advisable to refer to specific diagrams tailored to the vehicle in question.</li>
</ul>
<p><strong>Q: Why do professionals emphasize the importance of accurate wiring based on these diagrams?</strong></p>
<ul>
<li><strong>A:</strong> Professionals stress accuracy because the wiring diagrams represent the original design intent. Accurate wiring ensures not only the functionality of the vehicle but also preserves its historical authenticity during restoration projects.</li>
</ul>
<p><strong>Q: Are there any online resources to access these wiring diagrams?</strong></p>
<ul>
<li><strong>A:</strong> Yes, various online platforms and automotive forums provide access to these wiring diagrams for enthusiasts and restorers. It's a great way to share knowledge, seek advice, and connect with a community passionate about classic cars.</li>
</ul>
<p><strong>Q: How do these wiring diagrams contribute to the overall charm of the 1968 Dodge Coronet GT Convertible?</strong></p>
<ul>
<li><strong>A:</strong> Beyond their technical significance, the diagrams contribute to the charm by revealing the meticulous craftsmanship and design aesthetics of 1968. They showcase the elegance that defines the Coronet GT Convertible, making them a visual delight for enthusiasts.</li>
</ul>
<p><strong>Q: Can novices use these diagrams for DIY projects?</strong></p>
<ul>
<li><strong>A:</strong> Absolutely! While some projects may require professional expertise, these wiring diagrams can be a valuable resource for novices embarking on DIY projects. They offer a learning opportunity and a chance to understand the electrical systems of classic cars.</li>
</ul><p> </p>
Keywords : 1968 DODGE CORONET GT CONVERTIBLE WIRING DIAGRAM IMAGESMilohttp://www.blogger.com/profile/01418902555588264834noreply@blogger.com0tag:blogger.com,1999:blog-4101198853060839868.post-17922280950765003772023-12-28T08:00:00.000-08:002024-01-21T14:33:03.493-08:00Revive Your Ride: Unveiling the Mystery of 1968 Dodge Coronet Factory AC Capillary Sensor Routing!<p> </p><p><article><figure><noscript><img src='https://tse1.mm.bing.net/th?q=Revive Your Ride: Unveiling the Mystery of 1968 Dodge Coronet Factory AC Capillary Sensor Routing!' alt='Revive Your Ride: Unveiling the Mystery of 1968 Dodge Coronet Factory AC Capillary Sensor Routing!' width='640' height='360' /></noscript><img class='v-cover ads-img' src='https://tse1.mm.bing.net/th?q=Revive Your Ride: Unveiling the Mystery of 1968 Dodge Coronet Factory AC Capillary Sensor Routing!' alt='Revive Your Ride: Unveiling the Mystery of 1968 Dodge Coronet Factory AC Capillary Sensor Routing!' width='100%' onerror='this.onerror=null;this.src='https://upload.wikimedia.org/wikipedia/commons/d/d1/Image_not_available.png?20210219185637';' style='margin-right: 8px;margin-bottom: 8px;' /></figure></article></p><blockquote>"Unlock the secrets of 1968 Dodge Coronet AC capillary sensor routing. Gain professional insights for optimal performance and a cool ride. Dive in now!"</blockquote><p> </p><b>1968 Dodge Coronet</b> owners, ever wondered about the secrets behind your classic's AC system? Well, buckle up because we're about to embark on a journey through time to unravel the enigma of the <i>capillary sensor routing</i>. Picture this: you, cruising down the open road in your vintage beauty, the wind in your hair, and the hum of the engine as your loyal companion. Now, imagine enhancing that experience with a deep dive into the intricacies of your car's factory AC system. In this conversational exploration, we'll navigate the twists and turns of the <b>1968 Dodge Coronet</b> and uncover the fascinating world of capillary sensor routing, bringing a touch of nostalgia and a dash of technical insight to your automotive adventure. Ready to rev up your curiosity? Let's hit the road!<p> </p><h4>Top 10 important point for '1968 DODGE CORONET FACTORY AC CAPILLARY SENSOR ROUTING'</h4><table cellpadding='0' cellspacing='0' class='tr-caption-container' style='float: right;'><tbody><tr><td style='text-align: center;'><img border='0' src='https://tse1.mm.bing.net/th?q=Top 10 '1968 DODGE CORONET FACTORY AC CAPILLARY SENSOR ROUTING'' width='200' /></td></tr><tr></tr></tbody></table> <ol>
<li>🕵️♂️ The AC Mystery Unveiled</li>
<li>🔍 Decoding Capillary Sensor Routes</li>
<li>⚙️ Journey into Vintage Cooling Tech</li>
<li>🚗 Behind the Wheel of '68 Coronet AC</li>
<li>🔧 Nuts and Bolts of Sensor Placement</li>
<li>🌬️ Revitalize Your Cool Factor</li>
<li>🔬 Tech Talk: Inside the Capillary System</li>
<li>🔧 DIY Tips for AC Optimization</li>
<li>🛠️ Mastering the Art of Sensor Routing</li>
<li>🎩 Retro Cool: Elevate Your Driving Experience</li>
</ol><p> </p><h5>Several Facts that you should know about '1968 DODGE CORONET FACTORY AC CAPILLARY SENSOR ROUTING'.</h5><h3>Unveiling the AC Enigma</h3>
<center><img src="https://tse1.mm.bing.net/th?q=AC Enigma 1968 Dodge Coronet" alt="AC Enigma"></center>
<p>Picture this: you're cruising in your '68 Dodge Coronet, windows down, wind in your hair, and suddenly, you wonder, "What on earth is happening with the AC?" Get ready to dive into the mysterious world of the <b>1968 Dodge Coronet factory AC capillary sensor routing</b>.</p>
<h3>Decoding Capillary Chaos</h3>
<center><img src="https://tse1.mm.bing.net/th?q=Decoding Capillary Chaos 1968 Dodge Coronet" alt="Capillary Chaos"></center>
<p>Hold on to your wrenches! We're about to decode the capillary chaos that happens behind the scenes. It's not just a maze of tubes; it's the secret dance of the AC system that keeps your cool factor intact.</p>
<h3>A Journey Back in Time</h3>
<center><img src="https://tse1.mm.bing.net/th?q=A Journey Back in Time 1968 Dodge Coronet" alt="Journey Back in Time"></center>
<p>Take a nostalgic journey back to the swinging '60s when the Dodge Coronet ruled the roads. Our time machine? The capillary sensor routing! Buckle up as we explore how they kept it cool, quite literally.</p>
<h3>The AC Chronicles</h3>
<center><img src="https://tse1.mm.bing.net/th?q=The AC Chronicles 1968 Dodge Coronet" alt="AC Chronicles"></center>
<p>Enter the riveting AC Chronicles, where we spill the beans on sensor sagas and routing tales. It's like a soap opera for your car, but with less drama and more refrigerant.</p>
<h3>DIY: Dodge It Yourself</h3>
<center><img src="https://tse1.mm.bing.net/th?q=DIY: Dodge It Yourself 1968 Dodge Coronet" alt="DIY"></center>
<p>Feeling adventurous? Learn the art of dodging AC disasters by doing it yourself. We'll share tips and tricks that even your toolbox didn't know existed. Spoiler alert: it involves more laughter than sweat.</p>
<h3>Retro Cool Hacks</h3>
<center><img src="https://tse1.mm.bing.net/th?q=Retro Cool Hacks 1968 Dodge Coronet" alt="Retro Cool Hacks"></center>
<p>Want to be the coolest cat on the block? We've got retro cool hacks that will make your AC system purr like a kitten. Bonus: Your Dodge Coronet might even wink at you appreciatively.</p>
<h3>The Tech Talk Tango</h3>
<center><img src="https://tse1.mm.bing.net/th?q=The Tech Talk Tango 1968 Dodge Coronet" alt="Tech Talk Tango"></center>
<p>Put on your dancing shoes as we waltz through the Tech Talk Tango. We'll demystify the tech jargon, so you'll be talking about capillary sensor routing like a pro. Impress your friends or confuse them—it's your choice!</p>
<h3>Parting Words: Stay Cool, Literally</h3>
<center><img src="https://tse1.mm.bing.net/th?q=Stay Cool Literally 1968 Dodge Coronet" alt="Stay Cool"></center>
<p>As we bid adieu, remember, the key to a happy Dodge Coronet life is staying cool—literally. Now that you're armed with capillary sensor wisdom, hit the road, and let the wind (and your AC) be your guide!</p><p> </p><h2>The Heartbeat of Vintage Comfort</h2>
<p>Welcome to the enchanting world of the <b>1968 Dodge Coronet</b>, where every rev of the engine carries whispers of a bygone era. As we embark on this journey, let's unravel the hidden gem within your classic beauty—the intricate dance of the <i>factory AC capillary sensor routing</i>. Nestled within the heart of your car, this system is more than just tubes and wires; it's the symphony that orchestrates your driving comfort.</p>
<h3>Peeling Back the Layers</h3>
<img src="https://tse1.mm.bing.net/th?q=Peeling Back the Layers 1968 Dodge Coronet" alt="Peeling Back the Layers">
<p>Like peeling back the layers of time, let's explore the <i>capillary sensor routing</i> that makes your vintage Dodge Coronet's air conditioning a marvel of its era. In the mechanics of these systems lies a story—a tale of innovation and design that set the stage for the comfort we often take for granted today.</p>
<h3>The Intricate Ballet of Tubes and Sensors</h3>
<img src="https://tse1.mm.bing.net/th?q=Intricate Ballet 1968 Dodge Coronet" alt="Intricate Ballet">
<p>Imagine a ballet, not on a grand stage, but beneath the hood of your car. The <i>capillary sensor routing</i> orchestrates a dance between tubes and sensors, gracefully ensuring that the cool breeze reaches every corner of your cherished vehicle. It's a performance that defines the comfort you've come to love.</p>
<h3>A Symphony of Comfort</h3>
<img src="https://tse1.mm.bing.net/th?q=Symphony of Comfort 1968 Dodge Coronet" alt="Symphony of Comfort">
<p>The comfort provided by your car's AC system is more than a luxury; it's a symphony. The <i>1968 Dodge Coronet factory AC capillary sensor routing</i> plays a pivotal role in this musical composition, ensuring that every note is a breeze of cool air, creating a harmonious driving experience.</p>
<h3>Engineering Marvel of Its Time</h3>
<img src="https://tse1.mm.bing.net/th?q=Engineering Marvel 1968 Dodge Coronet" alt="Engineering Marvel">
<p>Transport yourself back to the late '60s—a time of bold design and engineering marvels. Your Dodge Coronet, equipped with the factory AC system, was a testament to this era. The <i>capillary sensor routing</i>, though hidden from plain sight, represents a technological feat that added a touch of sophistication to your driving adventures.</p>
<h3>Behind the Wheel of Nostalgia</h3>
<img src="https://tse1.mm.bing.net/th?q=Behind the Wheel 1968 Dodge Coronet" alt="Behind the Wheel">
<p>As you sit behind the wheel, gripping it with a sense of nostalgia, remember that the <i>1968 Dodge Coronet factory AC capillary sensor routing</i> is working tirelessly to recreate the comfort and style of an era defined by its distinctive charm. It's not just a car; it's a time machine, transporting you to the golden days of motoring.</p>
<h3>The Evolution of Cool</h3>
<img src="https://tse1.mm.bing.net/th?q=Evolution of Cool 1968 Dodge Coronet" alt="Evolution of Cool">
<p>Coolness evolves, and so does the technology that brings it to your fingertips. The <i>capillary sensor routing</i> in your '68 Coronet is a piece of the puzzle that represents the evolution of automotive comfort. It's a nod to the ingenuity of the past and a bridge to the innovations that shape our driving experiences today.</p>
<h3>Preserving the Legacy</h3>
<img src="https://tse1.mm.bing.net/th?q=Preserving the Legacy 1968 Dodge Coronet" alt="Preserving the Legacy">
<p>Preservation is an art, and your classic Dodge Coronet is a masterpiece. The <i>capillary sensor routing</i> is not just a technical aspect; it's a piece of history. As enthusiasts, it's our duty to preserve and cherish these intricacies, ensuring that the legacy of the '68 Coronet lives on for generations to come.</p>
<h3>The Road Ahead</h3>
<img src="https://tse1.mm.bing.net/th?q=The Road Ahead 1968 Dodge Coronet" alt="The Road Ahead">
<p>As we navigate the roads of the present, let the <i>1968 Dodge Coronet factory AC capillary sensor routing</i> be a reminder that our journey is shaped by the whispers of the past. It's a road paved with nostalgia, comfort, and the subtle hum of a system that has stood the test of time.</p>
<p>So, fellow traveler, revel in the magic beneath your hood, appreciate the symphony of coolness, and let the <i>capillary sensor routing</i> be the heartbeat of your vintage comfort. Your '68 Dodge Coronet is not just a car; it's a story—a story told by the hum of the engine, the rush of the wind, and the dance of tubes and sensors working in harmony to keep you cool on the road of life.</p><p> </p><h6>Another point of view about '1968 DODGE CORONET FACTORY AC CAPILLARY SENSOR ROUTING'.</h6><p>In the realm of classic automobiles, the <b>1968 Dodge Coronet</b> stands as an icon, and beneath its hood lies a hidden marvel—the intricate ballet of the <i>factory AC capillary sensor routing</i>. Let's take a closer look at this automotive masterpiece from a journalist's perspective:</p>
<ol>
<li><p><b>The Historical Tapestry:</b> The year 1968 marked a pivotal moment in automotive history, and the Dodge Coronet, with its factory AC system, was a canvas on which technological innovations were painted.</p></li>
<li><p><b>The Capillary Choreography:</b> Picture this: under the hood, a carefully choreographed dance unfolds. Tubes and sensors perform a symphony, ensuring that the cool breeze reaches every nook and cranny of the vehicle, creating a comfort zone that was revolutionary for its time.</p></li>
<li><p><b>Engineering Marvel:</b> From an engineering standpoint, the <i>capillary sensor routing</i> of the '68 Coronet is a testament to the ingenuity of its creators. It wasn't just about providing cool air; it was about elevating the driving experience to new heights.</p></li>
<li><p><b>A Nod to Nostalgia:</b> As we delve into the capillary routing, it's impossible to ignore the nostalgia embedded in every inch of the system. It's like peeling back layers of time, revealing a technology that was cutting-edge in its era and continues to be a symbol of automotive elegance.</p></li>
<li><p><b>Behind the Wheel Experience:</b> Sitting behind the wheel of a '68 Dodge Coronet equipped with the factory AC system is akin to stepping into a time capsule. The hum of the engine, the scent of vintage leather, and the cool breeze—all orchestrated by the capillary routing—create an immersive driving experience.</p></li>
<li><p><b>Preserving Automotive Heritage:</b> Enthusiasts and collectors understand the importance of preserving automotive heritage. The <i>capillary sensor routing</i> is not just a technical aspect; it's a piece of history that warrants careful preservation for future generations of automotive connoisseurs.</p></li>
<li><p><b>Technical Brilliance Unveiled:</b> Peel back the layers, and you'll discover a technical brilliance that was ahead of its time. The capillary sensor routing, though concealed, is the unsung hero that ensured optimal cooling efficiency, proving that even in the intricate details, innovation thrives.</p></li>
<li><p><b>Road to Modern Comfort:</b> The capillary routing in the '68 Coronet paved the road to modern automotive comfort. Today's innovations owe a debt to the systems that laid the foundation, and understanding the intricacies of the capillary routing is like decoding the DNA of automotive evolution.</p></li>
</ol>
<p>In conclusion, the <i>1968 Dodge Coronet factory AC capillary sensor routing</i> is not just a technical component; it's a narrative woven into the fabric of automotive history. As we dissect its complexities, we gain a profound appreciation for the engineers who crafted a masterpiece that continues to captivate enthusiasts and define the essence of a bygone era.</p><p> </p><strong><u>Conclusion : Revive Your Ride: Unveiling the Mystery of 1968 Dodge Coronet Factory AC Capillary Sensor Routing!.</u></strong><p>As we wrap up our journey through the captivating world of the <u>1968 Dodge Coronet factory AC capillary sensor routing</u>, I hope you've enjoyed the ride as much as I have. It's fascinating to peel back the layers of automotive history and discover the hidden ballet that makes your classic '68 Coronet not just a car but a time capsule on wheels. The <em>capillary sensor routing</em> is the unsung hero, orchestrating a symphony of comfort that transcends time.</p>
<p>As you hit the road, whether behind the wheel of a vintage Coronet or simply reveling in the nostalgia from afar, remember that every rev of the engine, every whisper of the wind, is a testament to the ingenious technology of the past. The <u>1968 Dodge Coronet factory AC capillary sensor routing</u> isn't just a technical detail; it's a story—a story told through tubes and sensors, a story that continues to echo in the hum of your engine. So, here's to preserving automotive heritage, to keeping the cool breeze of the past alive, and to embracing the timeless elegance of the '68 Coronet. Until our next adventure on the road of classic wonders!</p><p> </p><p><article><figure><noscript><img src='https://tse1.mm.bing.net/th?q=Question and answer Revive Your Ride: Unveiling the Mystery of 1968 Dodge Coronet Factory AC Capillary Sensor Routing!' alt='Question and answer Revive Your Ride: Unveiling the Mystery of 1968 Dodge Coronet Factory AC Capillary Sensor Routing!' /></noscript><img class='v-cover ads-img' src='https://tse1.mm.bing.net/th?q=Question and answer Revive Your Ride: Unveiling the Mystery of 1968 Dodge Coronet Factory AC Capillary Sensor Routing!' alt='Question and answer Revive Your Ride: Unveiling the Mystery of 1968 Dodge Coronet Factory AC Capillary Sensor Routing!' width='100%' onerror='this.onerror=null;this.src='https://upload.wikimedia.org/wikipedia/commons/d/d1/Image_not_available.png?20210219185637';' style='margin-right: 8px;margin-bottom: 8px;' /></figure></article></p><p> </p><strong><i>Questions & Answer :</i></strong><p><strong>Q: What is the purpose of the capillary sensor routing in the 1968 Dodge Coronet factory AC system?</strong></p>
<ul>
<li>1. The capillary sensor routing serves as the intricate network that regulates the flow of refrigerant in the AC system.</li>
<li>2. Its primary purpose is to ensure that the cool air generated by the system reaches every part of your '68 Coronet, providing optimal comfort.</li>
</ul>
<p><strong>Q: How does the capillary sensor routing contribute to the overall driving experience?</strong></p>
<ul>
<li>1. The capillary sensor routing plays a crucial role in creating a comfortable driving environment by maintaining a consistent and efficient cooling process.</li>
<li>2. It enhances the overall driving experience by ensuring that the temperature inside the vehicle remains pleasant, regardless of external conditions.</li>
</ul>
<p><strong>Q: Is understanding the capillary sensor routing important for car enthusiasts?</strong></p>
<ul>
<li>1. Absolutely! For car enthusiasts, understanding the capillary sensor routing adds a layer of appreciation for the engineering behind the '68 Coronet's factory AC system.</li>
<li>2. It allows enthusiasts to grasp the intricacies of vintage automotive technology and enhances their ability to maintain and appreciate classic cars.</li>
</ul>
<p><strong>Q: Can issues with the capillary sensor routing affect the performance of the AC system?</strong></p>
<ul>
<li>1. Yes, issues with the capillary sensor routing can impact the efficiency of the AC system, leading to uneven cooling or, in some cases, a complete malfunction.</li>
<li>2. Regular maintenance and prompt addressing of any routing issues are essential to ensure the longevity and optimal performance of your '68 Coronet's AC system.</li>
</ul>
<p><strong>Q: Are there DIY tips for maintaining the capillary sensor routing?</strong></p>
<ul>
<li>1. While complex issues may require professional attention, car enthusiasts can ensure proper maintenance by keeping the routing free from debris and checking for any visible signs of wear.</li>
<li>2. Performing routine inspections and addressing minor issues promptly can contribute to the longevity and efficiency of the capillary sensor routing in the '68 Dodge Coronet's AC system.</li>
</ul><p> </p>
Keywords : '1968 DODGE CORONET FACTORY AC CAPILLARY SENSOR ROUTING'Milohttp://www.blogger.com/profile/01418902555588264834noreply@blogger.com0tag:blogger.com,1999:blog-4101198853060839868.post-85839791777024759262023-12-26T21:00:00.000-08:002024-01-21T14:33:03.817-08:00Dive into the Past: Unveiling the 1968 Dodge Coronet 500 Wiring Secrets with Our Schematic Book!<p> </p><p><article><figure><noscript><img src='https://tse1.mm.bing.net/th?q=Dive into the Past: Unveiling the 1968 Dodge Coronet 500 Wiring Secrets with Our Schematic Book!' alt='Dive into the Past: Unveiling the 1968 Dodge Coronet 500 Wiring Secrets with Our Schematic Book!' width='640' height='360' /></noscript><img class='v-cover ads-img' src='https://tse1.mm.bing.net/th?q=Dive into the Past: Unveiling the 1968 Dodge Coronet 500 Wiring Secrets with Our Schematic Book!' alt='Dive into the Past: Unveiling the 1968 Dodge Coronet 500 Wiring Secrets with Our Schematic Book!' width='100%' onerror='this.onerror=null;this.src='https://upload.wikimedia.org/wikipedia/commons/d/d1/Image_not_available.png?20210219185637';' style='margin-right: 8px;margin-bottom: 8px;' /></figure></article></p><blockquote>Unlock the secrets of your 1968 Dodge Coronet 500 with our comprehensive wiring schematic book. Navigate with confidence, harnessing professional insights for a seamless restoration journey.</blockquote><p> </p>Embark on a journey through time with our <b>1968 Dodge Coronet 500 wiring schematic book</b>, a treasure trove of automotive ingenuity waiting to be unraveled. Picture this: as you flip through the pages, <i>creative</i> engineering unfolds, revealing the intricate dance of wires that brought this classic beauty to life. This isn't just a manual; it's a portal to the past, where each connection tells a story of innovation and craftsmanship. Brace yourself for a <i>creative</i> adventure as we decode the vehicular poetry etched within these pages, bringing the 1968 Dodge Coronet 500 roaring back to life in your imagination.<p> </p><h4>Top 10 important point for '1968 DODGE CORONET 500 WIRING SCHEMATIC BOOK'</h4><table cellpadding='0' cellspacing='0' class='tr-caption-container' style='float: right;'><tbody><tr><td style='text-align: center;'><img border='0' src='https://tse1.mm.bing.net/th?q=Top 10 '1968 DODGE CORONET 500 WIRING SCHEMATIC BOOK'' width='200' /></td></tr><tr></tr></tbody></table> <ol>
<li>Comprehensive Wiring Insights</li>
<li>Expert-Verified Schematics</li>
<li>Precision Restoration Guidance</li>
<li>Systematic Circuit Breakdowns</li>
<li>Optimized Electrical Performance</li>
<li>Time-Tested Restoration Strategies</li>
<li>Professional Tips and Tricks</li>
<li>Efficient Troubleshooting Techniques</li>
<li>Enhanced Safety Measures</li>
<li>Seamless Integration Instructions</li>
</ol><p> </p><h5>Several Facts that you should know about '1968 DODGE CORONET 500 WIRING SCHEMATIC BOOK'.</h5><h3>Unveiling Automotive History</h3>
<center><img src="https://tse1.mm.bing.net/th?q=Unveiling+Automotive+History+1968+dodge+coronet+500+wiring+schematic+book" alt="Unveiling Automotive History"></center>
<p>Embark on a historical journey with our <b>1968 Dodge Coronet 500 Wiring Schematic Book</b>, designed to unravel the intricate tapestry of automotive engineering from a bygone era.</p>
<h3>Expert-Verified Schematics</h3>
<center><img src="https://tse1.mm.bing.net/th?q=Expert-Verified+Schematics+1968+dodge+coronet+500+wiring+schematic+book" alt="Expert-Verified Schematics"></center>
<p>Trust in the precision of our expert-verified schematics, meticulously crafted to guide you through the labyrinth of wires in your 1968 Dodge Coronet 500.</p>
<h3>Step-by-Step Restoration Guidance</h3>
<center><img src="https://tse1.mm.bing.net/th?q=Step-by-Step+Restoration+Guidance+1968+dodge+coronet+500+wiring+schematic+book" alt="Step-by-Step Restoration Guidance"></center>
<p>Follow our step-by-step instructions for a seamless restoration experience, ensuring every wire is placed with the accuracy demanded by automotive professionals.</p>
<h3>Efficient Troubleshooting Techniques</h3>
<center><img src="https://tse1.mm.bing.net/th?q=Efficient+Troubleshooting+Techniques+1968+dodge+coronet+500+wiring+schematic+book" alt="Efficient Troubleshooting Techniques"></center>
<p>Encounter issues? Our guide provides efficient troubleshooting techniques, arming you with the knowledge to diagnose and rectify electrical glitches with finesse.</p>
<h3>Optimized Electrical Performance</h3>
<center><img src="https://tse1.mm.bing.net/th?q=Optimized+Electrical+Performance+1968+dodge+coronet+500+wiring+schematic+book" alt="Optimized Electrical Performance"></center>
<p>Learn how to optimize the electrical performance of your classic vehicle, ensuring a smooth and reliable driving experience that stays true to its 1968 roots.</p>
<h3>Professional Tips and Tricks</h3>
<center><img src="https://tse1.mm.bing.net/th?q=Professional+Tips+and+Tricks+1968+dodge+coronet+500+wiring+schematic+book" alt="Professional Tips and Tricks"></center>
<p>Gain access to a treasure trove of professional tips and tricks, empowering you with insider knowledge to elevate your restoration project to the next level.</p>
<h3>Enhanced Safety Measures</h3>
<center><img src="https://tse1.mm.bing.net/th?q=Enhanced+Safety+Measures+1968+dodge+coronet+500+wiring+schematic+book" alt="Enhanced Safety Measures"></center>
<p>Our guide prioritizes safety, offering insights into enhanced safety measures to ensure that your restored 1968 Dodge Coronet 500 not only performs well but also keeps you secure on the road.</p>
<h3>Seamless Integration Instructions</h3>
<center><img src="https://tse1.mm.bing.net/th?q=Seamless+Integration+Instructions+1968+dodge+coronet+500+wiring+schematic+book" alt="Seamless Integration Instructions"></center>
<p>Discover the art of seamless integration with our comprehensive instructions, guiding you through the process of integrating the wiring schematics effortlessly into your restoration project.</p><p> </p><h2>The Journey Through Time</h2>
<center><img src="https://tse1.mm.bing.net/th?q=The+Journey+Through+Time+1968+dodge+coronet+500+wiring+schematic+book" alt="The Journey Through Time"></center>
<p>Embark on a captivating journey through automotive history with our <b>1968 Dodge Coronet 500 Wiring Schematic Book</b>. This comprehensive guide is your portal to the past, where the intricate details of the Coronet 500's wiring system come to life. As we delve into the depths of this classic beauty's electrical architecture, you'll discover a wealth of insights that will guide you through the restoration process with precision and expertise.</p>
<h2>Expert-Verified Schematics</h2>
<center><img src="https://tse1.mm.bing.net/th?q=Expert-Verified+Schematics+1968+dodge+coronet+500+wiring+schematic+book" alt="Expert-Verified Schematics"></center>
<p>One of the hallmarks of our guide is the inclusion of expert-verified schematics. These diagrams are not just blueprints; they are the result of meticulous scrutiny by automotive professionals who understand the intricacies of the 1968 Dodge Coronet 500's wiring system. With these schematics at your disposal, you can confidently navigate the labyrinth of wires, ensuring that each connection is made with the precision demanded by seasoned experts.</p>
<h3>Understanding the Blueprint</h3>
<center><img src="https://tse1.mm.bing.net/th?q=Understanding+the+Blueprint+1968+dodge+coronet+500+wiring+schematic+book" alt="Understanding the Blueprint"></center>
<p>Before diving into the hands-on aspects of the restoration, it's crucial to understand the blueprint laid out in the wiring schematics. These detailed diagrams provide a roadmap of the electrical pathways within the Coronet 500. Take the time to familiarize yourself with each component, connection, and circuit. This foundational knowledge will serve as your guiding light throughout the restoration process, ensuring that you approach each step with confidence and clarity.</p>
<h2>Step-by-Step Restoration Guidance</h2>
<center><img src="https://tse1.mm.bing.net/th?q=Step-by-Step+Restoration+Guidance+1968+dodge+coronet+500+wiring+schematic+book" alt="Step-by-Step Restoration Guidance"></center>
<p>With the blueprint in hand, it's time to embark on the restoration journey. Our guide provides comprehensive, step-by-step instructions that transform the seemingly complex task of rewiring a classic vehicle into a systematic and manageable process. Whether you're a seasoned enthusiast or a novice in the world of automotive restoration, these instructions act as your trusted companion, offering a clear path to success.</p>
<h3>From Chaos to Order</h3>
<center><img src="https://tse1.mm.bing.net/th?q=From+Chaos+to+Order+1968+dodge+coronet+500+wiring+schematic+book" alt="From Chaos to Order"></center>
<p>Restoring the wiring of a 1968 Dodge Coronet 500 may initially seem like navigating through chaos. However, our step-by-step guidance transforms this chaos into order. Each instruction is crafted with precision, ensuring that you proceed with confidence, knowing that every action contributes to the overall restoration objective. It's not just about connecting wires; it's about orchestrating a symphony of electrical components that brings the Coronet 500 back to life.</p>
<h2>Efficient Troubleshooting Techniques</h2>
<center><img src="https://tse1.mm.bing.net/th?q=Efficient+Troubleshooting+Techniques+1968+dodge+coronet+500+wiring+schematic+book" alt="Efficient Troubleshooting Techniques"></center>
<p>Even with the most meticulous planning, challenges may arise during the restoration process. Our guide equips you with efficient troubleshooting techniques, empowering you to identify and address issues with precision. From identifying a faulty connection to diagnosing more complex electrical problems, these techniques are the result of years of collective expertise, providing you with the skills needed to navigate any roadblock that may emerge.</p>
<h3>Diagnosing the Heart of the Issue</h3>
<center><img src="https://tse1.mm.bing.net/th?q=Diagnosing+the+Heart+of+the+Issue+1968+dodge+coronet+500+wiring+schematic+book" alt="Diagnosing the Heart of the Issue"></center>
<p>When faced with an electrical issue, it's essential to diagnose the heart of the problem. Our guide goes beyond surface-level solutions, teaching you how to delve into the intricacies of the Coronet 500's wiring system. With a systematic approach to diagnostics, you'll be able to identify not only the symptoms but also the underlying causes, ensuring a thorough and effective resolution to any issues that may arise.</p>
<h2>Optimized Electrical Performance</h2>
<center><img src="https://tse1.mm.bing.net/th?q=Optimized+Electrical+Performance+1968+dodge+coronet+500+wiring+schematic+book" alt="Optimized Electrical Performance"></center>
<p>Restoring a classic vehicle isn't just about ensuring it runs; it's about optimizing its performance to meet and exceed its original specifications. Our guide provides insights into how you can achieve optimized electrical performance, allowing your 1968 Dodge Coronet 500 to not only function reliably but to do so with the efficiency and prowess expected of a classic beauty.</p>
<h3>Beyond Restoration: A Performance Upgrade</h3>
<center><img src="https://tse1.mm.bing.net/th?q=Beyond+Restoration:+A+Performance+Upgrade+1968+dodge+coronet+500+wiring+schematic+book" alt="Beyond Restoration: A Performance Upgrade"></center>
<p>While the primary focus is on restoration, our guide takes it a step further by guiding you on how to turn this process into a performance upgrade. Discover tweaks and enhancements that not only bring the Coronet 500 back to its original glory but elevate its performance to new heights. It's not just about nostalgia; it's about crafting a driving experience that seamlessly merges the classic with the contemporary.</p>
<h2>Professional Tips and Tricks</h2>
<center><img src="https://tse1.mm.bing.net/th?q=Professional+Tips+and+Tricks+1968+dodge+coronet+500+wiring+schematic+book" alt="Professional Tips and Tricks"></center>
<p>As you navigate the restoration and optimization process, our guide doesn't just provide instructions; it shares professional tips and tricks that can make a significant difference. These nuggets of wisdom come from seasoned experts who have not only studied the Coronet 500's wiring system but have also spent countless hours in the garage, turning restoration projects into works of art.</p>
<h3>Insider Knowledge Unveiled</h3>
<center><img src="https://tse1.mm.bing.net/th?q=Insider+Knowledge+Unveiled+1968+dodge+coronet+500+wiring+schematic+book<p> </p><h6>Another point of view about '1968 DODGE CORONET 500 WIRING SCHEMATIC BOOK'.</h6><p>1. **Comprehensive Guidance:** The 1968 Dodge Coronet 500 Wiring Schematic Book provides a comprehensive roadmap for enthusiasts delving into the intricacies of their vehicle's electrical system.Expert-Verified Accuracy: Rest assured with expert-verified schematics that have undergone meticulous scrutiny, ensuring accuracy in every detail of the Coronet 500's wiring configuration.Blueprint Understanding: Start by understanding the blueprint laid out in the wiring schematics. This foundational knowledge serves as a crucial guide throughout the restoration process.Step-by-Step Restoration: Follow step-by-step instructions that transform the seemingly complex task of rewiring into a systematic and manageable process, suitable for both seasoned enthusiasts and novices.Order from Chaos: The guide transforms the chaos of restoring the wiring system into a methodical order. Each instruction contributes to the overall restoration objective, turning what may seem intricate into a manageable task.Efficient Troubleshooting: Equip yourself with efficient troubleshooting techniques to identify and address issues with precision, ensuring a smooth restoration journey.Diagnosis Expertise: Learn to diagnose the heart of electrical issues. The guide goes beyond surface-level solutions, teaching a systematic approach to identify and address both symptoms and root causes.Optimized Performance: Beyond mere restoration, gain insights into optimizing the electrical performance of your Coronet 500, ensuring it operates with the efficiency and prowess expected of a classic beauty.Performance Upgrade Tips: Discover tips for turning the restoration process into a performance upgrade, seamlessly merging classic aesthetics with contemporary driving capabilities.Professional Insights: Benefit from professional tips and tricks that go beyond basic instructions, offering insider knowledge from experts who have dedicated substantial time to understanding and enhancing the Coronet 500's wiring system. </p><p> </p><strong><u>Conclusion : Dive into the Past: Unveiling the 1968 Dodge Coronet 500 Wiring Secrets with Our Schematic Book!.</u></strong><p>As we conclude this journey through the intricacies of the <u><em>1968 Dodge Coronet 500 wiring schematic book</em></u>, I invite you to envision the transformation awaiting your classic beauty. Armed with expert-verified schematics, you now hold the key to unlocking the hidden stories within each wire. The blueprint, once a puzzle, becomes a map guiding you through a restoration adventure that transcends the ordinary. Every page of the guide is a portal to the past, where the <u><em>1968 Dodge Coronet 500</em></u> comes to life, not just as a vintage vehicle but as a testament to the harmonious dance of wires that defined an era.</p>
<p>As you embark on this journey, remember that restoring a classic goes beyond technicalities; it's an art. The <u><em>1968 Dodge Coronet 500 wiring schematic book</em></u> isn't just a manual; it's a creative canvas awaiting your expertise. From unraveling the chaos to orchestrating a symphony of electrical components, each step is an opportunity to breathe life into automotive history. So, fellow enthusiasts, may your restoration be as vibrant as the era it hails from, and may the road ahead be illuminated by the glow of a meticulously restored Coronet 500.</p><p> </p><p><article><figure><noscript><img src='https://tse1.mm.bing.net/th?q=Question and answer Dive into the Past: Unveiling the 1968 Dodge Coronet 500 Wiring Secrets with Our Schematic Book!' alt='Question and answer Dive into the Past: Unveiling the 1968 Dodge Coronet 500 Wiring Secrets with Our Schematic Book!' /></noscript><img class='v-cover ads-img' src='https://tse1.mm.bing.net/th?q=Question and answer Dive into the Past: Unveiling the 1968 Dodge Coronet 500 Wiring Secrets with Our Schematic Book!' alt='Question and answer Dive into the Past: Unveiling the 1968 Dodge Coronet 500 Wiring Secrets with Our Schematic Book!' width='100%' onerror='this.onerror=null;this.src='https://upload.wikimedia.org/wikipedia/commons/d/d1/Image_not_available.png?20210219185637';' style='margin-right: 8px;margin-bottom: 8px;' /></figure></article></p><p> </p><strong><i>Questions & Answer :</i></strong><p><strong>Q: What does the 1968 Dodge Coronet 500 Wiring Schematic Book offer?</strong></p>
<ul>
<li>1. <em>Comprehensive Guidance:</em> The book provides a detailed roadmap for understanding and working with the Coronet 500's intricate wiring system.</li>
<li>2. <em>Expert-Verified Schematics:</em> Expect accuracy with schematics verified by automotive professionals, ensuring every detail aligns with the original specifications.</li>
<li>3. <em>Step-by-Step Instructions:</em> Whether you're a novice or an expert, the guide offers clear, step-by-step instructions, making the rewiring process manageable for all enthusiasts.</li>
</ul>
<p><strong>Q: How does it simplify troubleshooting?</strong></p>
<ul>
<li>1. <em>Efficient Troubleshooting Techniques:</em> The guide equips users with efficient techniques, helping to identify and resolve issues with precision, saving time and minimizing frustration.</li>
<li>2. <em>Diagnosis Expertise:</em> Learn to diagnose the root causes of problems, going beyond surface-level solutions and ensuring a thorough resolution to any electrical issues.</li>
</ul>
<p><strong>Q: Can it enhance the performance of the Coronet 500?</strong></p>
<ul>
<li>1. <em>Optimized Electrical Performance:</em> The guide offers insights into optimizing the Coronet 500's electrical performance, ensuring it operates with the efficiency expected of a classic vehicle.</li>
<li>2. <em>Performance Upgrade Tips:</em> Discover tips for turning the restoration process into a performance upgrade, blending classic aesthetics with contemporary driving capabilities.</li>
</ul>
<p><strong>Q: Is this guide suitable for both experienced enthusiasts and beginners?</strong></p>
<ul>
<li>Yes, absolutely! The <u><em>1968 Dodge Coronet 500 Wiring Schematic Book</em></u> caters to enthusiasts of all levels. Whether you're a seasoned pro or just starting, the clear instructions and expert insights make it accessible and valuable for everyone.</li>
</ul><p> </p>
Keywords : '1968 DODGE CORONET 500 WIRING SCHEMATIC BOOK'Milohttp://www.blogger.com/profile/01418902555588264834noreply@blogger.com0tag:blogger.com,1999:blog-4101198853060839868.post-17394239436519185182023-12-25T10:00:00.000-08:002024-01-21T14:33:04.141-08:00Revamp Your Ride: Unveiling the Ultimate 1968 Camaro Interior Wiring Diagram for Seamless Style and Performance!<p> </p><p><article><figure><noscript><img src='https://tse1.mm.bing.net/th?q=Revamp Your Ride: Unveiling the Ultimate 1968 Camaro Interior Wiring Diagram for Seamless Style and Performance!' alt='Revamp Your Ride: Unveiling the Ultimate 1968 Camaro Interior Wiring Diagram for Seamless Style and Performance!' width='640' height='360' /></noscript><img class='v-cover ads-img' src='https://tse1.mm.bing.net/th?q=Revamp Your Ride: Unveiling the Ultimate 1968 Camaro Interior Wiring Diagram for Seamless Style and Performance!' alt='Revamp Your Ride: Unveiling the Ultimate 1968 Camaro Interior Wiring Diagram for Seamless Style and Performance!' width='100%' onerror='this.onerror=null;this.src='https://upload.wikimedia.org/wikipedia/commons/d/d1/Image_not_available.png?20210219185637';' style='margin-right: 8px;margin-bottom: 8px;' /></figure></article></p><blockquote>"Master your 1968 Camaro's interior wiring with precision. Unlock professional insights for a flawless restoration. Elevate your ride with confidence!"</blockquote><p> </p>Unlock the secrets of your classic 1968 Camaro's interior with our meticulously crafted <b>wiring diagram</b>. Seamlessly navigate the intricate web of connections as our detailed <i>instructions</i> guide you through each circuit, illuminating a path to a vintage masterpiece. Transform your ride with confidence, armed with the knowledge to conquer any electrical challenge. From the heart of the engine to the dashboard controls, our <i>wiring diagram</i> is your indispensable companion, ensuring a smooth and reliable journey through the restoration process. Elevate your driving experience and bring your Camaro's interior to life with our expertly curated guide.<p> </p><h4>Top 10 important point for '1968 CAMARO INTERIOR WIRING DIAGRAM'</h4><table cellpadding='0' cellspacing='0' class='tr-caption-container' style='float: right;'><tbody><tr><td style='text-align: center;'><img border='0' src='https://tse1.mm.bing.net/th?q=Top 10 '1968 CAMARO INTERIOR WIRING DIAGRAM'' width='200' /></td></tr><tr></tr></tbody></table> <ol>
<li>Decoding the Wire Jungle: A Safari Through Your Camaro's Interior</li>
<li>Wire Wrestling 101: Taming the Wild Cables of '68</li>
<li>Electric Ballet: Your Camaro's Dance Floor Revealed</li>
<li>Spaghetti No More: Untangling the Mysteries of Interior Wiring</li>
<li>Lights, Camera, Action! Your Camaro's Interior Wiring Premiere</li>
<li>Shock Therapy: Electrifying Insights for a Sparkling Interior</li>
<li>Camaro Whisperer: Understanding the Secret Language of Wires</li>
<li>Ohm Sweet Ohm: Navigating the Zen of '68 Camaro Wiring</li>
<li>Confessions of a Wireaholic: Rehabilitating Your Camaro's Interior</li>
<li>Wires Gone Wild: A Comedy of Errors in the Camaro Chronicles</li>
</ol><p> </p><h5>Several Facts that you should know about '1968 CAMARO INTERIOR WIRING DIAGRAM'.</h5><h3>Embarking on a Nostalgic Journey</h3>
<center><img src="https://tse1.mm.bing.net/th?q=Embarking+on+a+Nostalgic+Journey+1968+Camaro+interior+wiring+diagram" alt="Nostalgic Journey Image"></center>
<p>Welcome to a journey back in time as we delve into the intricacies of the '1968 Camaro Interior Wiring Diagram.' Embrace the nostalgia of classic automotive craftsmanship and discover the heart and soul of your beloved Camaro through its wiring intricacies.</p>
<h3>Deciphering the Blueprint of Elegance</h3>
<center><img src="https://tse1.mm.bing.net/th?q=Deciphering+the+Blueprint+of+Elegance+1968+Camaro+interior+wiring+diagram" alt="Blueprint of Elegance Image"></center>
<p>Unravel the elegant blueprint that defines the interior of your '68 Camaro. Our wiring diagram serves as a guide to decode the intricate language of wires, providing insight into the beauty hidden beneath the surface.</p>
<h3>Guided by Expert Hands</h3>
<center><img src="https://tse1.mm.bing.net/th?q=Guided+by+Expert+Hands+1968+Camaro+interior+wiring+diagram" alt="Guided by Expert Hands Image"></center>
<p>Feel the assurance of being guided by the hands of experts. Our comprehensive wiring diagram offers step-by-step instructions, ensuring that you navigate the complexities with ease, transforming your Camaro with professional finesse.</p>
<h3>Electrifying Your Ride with Confidence</h3>
<center><img src="https://tse1.mm.bing.net/th?q=Electrifying+Your+Ride+with+Confidence+1968+Camaro+interior+wiring+diagram" alt="Electrifying Your Ride Image"></center>
<p>Infuse your ride with confidence as you master the art of electrifying your '68 Camaro's interior. Gain the knowledge to handle every connection and wire, turning potential challenges into opportunities for enhancing your driving experience.</p>
<h3>Illuminate the Path to Restoration</h3>
<center><img src="https://tse1.mm.bing.net/th?q=Illuminate+the+Path+to+Restoration+1968+Camaro+interior+wiring+diagram" alt="Illuminate the Path Image"></center>
<p>Let the light of understanding illuminate your path to restoration. Our wiring diagram acts as a beacon, guiding you through the restoration process, ensuring that every wire contributes to the brilliance of your Camaro's interior.</p>
<h3>Revolutionizing Your Connection with the Past</h3>
<center><img src="https://tse1.mm.bing.net/th?q=Revolutionizing+Your+Connection+with+the+Past+1968+Camaro+interior+wiring+diagram" alt="Connection with the Past Image"></center>
<p>Experience a revolutionary connection with the past as you explore the inner workings of your Camaro's interior. The wiring diagram becomes a time machine, allowing you to bridge the gap between then and now, connecting with the essence of classic automotive design.</p>
<h3>Crafting Memories with Every Connection</h3>
<center><img src="https://tse1.mm.bing.net/th?q=Crafting+Memories+with+Every+Connection+1968+Camaro+interior+wiring+diagram" alt="Crafting Memories Image"></center>
<p>Transform the process of wiring into a memorable experience. Each connection becomes a thread weaving the fabric of memories associated with your Camaro. Craft a narrative that goes beyond functionality, infusing soul into your classic ride.</p>
<h3>Empowering Your Camaro, Empowering You</h3>
<center><img src="https://tse1.mm.bing.net/th?q=Empowering+Your+Camaro,+Empowering+You+1968+Camaro+interior+wiring+diagram" alt="Empowering Your Camaro Image"></center>
<p>Experience empowerment not just for your Camaro but for yourself. Our wiring diagram transcends the technical, instilling a sense of mastery and pride as you take control of your vehicle's interior. Empower your journey with knowledge, skill, and the joy of restoration.</p><p> </p><h2>The Historical Significance of the 1968 Camaro</h2>
<center><img src="https://tse1.mm.bing.net/th?q=The+Historical+Significance+of+the+1968+Camaro" alt="Historical Significance Image"></center>
<p>The introduction of the 1968 Camaro marked a pivotal moment in automotive history. As we delve into the intricacies of the <i>1968 Camaro interior wiring diagram</i>, it is imperative to first understand the historical significance of this iconic vehicle. The Camaro, introduced by Chevrolet as a response to the Ford Mustang, quickly became a symbol of American muscle cars during the golden era of the late 1960s.</p>
<p>The 1968 model year brought forth significant design changes, distinguishing it from its predecessors. A sleek exterior, powerful engine options, and a focus on performance elevated the Camaro to a status that transcended mere transportation. The interior, a critical component of the overall design, underwent changes to accommodate both functionality and aesthetics.</p>
<h2>The Anatomy of Automotive Wiring Systems</h2>
<center><img src="https://tse1.mm.bing.net/th?q=The+Anatomy+of+Automotive+Wiring+Systems" alt="Anatomy of Automotive Wiring Image"></center>
<p>Before delving into the specifics of the <i>1968 Camaro interior wiring diagram</i>, it is essential to comprehend the fundamental principles of automotive wiring systems. A vehicle's wiring system serves as its nervous system, facilitating communication and coordination among various components. Wires act as conduits for electrical signals, ensuring the seamless operation of essential functions such as lighting, ignition, and instrumentation.</p>
<p>The complexity of automotive wiring has evolved over the years, adapting to technological advancements and the increasing integration of electronic components. Modern vehicles, including classic models like the 1968 Camaro, feature intricate wiring systems designed for optimal performance and safety.</p>
<h3>The Evolution of Wiring Diagrams</h3>
<center><img src="https://tse1.mm.bing.net/th?q=The+Evolution+of+Wiring+Diagrams" alt="Evolution of Wiring Diagrams Image"></center>
<p>Wiring diagrams play a crucial role in understanding and troubleshooting a vehicle's electrical system. In the context of the 1968 Camaro, these diagrams provide a visual representation of the intricate network of wires that run through the interior. Over the years, the format and presentation of wiring diagrams have evolved, aligning with technological advancements and the need for comprehensive documentation.</p>
<p>Early wiring diagrams were rudimentary, often resembling basic schematics with limited details. However, as vehicles became more complex, so did the wiring diagrams. Modern diagrams incorporate color-coding, detailed labeling, and symbols to represent various components and their connections. This evolution has significantly enhanced the accessibility and interpretability of wiring diagrams, empowering both automotive enthusiasts and professionals alike.</p>
<h3>Importance of the 1968 Camaro Interior Wiring Diagram</h3>
<center><img src="https://tse1.mm.bing.net/th?q=Importance+of+the+1968+Camaro+Interior+Wiring+Diagram" alt="Importance of Wiring Diagram Image"></center>
<p>Understanding the <i>1968 Camaro interior wiring diagram</i> holds immense importance for enthusiasts, restorers, and technicians alike. The wiring diagram serves as a comprehensive guide to the electrical system of the vehicle, offering insights into the placement and function of each wire and component. This knowledge is paramount during restoration projects, diagnostics, and modifications.</p>
<p>For enthusiasts seeking an authentic restoration of their 1968 Camaro, the wiring diagram is a blueprint that ensures every wire is placed precisely as it was in the original design. This attention to detail not only preserves the historical accuracy of the vehicle but also contributes to its overall functionality and performance.</p>
<p>From a diagnostic perspective, the wiring diagram is an invaluable tool. When electrical issues arise, referencing the diagram allows technicians to trace the path of the malfunction, identify faulty components, and expedite the repair process. This level of precision minimizes downtime and enhances the efficiency of troubleshooting procedures.</p>
<h2>The Components of the 1968 Camaro Interior Wiring System</h2>
<center><img src="https://tse1.mm.bing.net/th?q=The+Components+of+the+1968+Camaro+Interior+Wiring+System" alt="Components of Wiring System Image"></center>
<p>Now, let's dissect the various components that constitute the <i>1968 Camaro interior wiring diagram</i>. Each element plays a crucial role in ensuring the seamless operation of the vehicle's electrical system.</p>
<h3>1. Dashboard and Instrumentation Wiring</h3>
<center><img src="https://tse1.mm.bing.net/th?q=Dashboard+and+Instrumentation+Wiring+1968+Camaro" alt="Dashboard and Instrumentation Wiring Image"></center>
<p>The dashboard and instrumentation wiring is responsible for connecting the various gauges, indicators, and controls on the Camaro's dashboard. This includes the speedometer, fuel gauge, temperature gauge, and other vital indicators. The wiring diagram delineates the pathways for electrical signals to travel, ensuring accurate readings and responsiveness of these essential components.</p>
<h3>2. Lighting Systems Wiring</h3>
<center><img src="https://tse1.mm.bing.net/th?q=Lighting+Systems+Wiring+1968+Camaro" alt="Lighting Systems Wiring Image"></center>
<p>The lighting systems wiring encompasses the intricate network of wires responsible for the Camaro's lighting functionalities. This includes headlights, taillights, brake lights, turn signals, and interior lighting. The wiring diagram meticulously outlines the connections, ensuring proper illumination and compliance with safety standards.</p>
<h3>3. Power Window and Door Lock Wiring</h3>
<center><img src="https://tse1.mm.bing.net/th?q=Power+Window+and+Door+Lock+Wiring+1968+Camaro" alt="Power Window and Door Lock Wiring Image"></center>
<p>For Camaros equipped with power windows and door locks, a specific section of the wiring diagram is dedicated to these components. The diagram elucidates the pathways for electrical signals that control the operation of power windows and door locks, contributing to the convenience and modernity of the vehicle.</p>
<h3>4. Heating and Air Conditioning Wiring</h3>
<center><img src="https://tse1.mm.bing.net/th?q=Heating+and+Air+Conditioning+Wiring+1968+Camaro" alt="Heating and Air Conditioning Wiring Image"></center>
<p>The heating and air conditioning wiring is integral to maintaining a comfortable interior environment. The wiring diagram outlines the connections for the blower motor, temperature controls, and compressor, ensuring efficient climate control within the Camaro. This section is particularly vital for a holistic understanding of the vehicle's interior functionality.</p>
<h3>5. Audio System Wiring</h3>
<center><img src="https://tse1.mm.bing.net/th?q=Audio+System+Wiring+1968+Camaro" alt="Audio System Wiring Image"></center>
<p>For those enthusiasts who appreciate the auditory experience of driving, the audio system wiring is a crucial<p> </p><h6>Another point of view about '1968 CAMARO INTERIOR WIRING DIAGRAM'.</h6><p>So, you've got yourself a classic 1968 Camaro, and now you're diving into the world of the interior wiring diagram. Let me tell you, it's more than just a bunch of lines and circles on a page. Here's my take on the 1968 Camaro interior wiring diagram:</p>
<ul>
<li><p><strong>Decoding the Puzzle:</strong> At first glance, it might seem like a maze of wires, but think of it as the Camaro's secret code. The wiring diagram is your decoder ring, unraveling the mystery of what goes where.</p></li>
<li><p><strong>A Trip Down Memory Lane:</strong> There's something nostalgic about tracing those wires back to the '68 era. It's like you're on a journey through time, connecting with the craftsmanship and design of a bygone automotive era.</p></li>
<li><p><strong>Empowerment in Your Hands:</strong> Holding that wiring diagram is like holding the power to transform your Camaro. You're not just fixing wires; you're taking control of your ride's heart and soul.</p></li>
<li><p><strong>From Theory to Reality:</strong> As you follow the lines on the diagram, you start seeing the connections in the physical world of your Camaro. It's like turning a blueprint into a living, breathing machine.</p></li>
<li><p><strong>DIY Adventure:</strong> Tackling the wiring diagram is a bit like going on a DIY adventure. It's you against the wires, armed with knowledge and a wrench. The sense of accomplishment when everything clicks into place is unparalleled.</p></li>
<li><p><strong>Lights, Camera, Action:</strong> Ever wonder how those dashboard lights come to life? The wiring diagram is the script, and your Camaro is the stage. Each wire has a role to play in the electrifying performance under your hood.</p></li>
<li><p><strong>Finding Beauty in Complexity:</strong> Sure, it can look complex, but there's a beauty in the complexity of the wiring. Each wire has a purpose, contributing to the symphony of functions that make your Camaro purr.</p></li>
<li><p><strong>Mind of Its Own:</strong> Your Camaro's wiring is like its nervous system, and the diagram is the guide to understanding its every impulse. It's almost like your car has a mind of its own, and you're learning to speak its language.</p></li>
</ul>
<p>So, as you embark on this wiring journey, remember, it's not just about connecting dots; it's about understanding the essence of your 1968 Camaro. Happy wiring!</p><p> </p><strong><u>Conclusion : Revamp Your Ride: Unveiling the Ultimate 1968 Camaro Interior Wiring Diagram for Seamless Style and Performance!.</u></strong><p>In conclusion, delving into the intricacies of the <em><u>1968 Camaro interior wiring diagram</u></em> unveils a profound understanding of this classic automotive masterpiece. The blueprint of wires, meticulously documented in the wiring diagram, serves as a bridge connecting enthusiasts, restorers, and technicians to the essence of a bygone era. It is not merely a technical guide but a historical artifact that encapsulates the spirit of American muscle cars during the golden age of the late 1960s.</p>
<p>As you navigate the pathways of wires on the <em><u>1968 Camaro interior wiring diagram</u></em>, remember that you are deciphering more than just electrical connections; you are unraveling a story. Each wire contributes to the narrative of a vehicle that embodies power, style, and innovation. Whether you are embarking on a restoration journey, troubleshooting electrical issues, or simply seeking to understand the inner workings of your Camaro, the wiring diagram becomes a companion on your quest for automotive knowledge. Embrace the learning process, for in decoding the diagram, you are not only mastering the technical intricacies but also preserving a piece of automotive history.</p><p> </p><p><article><figure><noscript><img src='https://tse1.mm.bing.net/th?q=Question and answer Revamp Your Ride: Unveiling the Ultimate 1968 Camaro Interior Wiring Diagram for Seamless Style and Performance!' alt='Question and answer Revamp Your Ride: Unveiling the Ultimate 1968 Camaro Interior Wiring Diagram for Seamless Style and Performance!' /></noscript><img class='v-cover ads-img' src='https://tse1.mm.bing.net/th?q=Question and answer Revamp Your Ride: Unveiling the Ultimate 1968 Camaro Interior Wiring Diagram for Seamless Style and Performance!' alt='Question and answer Revamp Your Ride: Unveiling the Ultimate 1968 Camaro Interior Wiring Diagram for Seamless Style and Performance!' width='100%' onerror='this.onerror=null;this.src='https://upload.wikimedia.org/wikipedia/commons/d/d1/Image_not_available.png?20210219185637';' style='margin-right: 8px;margin-bottom: 8px;' /></figure></article></p><p> </p><strong><i>Questions & Answer :</i></strong><p><strong>1. <em>Is understanding the 1968 Camaro interior wiring diagram necessary for restoration?</em></strong></p>
<ul>
<li><p>Absolutely. The <em>1968 Camaro interior wiring diagram</em> is your roadmap to authenticity during restoration. It ensures every wire finds its original place, preserving the historical accuracy of your beloved classic.</p></li>
</ul>
<p><strong>2. <em>How challenging is it to interpret the wiring diagram for a non-expert?</em></strong></p>
<ul>
<li><p>Interpreting the wiring diagram might seem daunting at first, but fear not. With patience and a bit of curiosity, even non-experts can grasp the intricacies. It's a learning process that empowers enthusiasts to understand the heartbeat of their Camaro.</p></li>
</ul>
<p><strong>3. <em>What benefits does a comprehensive understanding of the wiring diagram offer?</em></strong></p>
<ul>
<li><p>Comprehensive understanding of the <em>1968 Camaro interior wiring diagram</em> offers a myriad of benefits. It facilitates efficient troubleshooting, empowers DIY projects, and fosters a deeper connection with the vehicle's design and functionality.</p></li>
</ul>
<p><strong>4. <em>Are there resources or guides available to assist in interpreting the wiring diagram?</em></strong></p>
<ul>
<li><p>Absolutely. Numerous resources, including manuals and online guides, provide assistance in interpreting the wiring diagram. These resources often break down the complexities, making the process more accessible for enthusiasts of all levels.</p></li>
</ul>
<p><strong>5. <em>How does understanding the wiring diagram contribute to the overall driving experience?</em></strong></p>
<ul>
<li><p>Understanding the wiring diagram contributes significantly to the overall driving experience. It instills confidence in handling electrical issues, enhances the DIY aspect of maintenance, and fosters a sense of connection with the vehicle's inner workings, ultimately enriching the joy of driving.</p></li>
</ul>
<p><strong>6. <em>Is it worth seeking professional help for interpreting the wiring diagram?</em></strong></p>
<ul>
<li><p>While enthusiasts can certainly decipher the wiring diagram independently, seeking professional help is always an option. Professionals bring expertise and efficiency to the process, ensuring accurate interpretation and implementation, especially for complex restorations.</p></li>
</ul><p> </p>
Keywords : '1968 CAMARO INTERIOR WIRING DIAGRAM'Milohttp://www.blogger.com/profile/01418902555588264834noreply@blogger.com0tag:blogger.com,1999:blog-4101198853060839868.post-51221311672918757682023-12-23T23:00:00.000-08:002024-01-21T14:33:04.465-08:00Rev Up Your Ride: Unveiling the 1968 Camaro Low Fuel Wiring Blueprint for Peak Performance!<p> </p><p><article><figure><noscript><img src='https://tse1.mm.bing.net/th?q=Rev Up Your Ride: Unveiling the 1968 Camaro Low Fuel Wiring Blueprint for Peak Performance!' alt='Rev Up Your Ride: Unveiling the 1968 Camaro Low Fuel Wiring Blueprint for Peak Performance!' width='640' height='360' /></noscript><img class='v-cover ads-img' src='https://tse1.mm.bing.net/th?q=Rev Up Your Ride: Unveiling the 1968 Camaro Low Fuel Wiring Blueprint for Peak Performance!' alt='Rev Up Your Ride: Unveiling the 1968 Camaro Low Fuel Wiring Blueprint for Peak Performance!' width='100%' onerror='this.onerror=null;this.src='https://upload.wikimedia.org/wikipedia/commons/d/d1/Image_not_available.png?20210219185637';' style='margin-right: 8px;margin-bottom: 8px;' /></figure></article></p><blockquote>Unlock optimal performance with the 1968 Camaro low fuel wiring diagram. Gain insights from a professional perspective for enhanced efficiency and a seamless driving experience.</blockquote><p> </p>Embark on a journey through time as we delve into the intricacies of the <b>1968 Camaro low fuel wiring diagram</b>. In the world of classic automobiles, understanding the <i>simple</i> yet crucial elements can make all the difference. Picture yourself behind the wheel, the rumble of the engine echoing through the decades. Now, let's unravel the <i>simple</i> mysteries tucked away in the heart of this iconic vehicle—discover the magic concealed within the <b>diagram</b> that holds the key to its vintage charm and efficient functionality.<p> </p><h4>Top 10 important point for '1968 CAMARO LOW FUEL WIRING DIAGRAM'</h4><table cellpadding='0' cellspacing='0' class='tr-caption-container' style='float: right;'><tbody><tr><td style='text-align: center;'><img border='0' src='https://tse1.mm.bing.net/th?q=Top 10 '1968 CAMARO LOW FUEL WIRING DIAGRAM'' width='200' /></td></tr><tr></tr></tbody></table> <ol>
<li>Decoding History: Tracing the Roots of the 1968 Camaro</li>
<li>The Anatomy of Efficiency: Exploring the Low Fuel Wiring System</li>
<li>Behind the Scenes: Unveiling the Blueprint's Hidden Gems</li>
<li>Expert Insights: A Journalistic Dive into Camaro's Engineering Marvels</li>
<li>Wiring Wonders: How the 1968 Model Revolutionized Fuel Efficiency</li>
<li>Common Mysteries Unraveled: Troubleshooting the Wiring Diagram</li>
<li>Driving Back in Time: Connecting with Camaro's Classic Design</li>
<li>Performance Unleashed: The Impact of a Well-Maintained Wiring System</li>
<li>From Paper to Pavement: Applying the Wiring Diagram for Peak Results</li>
<li>Modern Relevance: Adapting the 1968 Camaro Wiring Wisdom Today</li>
</ol><p> </p><h5>Several Facts that you should know about '1968 CAMARO LOW FUEL WIRING DIAGRAM'.</h5><h3>Introduction</h3>
<p>The 1968 Camaro stands as a testament to automotive innovation, and at the heart of its functionality lies a critical component—the low fuel wiring diagram. This academic exploration aims to dissect the intricacies of this blueprint, shedding light on its historical significance and engineering marvels.</p>
<center><img src="https://tse1.mm.bing.net/th?q=1968+Camaro" alt="1968 Camaro"></center>
<h3>Historical Evolution of the 1968 Camaro</h3>
<p>Before delving into the wiring diagram, it's imperative to understand the historical context that birthed the 1968 Camaro. From its inception, this iconic vehicle has undergone evolutionary changes, shaping the automotive landscape of its time.</p>
<center><img src="https://tse1.mm.bing.net/th?q=Historical+Evolution+of+1968+Camaro" alt="Historical Evolution"></center>
<h3>Anatomy of Efficiency: Low Fuel Wiring System</h3>
<p>Examining the intricate details of the low fuel wiring system reveals a masterpiece of engineering. Each wire, connection, and node plays a pivotal role in optimizing fuel efficiency, contributing to the Camaro's stellar performance.</p>
<center><img src="https://tse1.mm.bing.net/th?q=Low+Fuel+Wiring+System+Diagram" alt="Low Fuel Wiring System"></center>
<h3>Expert Insights on Camaro Engineering</h3>
<p>Experts in the field provide invaluable insights into the engineering marvels embedded within the 1968 Camaro. Their perspectives shed light on the innovative approaches that defined this classic model.</p>
<center><img src="https://tse1.mm.bing.net/th?q=Expert+Insights+on+Camaro+Engineering" alt="Expert Insights"></center>
<h3>Wiring Wonders: Revolutionizing Fuel Efficiency</h3>
<p>The 1968 Camaro played a pivotal role in revolutionizing fuel efficiency standards. Exploring the wiring wonders of this model unveils the forward-thinking design choices that set it apart in its era.</p>
<center><img src="https://tse1.mm.bing.net/th?q=Wiring+Wonders+of+1968+Camaro" alt="Wiring Wonders"></center>
<h3>Troubleshooting the Wiring Diagram</h3>
<p>Even engineering marvels encounter challenges. This section delves into common issues associated with the wiring diagram and provides insights into troubleshooting methods, ensuring optimal performance.</p>
<center><img src="https://tse1.mm.bing.net/th?q=Troubleshooting+1968+Camaro+Wiring+Diagram" alt="Troubleshooting"></center>
<h3>Connecting with Camaro's Classic Design</h3>
<p>Driving back in time, we explore the emotional connection enthusiasts have with the classic design of the 1968 Camaro. Its timeless aesthetic continues to captivate automotive aficionados.</p>
<center><img src="https://tse1.mm.bing.net/th?q=Classic+Design+of+1968+Camaro" alt="Classic Design"></center>
<h3>Performance Unleashed: Well-Maintained Wiring System</h3>
<p>An in-depth look at the impact of a well-maintained wiring system on the overall performance of the 1968 Camaro. This section emphasizes the importance of regular maintenance for longevity and peak results.</p>
<center><img src="https://tse1.mm.bing.net/th?q=Well-Maintained+Wiring+System+Performance" alt="Well-Maintained Wiring System"></center>
<h3>Adapting 1968 Camaro Wiring Wisdom Today</h3>
<p>Concluding our academic journey, we explore the modern relevance of the 1968 Camaro's wiring wisdom. Discover how the lessons learned from this classic model can be adapted and applied in today's automotive landscape.</p>
<center><img src="https://tse1.mm.bing.net/th?q=Adapting+1968+Camaro+Wiring+Wisdom" alt="Adapting Wiring Wisdom"></center><p> </p><h2>Unraveling the Mysteries of the 1968 Camaro Low Fuel Wiring Diagram</h2>
<p>Get ready for a wild ride down the memory lane of automotive engineering as we dig deep into the quirky world of the 1968 Camaro low fuel wiring diagram. Buckle up, because this isn't your typical stroll through blueprints and wires—this is a journey through the eccentricities of vintage vehicular wizardry!</p>
<h3>The Blast from the Past: 1968 Camaro</h3>
<p>Hold onto your hats as we kick off with a look at the 1968 Camaro itself. Picture this: bell-bottoms, psychedelic patterns, and a car that embodies the essence of the '60s. This classic beauty is more than just a vehicle; it's a time machine on wheels. Now, let's talk about the low fuel wiring diagram—a document that probably had its own spot at Woodstock.</p>
<center><img src="https://tse1.mm.bing.net/th?q=1968+Camaro" alt="1968 Camaro"></center>
<h3>Decoding the Enigma: What's a Wiring Diagram Anyway?</h3>
<p>Before we dive into the tangled web of wires, let's demystify the term "wiring diagram." It's like the car's version of a treasure map, revealing the secret paths of electrical currents. Imagine it as a roadmap for electrons, and suddenly, you're in the driver's seat of an electric safari. Who knew deciphering hieroglyphics could be this electrifying?</p>
<center><img src="https://tse1.mm.bing.net/th?q=Wiring+Diagram+Enigma" alt="Wiring Diagram Enigma"></center>
<h3>Electrifying Efficiency: The Low Fuel Conundrum</h3>
<p>Now, let's address the elephant in the garage—the low fuel aspect. The '68 Camaro, like a seasoned marathon runner, needed a well-thought-out strategy for fuel efficiency. The low fuel wiring diagram was the maestro orchestrating this symphony of electrons, ensuring that the gas tank never felt neglected. After all, a thirsty Camaro is not a happy Camaro!</p>
<center><img src="https://tse1.mm.bing.net/th?q=Low+Fuel+Wiring+Efficiency" alt="Low Fuel Wiring Efficiency"></center>
<h3>The Wire-y Business of Fuel Efficiency</h3>
<p>Now, let's talk wires. Wires in a car are like the veins in our bodies—essential for keeping things flowing smoothly. The low fuel wiring diagram, akin to a mad scientist's masterpiece, mapped out these wires with precision. It's the brain surgery of the automotive world, only with more sparks and less scalpels.</p>
<center><img src="https://tse1.mm.bing.net/th?q=Car+Wires" alt="Car Wires"></center>
<h3>Shockingly Simple: Breaking Down the Complexity</h3>
<p>Before you start sweating over the complexities, fear not! The low fuel wiring diagram, despite sounding like a cryptic manuscript from a secret society, is shockingly simple. It's the Ikea manual of the car world—follow the arrows, connect the dots, and voila, you've assembled your very own fuel-efficient time machine!</p>
<center><img src="https://tse1.mm.bing.net/th?q=Simple+Wiring+Diagram" alt="Simple Wiring Diagram"></center>
<h3>When Wires Go Haywire: Troubleshooting Fun</h3>
<p>Of course, with great power (or electricity) comes great responsibility. Sometimes, these wires throw a party of their own, and things go haywire. But fear not, intrepid driver! The low fuel wiring diagram is your trusty guide in the troubleshooting adventure. It's like having a superhero sidekick, but instead of a cape, it wears a multicolored array of wires.</p>
<center><img src="https://tse1.mm.bing.net/th?q=Troubleshooting+Wires" alt="Troubleshooting Wires"></center>
<h3>Electro-Nostalgia: Revisiting the Classics</h3>
<p>Let's take a moment to revel in the electro-nostalgia of the '68 Camaro. This car wasn't just a mode of transportation; it was a rolling disco ball on wheels. The low fuel wiring diagram is a ticket to relive those disco nights, complete with the electric hum of a bygone era. Break out the disco ball, because your car is about to get groovy!</p>
<center><img src="https://tse1.mm.bing.net/th?q=Classic+Camaro" alt="Classic Camaro"></center>
<h3>The Wire Whisperer's Legacy</h3>
<p>As we wrap up our electric escapade, let's acknowledge the unsung hero—the wire whisperer. The mind behind the low fuel wiring diagram left a legacy that still sparks joy in the hearts of Camaro enthusiasts. It's like the Shakespeare of the automotive world, only instead of sonnets, it wrote symphonies of volts and ohms.</p>
<center><img src="https://tse1.mm.bing.net/th?q=Wire+Whisperer+Legacy" alt="Wire Whisperer Legacy"></center>
<h3>Cruising into the Future: Adapting the '68 Wisdom</h3>
<p>As we drive off into the sunset (or sunrise, depending on your preference), let's ponder the timeless wisdom embedded in the '68 Camaro's low fuel wiring diagram. It's not just a relic of the past; it's a roadmap to a future where wires still dance to the electric boogie. So, fellow drivers, adapt this wisdom and let the sparks fly!</p>
<center><img src="https://tse1.mm.bing.net/th?q=Adapting+1968+Camaro+Wiring+Wisdom" alt="Adapting Wiring Wisdom"></center>
<p>In conclusion, the 1968 Camaro low fuel wiring diagram is not just a piece of paper with squiggly lines; it's a time-traveling, disco-dancing, wire-whispering masterpiece. So, next time you rev up your vintage Camaro, give a nod to the unsung hero—the low fuel wiring diagram—and let the electric symphony play on!</p><p> </p><h6>Another point of view about '1968 CAMARO LOW FUEL WIRING DIAGRAM'.</h6><p>Understanding the intricacies of the 1968 Camaro low fuel wiring diagram offers a profound glimpse into the soul of this iconic vehicle. Let's explore its mysteries with empathy:</p>
<ol>
<li><p><b>Connection with Nostalgia:</b> The 1968 Camaro low fuel wiring diagram isn't just a technical blueprint; it's a nostalgic link to an era when driving was an experience, not just a commute.</p></li><li><p><b>Symbolic Significance:</b> Every wire and connection represents more than just a mechanical function. They are the threads weaving together memories, stories, and a collective automotive history.</p></li>
<li><p><b>Appreciation for Vintage Craftsmanship:</b> Looking at the wiring diagram is like appreciating a vintage piece of art. Each line tells a story of meticulous craftsmanship and an era when cars were built with passion and soul.</p></li>
<li><p><b>Empathy for the Designers:</b> Behind the lines and symbols, there were designers and engineers who poured their creativity and expertise into creating not just a car but a rolling masterpiece. Understanding their intent fosters a sense of connection.</p></li>
<li><p><b>Respect for the Journey:</b> The wiring diagram is a roadmap of the Camaro's journey through time. It's a testament to endurance, adaptability, and the ability to stay relevant across generations.</p></li>
<li><p><b>Sensitivity to Technological Evolution:</b> Amidst the paper and ink lies the evolution of automotive technology. The wiring diagram showcases a transition from simple mechanics to the intricate electrical systems that power today's vehicles.</p></li>
<li><p><b>Recognition of Challenges:</b> Embracing the wiring diagram involves acknowledging the challenges faced by the designers. It's an empathetic acknowledgment of the hurdles they overcame to create a vehicle that would stand the test of time.</p></li>
<li><p><b>Gratitude for Legacy:</b> Every glance at the wiring diagram is a nod of gratitude to the legacy it represents. It's an acknowledgment that the Camaro isn't just a car; it's a cultural symbol embedded in the hearts of enthusiasts.</p></li>
<li><p><b>Connection with Community:</b> Understanding the wiring diagram fosters a sense of community among Camaro enthusiasts. It's a shared language that brings together individuals who appreciate the beauty of vintage automobiles.</p></li>
<li><p><b>Affectionate Reverence:</b> In the end, exploring the 1968 Camaro low fuel wiring diagram is an act of affectionate reverence. It's a journey that transcends wires and circuits, resonating with the emotional chords of those who see more than just a diagram—they see a piece of automotive history.</p></li>
</ol><p> </p><strong><u>Conclusion : Rev Up Your Ride: Unveiling the 1968 Camaro Low Fuel Wiring Blueprint for Peak Performance!.</u></strong><p>As we wrap up this journey into the labyrinth of the <u><em>1968 Camaro low fuel wiring diagram</em></u>, I invite you to reflect on the unique tapestry of history and engineering we've explored. This document, hidden in the annals of automotive design, is more than a mere guide for electrons—it's a testament to the timeless allure of classic cars. The <u><em>1968 Camaro</em></u>, with its low fuel wiring diagram as the maestro, orchestrates a symphony of nostalgia, craftsmanship, and technical brilliance.</p>
<p>So, dear readers, the next time you fire up your '68 Camaro, envision the intricate dance of wires beneath the hood. Each connection is a bridge to the past, a link to the era when driving was an art form. As you navigate the roads, remember that you're not just steering a car; you're guiding a piece of history. The <u><em>1968 Camaro low fuel wiring diagram</em></u> is not a relic—it's a living, breathing narrative etched into the soul of a classic, and you, my friend, are the storyteller behind the wheel.</p><p> </p><p><article><figure><noscript><img src='https://tse1.mm.bing.net/th?q=Question and answer Rev Up Your Ride: Unveiling the 1968 Camaro Low Fuel Wiring Blueprint for Peak Performance!' alt='Question and answer Rev Up Your Ride: Unveiling the 1968 Camaro Low Fuel Wiring Blueprint for Peak Performance!' /></noscript><img class='v-cover ads-img' src='https://tse1.mm.bing.net/th?q=Question and answer Rev Up Your Ride: Unveiling the 1968 Camaro Low Fuel Wiring Blueprint for Peak Performance!' alt='Question and answer Rev Up Your Ride: Unveiling the 1968 Camaro Low Fuel Wiring Blueprint for Peak Performance!' width='100%' onerror='this.onerror=null;this.src='https://upload.wikimedia.org/wikipedia/commons/d/d1/Image_not_available.png?20210219185637';' style='margin-right: 8px;margin-bottom: 8px;' /></figure></article></p><p> </p><strong><i>Questions & Answer :</i></strong><p><strong>Q: Is deciphering the 1968 Camaro low fuel wiring diagram like cracking a secret code?</strong></p>
<ul>
<li><p><b>A:</b> Oh, absolutely! Picture yourself as an automotive Sherlock Holmes, magnifying glass in hand, deciphering the intricate clues left by engineers of the past. It's less Morse code and more Morse horsepower.</p></li>
</ul>
<p><strong>Q: Can I survive without understanding the low fuel wiring diagram of my '68 Camaro?</strong></p>
<ul>
<li><p><b>A:</b> Survive? Probably. Thrive? Now, that's a different story. It's like owning a cookbook but never discovering the joy of cooking—sure, you'll eat, but you'll miss out on the feast of automotive enlightenment!</p></li>
</ul>
<p><strong>Q: How do I explain the importance of the low fuel wiring diagram to my friends without putting them to sleep?</strong></p>
<ul>
<li><p><b>A:</b> Ah, the eternal struggle! Picture this: It's not just a diagram; it's the GPS of your Camaro's soul. It's the maestro orchestrating a symphony of electrons, ensuring your car dances to the electric boogie.</p></li>
</ul>
<p><strong>Q: Can I just hire someone to deal with the low fuel wiring diagram?</strong></p>
<ul>
<li><p><b>A:</b> Sure, you can hire a wiring wizard, but where's the fun in that? It's like hiring a personal chef and never learning to flambe. Embrace the wires, my friend; they're the unsung heroes of your vintage chariot!</p></li>
</ul>
<p><strong>Q: Will understanding the wiring diagram make me a car whisperer?</strong></p>
<ul>
<li><p><b>A:</b> Congratulations, you've uncovered the ancient prophecy! Understanding the wiring diagram is the first step to becoming a certified car whisperer. Soon, you'll be hearing your Camaro purr in appreciation—just remember to thank the wires.</p></li>
</ul><p> </p>
Keywords : '1968 CAMARO LOW FUEL WIRING DIAGRAM'Milohttp://www.blogger.com/profile/01418902555588264834noreply@blogger.com0tag:blogger.com,1999:blog-4101198853060839868.post-26825639511510344372023-12-22T12:00:00.000-08:002024-01-21T14:33:04.789-08:00Illuminate Your Ride: Unveiling the 1968 Camaro Rear Body Light Harness Diagram for Ultimate Lighting Brilliance!<p> </p><p><article><figure><noscript><img src='https://tse1.mm.bing.net/th?q=Illuminate Your Ride: Unveiling the 1968 Camaro Rear Body Light Harness Diagram for Ultimate Lighting Brilliance!' alt='Illuminate Your Ride: Unveiling the 1968 Camaro Rear Body Light Harness Diagram for Ultimate Lighting Brilliance!' width='640' height='360' /></noscript><img class='v-cover ads-img' src='https://tse1.mm.bing.net/th?q=Illuminate Your Ride: Unveiling the 1968 Camaro Rear Body Light Harness Diagram for Ultimate Lighting Brilliance!' alt='Illuminate Your Ride: Unveiling the 1968 Camaro Rear Body Light Harness Diagram for Ultimate Lighting Brilliance!' width='100%' onerror='this.onerror=null;this.src='https://upload.wikimedia.org/wikipedia/commons/d/d1/Image_not_available.png?20210219185637';' style='margin-right: 8px;margin-bottom: 8px;' /></figure></article></p><blockquote>Unlock the secrets of your 1968 Camaro's lighting system with a professional touch. Master the rear body light harness diagram for flawless restoration.</blockquote><p> </p>In the realm of classic car restoration, a meticulous understanding of every detail is paramount to achieving perfection. Enter the <b>1968 Camaro rear body light harness diagram</b>, a vital blueprint that elevates your restoration endeavors to a professional level of precision. Unlocking the intricacies of this <i>indispensable</i> diagram not only unveils the hidden secrets of your vintage Camaro's lighting system but also provides a professional edge, ensuring your automotive masterpiece shines with authenticity. Delve into the realm of expertise as we dissect the nuances of this crucial <i>guide</i>, bringing a professional touch to your journey of restoring the luminous glory of the iconic 1968 Camaro.<p> </p><h4>Top 10 important point for '1968 CAMARO REAR BODY LIGHT HARNESS DIAGRAM'</h4><table cellpadding='0' cellspacing='0' class='tr-caption-container' style='float: right;'><tbody><tr><td style='text-align: center;'><img border='0' src='https://tse1.mm.bing.net/th?q=Top 10 '1968 CAMARO REAR BODY LIGHT HARNESS DIAGRAM'' width='200' /></td></tr><tr></tr></tbody></table> <ol>
<li>Decoding the Mysteries: Because Your Camaro's Lights Shouldn't Be a Riddle!</li>
<li>Wires and Wonders: How to Turn a Tangled Mess into Lighting Magic!</li>
<li>Behind the Taillights: A Drama Unfolds in Your Camaro's Rear – Spoiler Alert: It's Not a Soap Opera!</li>
<li>Electrical Elegance: Teaching Your Camaro to Shine Brighter than a Disco Ball!</li>
<li>Detangling Disco Inferno: Untwisting Wires with Style!</li>
<li>Enlightenment, Not Electrocution: A Comedy of Errors Turned Professional Guide!</li>
<li>The Harness Chronicles: Where Wires Become Superstars!</li>
<li>Flashing Lights, No Sirens: Making Your Camaro the Coolest Car on the Block!</li>
<li>Rearview Revelations: Because Your Camaro Deserves a Lighting Makeover!</li>
<li>DIY Disco: Turning Your Garage into a Lighting Extravaganza!</li>
</ol><p> </p><h5>Several Facts that you should know about '1968 CAMARO REAR BODY LIGHT HARNESS DIAGRAM'.</h5>htmlCopy code<p>Welcome to the Illuminating World of the 1968 Camaro Rear Body Light Harness Diagram! Whether you're a seasoned car enthusiast or diving into the realm of classic car restoration, understanding the intricacies of your vehicle's electrical system is crucial. In this guide, we'll explore the professional insights behind the 1968 Camaro's rear body light harness diagram, unraveling the mysteries that lie beneath the surface.</p>
<h3>Unveiling the Blueprint</h3>
<center><img src="https://tse1.mm.bing.net/th?q=Unveiling+the+Blueprint+1968+Camaro+Rear+Body+Light+Harness+Diagram" alt="Unveiling the Blueprint"></center>
<p>At the heart of any successful restoration project lies a blueprint, and the 1968 Camaro rear body light harness diagram is no exception. This comprehensive guide serves as the roadmap to understanding the intricate network of wires, connectors, and lights that make up the Camaro's rear lighting system.</p>
<h3>Decoding the Wiring Maze</h3>
<center><img src="https://tse1.mm.bing.net/th?q=Decoding+the+Wiring+Maze+1968+Camaro+Rear+Body+Light+Harness+Diagram" alt="Decoding the Wiring Maze"></center>
<p>Wires may seem like a tangled mess, but fear not! We'll delve into the wiring maze, providing a professional perspective on how to navigate and decipher the complex network. Say goodbye to confusion and hello to clarity as we guide you through each connection and its significance.</p>
<h3>Professional Restoration Tips</h3>
<center><img src="https://tse1.mm.bing.net/th?q=Professional+Restoration+Tips+1968+Camaro+Rear+Body+Light+Harness+Diagram" alt="Professional Restoration Tips"></center>
<p>Restoration isn't just about fixing what's broken; it's about elevating your Camaro to a new level of excellence. Discover professional restoration tips that will not only enhance the functionality of your rear lights but also add that touch of authenticity that sets your project apart.</p>
<h3>Ensuring Electrical Elegance</h3>
<center><img src="https://tse1.mm.bing.net/th?q=Ensuring+Electrical+Elegance+1968+Camaro+Rear+Body+Light+Harness+Diagram" alt="Ensuring Electrical Elegance"></center>
<p>Transforming a jumble of wires into a symphony of lights requires finesse. We'll guide you through the process of ensuring electrical elegance, providing insights into organizing, securing, and optimizing your Camaro's rear body light harness with a professional touch.</p>
<h3>Common Challenges and Solutions</h3>
<center><img src="https://tse1.mm.bing.net/th?q=Common+Challenges+and+Solutions+1968+Camaro+Rear+Body+Light+Harness+Diagram" alt="Common Challenges and Solutions"></center>
<p>Every restoration project encounters its share of challenges. Explore common issues that enthusiasts face when dealing with the rear body light harness, and uncover professional solutions to tackle these challenges head-on. No obstacle is too daunting with the right guidance!</p>
<h3>Enhancing Safety Features</h3>
<center><img src="https://tse1.mm.bing.net/th?q=Enhancing+Safety+Features+1968+Camaro+Rear+Body+Light+Harness+Diagram" alt="Enhancing Safety Features"></center>
<p>Safety is paramount, and your Camaro's lighting system plays a crucial role in ensuring a secure driving experience. Learn how the rear body light harness diagram contributes to enhancing safety features, from brake lights to turn signals, and make informed decisions to keep your classic car both stylish and secure.</p>
<h3>DIY with a Professional Edge</h3>
<center><img src="https://tse1.mm.bing.net/th?q=DIY+with+a+Professional+Edge+1968+Camaro+Rear+Body+Light+Harness+Diagram" alt="DIY with a Professional Edge"></center>
<p>Empower yourself with the knowledge and confidence to take on the restoration process with a DIY approach. We'll guide you through the steps, providing a professional edge to your do-it-yourself endeavors. Unleash your inner car enthusiast and watch your Camaro come to life!</p>
<h3>Conclusion: Shining a Light on Automotive Excellence</h3>
<center><img src="https://tse1.mm.bing.net/th?q=Conclusion+Shining+a+Light+on+Automotive+Excellence+1968+Camaro+Rear+Body+Light+Harness+Diagram" alt="Conclusion: Shining a Light on Automotive Excellence"></center>
<p>As we conclude our journey through the 1968 Camaro rear body light harness diagram, you're now equipped with the knowledge to illuminate your classic car restoration project. Embrace the professional insights shared here and embark on a journey that not only restores but enhances the brilliance of your iconic Camaro.</p>
<p> </p>htmlCopy code<p>Welcome to the comprehensive exploration of the intricate marvel that is the <strong>1968 Camaro rear body light harness diagram</strong>. In this detailed guide, we will delve into the essential aspects of this diagram, shedding light on its significance in the broader context of classic car restoration. From unraveling the blueprint to understanding the wiring maze and addressing common challenges, this article aims to provide a thorough explanation for enthusiasts and professionals alike.</p>
<h2>The Blueprint Unveiled</h2>
<center><img src="https://tse1.mm.bing.net/th?q=The+Blueprint+Unveiled+1968+Camaro+Rear+Body+Light+Harness+Diagram" alt="The Blueprint Unveiled"></center>
<p>The journey begins with a closer look at the blueprint itself. The <strong>1968 Camaro rear body light harness diagram</strong> serves as the guiding document for anyone seeking to comprehend the intricate network of wires, connectors, and lighting components that constitute the rear lighting system of this iconic vehicle. It's not just a map; it's the key to unlocking the mysteries beneath the surface of your Camaro.</p>
<h3>Understanding the Components</h3>
<center><img src="https://tse1.mm.bing.net/th?q=Understanding+the+Components+1968+Camaro+Rear+Body+Light+Harness+Diagram" alt="Understanding the Components"></center>
<p>Before we delve into the wiring intricacies, it's crucial to understand the various components highlighted in the diagram. From taillights and brake lights to turn signals and reverse lights, each element plays a unique role in ensuring the functionality and safety of your vehicle. This section will serve as a guide to deciphering the symbols and notations that represent these components on the diagram.</p>
<h2>Decoding the Wiring Maze</h2>
<center><img src="https://tse1.mm.bing.net/th?q=Decoding+the+Wiring+Maze+1968+Camaro+Rear+Body+Light+Harness+Diagram" alt="Decoding the Wiring Maze"></center>
<p>With a foundational understanding of the components, we now venture into the wiring maze—a labyrinth of interconnected paths that determine the flow of electrical currents within your Camaro. This section will employ a step-by-step approach, using the <strong>1968 Camaro rear body light harness diagram</strong> as our guide. Transitioning from one set of wires to another, we'll unravel the complexity and showcase how to interpret the connections effectively.</p>
<h3>Color-Coding and Its Significance</h3>
<center><img src="https://tse1.mm.bing.net/th?q=Color-Coding+and+Its+Significance+1968+Camaro+Rear+Body+Light+Harness+Diagram" alt="Color-Coding and Its Significance"></center>
<p>One of the key elements that simplifies the decoding process is color-coding. The diagram utilizes distinct colors to differentiate between different wires and their functions. Understanding this color scheme is paramount to successfully navigating the wiring maze. We'll break down the significance of each color, providing a comprehensive guide to ensure you're not left in the dark when deciphering the intricate patterns.</p>
<h2>Common Challenges and Solutions</h2>
<center><img src="https://tse1.mm.bing.net/th?q=Common+Challenges+and+Solutions+1968+Camaro+Rear+Body+Light+Harness+Diagram" alt="Common Challenges and Solutions"></center>
<p>Every restoration project comes with its share of challenges, and dealing with the <strong>1968 Camaro rear body light harness diagram</strong> is no exception. This section will address common issues enthusiasts may encounter, from damaged wires to corroded connectors. More importantly, we'll provide practical and professional solutions to overcome these challenges, ensuring a smooth restoration process.</p>
<h3>Upgrading for Modern Convenience</h3>
<center><img src="https://tse1.mm.bing.net/th?q=Upgrading+for+Modern+Convenience+1968+Camaro+Rear+Body+Light+Harness+Diagram" alt="Upgrading for Modern Convenience"></center>
<p>Beyond restoration, many enthusiasts aim to upgrade their classic cars for modern convenience and safety. This subsection will explore how the <strong>1968 Camaro rear body light harness diagram</strong> can be a valuable tool in integrating modern features. Whether it's incorporating LED lights or enhancing the wiring for advanced functionalities, we'll guide you through the process of blending the classic charm of the Camaro with contemporary conveniences.</p>
<h2>Ensuring Electrical Elegance</h2>
<center><img src="https://tse1.mm.bing.net/th?q=Ensuring+Electrical+Elegance+1968+Camaro+Rear+Body+Light+Harness+Diagram" alt="Ensuring Electrical Elegance"></center>
<p>Restoring a classic car isn't just about functionality; it's about achieving a level of elegance that matches the vehicle's design and heritage. In this section, we'll delve into the aesthetic aspects of the <strong>1968 Camaro rear body light harness diagram</strong>. From organizing wires neatly to securing connections with precision, we'll explore how to ensure electrical elegance that not only works flawlessly but also enhances the overall visual appeal of your Camaro.</p>
<h3>Professional Tips for Restoration</h3>
<center><img src="https://tse1.mm.bing.net/th?q=Professional+Tips+for+Restoration+1968+Camaro+Rear+Body+Light+Harness+Diagram" alt="Professional Tips for Restoration"></center>
<p>Professional restorers bring a level of expertise that can transform a project from ordinary to extraordinary. Drawing from the insights of seasoned professionals, this section will provide tips and tricks garnered from years of experience. Whether it's advice on choosing the right wiring materials or techniques for troubleshooting, these professional tips will elevate your restoration process to ensure a result that stands out in terms of both functionality and authenticity.</p>
<h2>Conclusion: Enlightening Your Restoration Journey</h2>
<center><img src="https://tse1.mm.bing.net/th?q=Conclusion+Enlightening+Your+Restoration+Journey+1968+Camaro+Rear+Body+Light+Harness+Diagram" alt="Conclusion: Enlightening Your Restoration Journey"></center>
<p>As we conclude our in-depth exploration of the <strong>1968 Camaro rear body light harness diagram</strong>, you now possess the knowledge to embark on a restoration journey with confidence and clarity. Whether you're a seasoned enthusiast or a novice in the world of classic cars, this guide aims to illuminate the path toward a successful and satisfying restoration of your iconic Camaro.</p>
<p> </p><h6>Another point of view about '1968 CAMARO REAR BODY LIGHT HARNESS DIAGRAM'.</h6>htmlCopy code<p>So, you've got yourself a '68 Camaro, and you've heard about this mystical thing called the <strong>1968 Camaro rear body light harness diagram</strong>. Let's break it down in a way that's as straightforward as chatting with a buddy over a cup of coffee:</p>
<ul>
<li>1. **What's the Buzz About?**</li>
<p>Alright, so the buzz is all about this diagram that's like the GPS for your Camaro's rear lights. It's the roadmap that tells you where every wire goes, making sure your lights shine bright and beautiful.</p>
<li>2. **Deciphering the Blueprint:**</li>
<p>Imagine it's a treasure map, but instead of ‘X marks the spot,’ it's more like ‘Yellow wire goes here, Red wire goes there.’ The blueprint shows you the secret code of your Camaro's lighting system.</p>
<li>3. **Wires, Wires Everywhere:**</li>
<p>Now, let's talk about the infamous wiring maze. It's like untangling a bunch of spaghetti, but each noodle has a specific purpose. The diagram helps you make sense of the chaos, ensuring your wires don’t end up in a knot.</p>
<li>4. **Colors Speak Louder Than Words:**</li>
<p>Colors are the heroes of this story. They're not just for looks; they have a job to do. The diagram uses a rainbow of colors to tell you which wire is responsible for what. It's like a color-coded superhero squad for your Camaro.</p>
<li>5. **Facing Challenges Head-On:**</li>
<p>Every hero has its villains, and your Camaro's wiring is no different. We'll chat about the common challenges you might face – from worn-out wires to tricky connectors – and how to show them who's boss.</p>
<li>6. **Modern Makeover:**</li>
<p>Want to give your classic ride a modern touch? We'll spill the beans on how the diagram can help you upgrade for that extra oomph. LED lights, anyone?</p>
<li>7. **Elegance in Every Wire:**</li>
<p>Restoration isn't just about making things work; it's about making them look good too. We'll talk about how to bring some elegance into the wiring game, because who said wires can't be stylish?</p>
<li>8. **Tips from the Pros:**</li>
<p>Now, let's get some advice from the pros – those folks who've been elbow-deep in Camaro wiring for years. They've got nuggets of wisdom to share, and you don't want to miss them.</p>
<li>9. **Time to Shine:**</li>
<p>As we wrap up, you're not just armed with a diagram; you've got the know-how to make your Camaro shine. Whether you're a gearhead or just dipping your toes into the classic car world, this journey is all about turning heads and lighting up the road.</p>
</ul>
<p> </p><strong><u>Conclusion : Illuminate Your Ride: Unveiling the 1968 Camaro Rear Body Light Harness Diagram for Ultimate Lighting Brilliance!.</u></strong><p>As we draw the curtain on our exploration of the <u><em>1968 Camaro rear body light harness diagram</em></u>, it's evident that deciphering the intricacies of your classic car's electrical system is not just a task; it's an essential journey for enthusiasts and restorers alike. With this comprehensive guide, we've navigated the blueprint, unraveled the wiring maze, and shed light on the challenges and solutions that come hand-in-hand with restoring a vintage Camaro. Armed with knowledge, you're now equipped to not only ensure the electrical elegance of your beloved vehicle but also to infuse a modern touch, transforming it into a head-turning automotive masterpiece.</p>
<p>So, whether you're a seasoned gearhead or a novice embarking on your first restoration project, remember that the <u><em>1968 Camaro rear body light harness diagram</em></u> is more than just a set of lines and colors on paper; it's your guide to preserving the legacy of a classic. As you navigate the wires and connectors, facing challenges and embracing professional tips, envision the moment when your Camaro's lights illuminate with a brilliance that transcends time. This journey is not just about restoration; it's about reviving the spirit of an era, one wire at a time. Safe travels on your Camaro restoration odyssey!</p><p> </p><p><article><figure><noscript><img src='https://tse1.mm.bing.net/th?q=Question and answer Illuminate Your Ride: Unveiling the 1968 Camaro Rear Body Light Harness Diagram for Ultimate Lighting Brilliance!' alt='Question and answer Illuminate Your Ride: Unveiling the 1968 Camaro Rear Body Light Harness Diagram for Ultimate Lighting Brilliance!' /></noscript><img class='v-cover ads-img' src='https://tse1.mm.bing.net/th?q=Question and answer Illuminate Your Ride: Unveiling the 1968 Camaro Rear Body Light Harness Diagram for Ultimate Lighting Brilliance!' alt='Question and answer Illuminate Your Ride: Unveiling the 1968 Camaro Rear Body Light Harness Diagram for Ultimate Lighting Brilliance!' width='100%' onerror='this.onerror=null;this.src='https://upload.wikimedia.org/wikipedia/commons/d/d1/Image_not_available.png?20210219185637';' style='margin-right: 8px;margin-bottom: 8px;' /></figure></article></p><p> </p><strong><i>Questions & Answer :</i></strong><p>**Q: What's the main purpose of the 1968 Camaro rear body light harness diagram?**A: Think of it as the GPS for your Camaro's lights. The diagram is the masterplan that shows where each wire goes, ensuring your rear lights shine as brilliantly as they did in '68.</p><p>**Q: Is decoding the wiring maze as complicated as it sounds?**A: Not really! It's like untangling headphones – looks messy, but once you know which wire goes where, it's a piece of cake. The diagram is your guide through this electric spaghetti.</p><p>**Q: Why do colors matter in the wiring diagram?**A: Colors are like the superheroes of the wiring world. Each one has a job, and the diagram uses them to tell you which wire does what. It's a rainbow-coded map to keep things organized and straightforward.</p><p>**Q: Can this diagram help with modern upgrades for my Camaro?**A: Absolutely! It's not just a tool for nostalgia; it can be your sidekick in upgrading to modern conveniences. LED lights, anyone? The diagram ensures you're not just restoring; you're revamping with style.</p><p>**Q: Are there common challenges, and how do I tackle them?**A: Like any hero's journey, you might face challenges – from worn-out wires to tricky connectors. But fear not! We've got practical solutions that even a wiring novice can master.</p><p>**Q: Is understanding the diagram necessary for DIY restoration?**A: Absolutely! Whether you're a seasoned pro or a first-time DIYer, the diagram is your go-to companion. It's like having a friend who knows the ins and outs of your Camaro's electrical soul.</p><p>**Q: Any tips from the pros to make the process smoother?**A: You bet! Pros have been in the wiring game for ages, and they've got nuggets of wisdom to share. From choosing the right materials to troubleshooting like a champ, these tips will make your restoration journey smoother than ever.</p><p>**Q: Can this guide be helpful for other classic car models?**A: While the focus is on the '68 Camaro, many principles apply to other classics. Wiring is like a universal language in the classic car world, so you'll find valuable insights here for various timeless rides.</p><p>Remember, the <strong>1968 Camaro rear body light harness diagram</strong> is not just a piece of paper; it's your backstage pass to the electric symphony that makes your Camaro a true classic.</p><p> </p>
Keywords : '1968 CAMARO REAR BODY LIGHT HARNESS DIAGRAM'Milohttp://www.blogger.com/profile/01418902555588264834noreply@blogger.com0tag:blogger.com,1999:blog-4101198853060839868.post-41196686590206435462023-12-19T14:00:00.000-08:002024-01-21T14:33:05.908-08:00Revamp Your Ride: Unleashing the Ultimate 1968 Camaro Stop Turn Light Wiring Upgrade!<p> </p><p><article><figure><noscript><img src='https://tse1.mm.bing.net/th?q=Revamp Your Ride: Unleashing the Ultimate 1968 Camaro Stop Turn Light Wiring Upgrade!' alt='Revamp Your Ride: Unleashing the Ultimate 1968 Camaro Stop Turn Light Wiring Upgrade!' width='640' height='360' /></noscript><img class='v-cover ads-img' src='https://tse1.mm.bing.net/th?q=Revamp Your Ride: Unleashing the Ultimate 1968 Camaro Stop Turn Light Wiring Upgrade!' alt='Revamp Your Ride: Unleashing the Ultimate 1968 Camaro Stop Turn Light Wiring Upgrade!' width='100%' onerror='this.onerror=null;this.src='https://upload.wikimedia.org/wikipedia/commons/d/d1/Image_not_available.png?20210219185637';' style='margin-right: 8px;margin-bottom: 8px;' /></figure></article></p><blockquote>"Optimize your 1968 Camaro's performance with expert insights on upgrading stop turn light wiring. Unlock enhanced safety and a sleek, modern driving experience."</blockquote><p> </p>Step back in time and cruise into the heart of classic car perfection with the <b>1968 Camaro</b>. Picture this: a seamless blend of vintage charm and modern functionality. Now, let's talk about a game-changer that's often overlooked – the <i>stop turn light wiring</i>. Beneath the hood lies the key to enhancing your driving experience, and we're about to unravel the secrets that will transform your Camaro into a road-ready masterpiece. So, buckle up and join us on this electrifying journey through the intricacies of automotive nostalgia and innovation.<p> </p><h4>Top 10 important point for 1968 CAMARO STOP TURN LIGHT WIRING</h4><table cellpadding='0' cellspacing='0' class='tr-caption-container' style='float: right;'><tbody><tr><td style='text-align: center;'><img border='0' src='https://tse1.mm.bing.net/th?q=Top 10 1968 CAMARO STOP TURN LIGHT WIRING' width='200' /></td></tr><tr></tr></tbody></table> <ol>
<li>Untangling the Mystery: Decoding 1968 Camaro Wires</li>
<li>Lighting Limbo: Where Did That Wire Go?</li>
<li>The Great Disconnect: Adventures in DIY Wiring</li>
<li>Sparks and Surprises: Unveiling Camaro's Electric Dance</li>
<li>Camaro vs. Wires: A Comedy of Errors</li>
<li>Stop, Turn, Laugh: Navigating the Hilarious Wiring Maze</li>
<li>Shocking Revelations: When Wires Have a Sense of Humor</li>
<li>Rev Up the Laughter: Camaro Wiring Comedy Club</li>
<li>Confessions of a Camaro: Wires Unleashed!</li>
<li>Wired for Fun: Where Auto Troubles Meet Comedy Gold</li>
</ol><p> </p><h5>Several Facts that you should know about 1968 CAMARO STOP TURN LIGHT WIRING.</h5><h3>Unlocking the Time Capsule</h3>
<center><img src="https://tse1.mm.bing.net/th?q=Unlocking+the+Time+Capsule+1968+Camaro+Stop+Turn+Light+Wiring" alt="Unlocking the Time Capsule"></center>
<p>Embark on a journey back to 1968, as we unravel the mysteries of your Camaro's stop turn light wiring. It's not just wires; it's a time capsule waiting to be opened!</p>
<h3>The Electric Symphony</h3>
<center><img src="https://tse1.mm.bing.net/th?q=The+Electric+Symphony+1968+Camaro+Stop+Turn+Light+Wiring" alt="The Electric Symphony"></center>
<p>Hear the hum of history as we delve into the intricate wiring system. Your Camaro's stop turn light wiring is not just functional—it's a symphony of electricity!</p>
<h3>Decoding the Wire Maze</h3>
<center><img src="https://tse1.mm.bing.net/th?q=Decoding+the+Wire+Maze+1968+Camaro+Stop+Turn+Light+Wiring" alt="Decoding the Wire Maze"></center>
<p>Feel like a detective as we decode the wire maze. It's like solving a puzzle, but instead of a magnifying glass, you have a toolbox!</p>
<h3>Sparks of Innovation</h3>
<center><img src="https://tse1.mm.bing.net/th?q=Sparks+of+Innovation+1968+Camaro+Stop+Turn+Light+Wiring" alt="Sparks of Innovation"></center>
<p>Discover how innovation sparks under the hood. Your Camaro's wiring is more than just a system; it's a testament to automotive evolution!</p>
<h3>DIY Adventures</h3>
<center><img src="https://tse1.mm.bing.net/th?q=DIY+Adventures+1968+Camaro+Stop+Turn+Light+Wiring" alt="DIY Adventures"></center>
<p>Ready to get hands-on? Join us in the world of DIY adventures, where every twist of the screwdriver is a step towards automotive enlightenment!</p>
<h3>Wiring Comedy Club</h3>
<center><img src="https://tse1.mm.bing.net/th?q=Wiring+Comedy+Club+1968+Camaro+Stop+Turn+Light+Wiring" alt="Wiring Comedy Club"></center>
<p>Laugh out loud as we navigate the hilarious side of Camaro wiring. It's not just a car; it's a stand-up comedian with wires!</p>
<h3>Safety Unleashed</h3>
<center><img src="https://tse1.mm.bing.net/th?q=Safety+Unleashed+1968+Camaro+Stop+Turn+Light+Wiring" alt="Safety Unleashed"></center>
<p>Transform your ride into a safety haven. Unleash the full potential of your Camaro's stop turn light wiring for a secure and stylish journey!</p>
<h3>Cruising with Confidence</h3>
<center><img src="https://tse1.mm.bing.net/th?q=Cruising+with+Confidence+1968+Camaro+Stop+Turn+Light+Wiring" alt="Cruising with Confidence"></center>
<p>Ready to hit the road with confidence? Upgrade your Camaro's wiring, and let every turn be a testament to your newfound automotive prowess!</p><p> </p><h2>Unveiling the Wonders of 1968 Camaro Stop Turn Light Wiring</h2>
<p>Stepping into the world of classic cars is like opening a door to a bygone era, and the 1968 Camaro stands as a timeless emblem of automotive nostalgia. Among its many components, the stop turn light wiring plays a pivotal role in blending vintage aesthetics with modern functionality.</p>
<h3>The Essence of 1968 Camaro</h3>
<center><img src="https://tse1.mm.bing.net/th?q=1968+Camaro" alt="1968 Camaro"></center>
<p>Before we dive into the intricacies of the stop turn light wiring, let's take a moment to appreciate the essence of the 1968 Camaro. With its sleek lines and powerful presence, this classic car has captured the hearts of automotive enthusiasts for decades.</p>
<h3>A Glimpse into the Past</h3>
<center><img src="https://tse1.mm.bing.net/th?q=A+Glimpse+into+the+Past+1968+Camaro+Stop+Turn+Light+Wiring" alt="A Glimpse into the Past"></center>
<p>Traveling back in time, the 1968 Camaro embodies an era of design and innovation. The stop turn light wiring, often overlooked, carries the legacy of the automobile industry's evolution. It's not just a set of wires; it's a glimpse into the engineering marvels of the past.</p>
<h3>The Anatomy of Stop Turn Light Wiring</h3>
<center><img src="https://tse1.mm.bing.net/th?q=The+Anatomy+of+Stop+Turn+Light+Wiring+1968+Camaro" alt="The Anatomy of Stop Turn Light Wiring"></center>
<p>Now, let's dissect the anatomy of the stop turn light wiring. This system is designed to control the rear lights of the Camaro, indicating stops, turns, and ensuring visibility on the road. It's a symphony of wires intricately woven to orchestrate safety and functionality.</p>
<p>The wiring system comprises various components, including the brake light switch, turn signal switch, and the bulbs themselves. These elements work in harmony to communicate your driving intentions to fellow road users and illuminate the path behind you.</p>
<h3>Electrical Symphony in Motion</h3>
<center><img src="https://tse1.mm.bing.net/th?q=Electrical+Symphony+in+Motion+1968+Camaro+Stop+Turn+Light+Wiring" alt="Electrical Symphony in Motion"></center>
<p>Imagine your Camaro as a conductor leading an electrical symphony. When you press the brake pedal or signal a turn, the intricate wiring comes to life, creating a harmonious display of lights. It's not just about functionality; it's about transforming a drive into an experience.</p>
<p>The stop turn light wiring is, in essence, the vehicle's way of communicating with the world. It's a silent language spoken through the glow of lights, ensuring that your intentions on the road are crystal clear, even in the darkest of nights.</p>
<h3>The Wiring Maze Unveiled</h3>
<center><img src="https://tse1.mm.bing.net/th?q=The+Wiring+Maze+Unveiled+1968+Camaro+Stop+Turn+Light+Wiring" alt="The Wiring Maze Unveiled"></center>
<p>Navigating through the wiring maze of the 1968 Camaro can initially seem like a daunting task. However, each wire has a purpose, and understanding this maze is the key to unlocking the full potential of your vehicle.</p>
<p>The color-coded wires may resemble a complex puzzle, but with patience and a bit of know-how, deciphering the maze becomes an empowering journey. Each connection contributes to the overall functionality, creating a network that ensures the smooth operation of the stop turn lights.</p>
<h3>DIY Adventures: Tackling Wiring Challenges</h3>
<center><img src="https://tse1.mm.bing.net/th?q=DIY+Adventures+1968+Camaro+Stop+Turn+Light+Wiring" alt="DIY Adventures"></center>
<p>For the adventurous souls who enjoy getting hands-on with their classic cars, diving into DIY adventures with the stop turn light wiring can be a rewarding experience. Armed with the right tools and a basic understanding of the system, you can tackle wiring challenges head-on.</p>
<p>Whether it's replacing a faulty bulb, troubleshooting a connection issue, or upgrading to modern LED lights, these DIY adventures not only enhance your knowledge of your Camaro but also provide a sense of accomplishment.</p>
<h3>From Wires to Comedy: Embracing the Humor</h3>
<center><img src="https://tse1.mm.bing.net/th?q=From+Wires+to+Comedy+1968+Camaro+Stop+Turn+Light+Wiring" alt="From Wires to Comedy"></center>
<p>Believe it or not, there's a humorous side to dealing with the intricacies of stop turn light wiring. The occasional mix-up, the perplexing moments of figuring out which wire goes where – it's all part of the comedy that comes with being a classic car enthusiast.</p>
<p>Picture this: you, the proud owner of a 1968 Camaro, engaging in a light-hearted battle with the wires. It's not just a technical endeavor; it's a comedy show where the wires take center stage, and you play the role of the director trying to orchestrate a flawless performance.</p>
<h3>Safety Unleashed: Upgrading for a Secure Ride</h3>
<center><img src="https://tse1.mm.bing.net/th?q=Safety+Unleashed+1968+Camaro+Stop+Turn+Light+Wiring" alt="Safety Unleashed"></center>
<p>Beyond the technicalities and the humor lies a crucial aspect – safety. Upgrading your 1968 Camaro stop turn light wiring isn't just about aesthetics; it's about unleashing a new level of safety on the road.</p>
<p>Modernizing the wiring system can involve incorporating advanced technologies, such as LED lights, which not only enhance visibility but also consume less power. This upgrade ensures that your classic car meets contemporary safety standards while retaining its vintage charm.</p>
<h3>Cruising with Confidence: The Final Glow</h3>
<center><img src="https://tse1.mm.bing.net/th?q=Cruising+with+Confidence+1968+Camaro+Stop+Turn+Light+Wiring" alt="Cruising with Confidence"></center>
<p>As you hit the road with your newly upgraded stop turn light wiring, there's a sense of confidence that accompanies every turn. The final glow of those lights not only illuminates the path but symbolizes the successful fusion of classic aesthetics with modern functionality.</p>
<p>Driving a 1968 Camaro isn't just a journey; it's a celebration of automotive history. The stop turn light wiring, once a mysterious network of wires, is now a testament to your understanding and appreciation of the intricate details that make this classic car a true icon on the road.</p>
<p><p> </p><h6>Another point of view about 1968 CAMARO STOP TURN LIGHT WIRING.</h6><p>From a professional standpoint, delving into the intricacies of the 1968 Camaro stop turn light wiring unveils a critical aspect of automotive engineering. Here's a breakdown of the key points regarding this specific component:</p>
<ol>
<li><p><strong>Importance of Stop Turn Light Wiring:</strong> The stop turn light wiring is a fundamental component of the 1968 Camaro, serving the crucial function of communicating the driver's intentions to other road users. It plays a pivotal role in enhancing safety and ensuring compliance with traffic regulations.</p></li>
<li><p><strong>Anatomy of the Wiring System:</strong> The wiring system consists of various components, including the brake light switch, turn signal switch, and bulbs. Understanding the arrangement and functionality of each part is essential for diagnosing issues and ensuring optimal performance.</p></li>
<li><p><strong>Electrical Symphony:</strong> When the driver engages the brake or signals a turn, the stop turn light wiring orchestrates an electrical symphony. This harmonious display of lights not only serves a functional purpose but also contributes to the overall aesthetic appeal of the classic car.</p></li>
<li><p><strong>Color-Coded Complexity:</strong> Deciphering the color-coded wiring may seem complex at first, but it follows a logical pattern. Each color corresponds to a specific function, and a systematic approach is crucial for understanding and troubleshooting the wiring maze.</p></li>
<li><p><strong>DIY Adventures:</strong> Enthusiastic owners can embark on do-it-yourself adventures related to the stop turn light wiring. Whether it's replacing bulbs, troubleshooting connections, or even upgrading to modern technologies, these DIY tasks provide a hands-on understanding of the vehicle's electrical system.</p></li>
<li><p><strong>Humorous Elements:</strong> Despite the technical nature of the wiring, there's a humorous side to dealing with the intricacies. The occasional mix-up and moments of confusion add a touch of lightheartedness to the otherwise serious task of maintaining and understanding the wiring system.</p></li>
<li><p><strong>Safety Considerations:</strong> Upgrading the stop turn light wiring goes beyond aesthetics; it addresses safety concerns. Modernizing the system with features like LED lights not only enhances visibility but also aligns the classic car with contemporary safety standards.</p></li>
<li><p><strong>Confidence on the Road:</strong> The final result of a well-maintained and upgraded stop turn light wiring system instills a sense of confidence in the driver. Cruising with properly functioning lights not only ensures safety but also reflects a commitment to preserving the classic car's authenticity.</p></li>
</ol>
<p>Approaching the 1968 Camaro stop turn light wiring with a professional perspective involves a holistic understanding of its functional significance, electrical intricacies, and the broader implications for safety and driving experience.</p><p> </p><strong><u>Conclusion : Revamp Your Ride: Unleashing the Ultimate 1968 Camaro Stop Turn Light Wiring Upgrade!.</u></strong><p>As we conclude our exploration into the <u>1968 Camaro stop turn light wiring</u>, it's evident that the intricacies of this component extend far beyond mere functionality. <em>Delving into the wiring system is akin to unraveling the history of automotive engineering</em>, where each wire and connection tells a story of innovation and design excellence.</p>
<p><em>For enthusiasts and owners of the 1968 Camaro, understanding and maintaining the stop turn light wiring is not just a technical endeavor; it's a journey through time</em>. It's a commitment to preserving the authenticity of a classic while embracing modern safety standards. As you navigate the wiring maze and engage in DIY adventures, remember that the <u>1968 Camaro stop turn light wiring</u> is not just a set of wires; it's a testament to the enduring legacy of a timeless automotive icon.</p>
<p>Whether you find yourself decoding the color-coded complexity or upgrading for enhanced safety, the meticulous attention to the stop turn light wiring ensures that your Camaro not only lights up the road but continues to shine as a symbol of automotive excellence. As you cruise with confidence, let the glow of those lights be a reminder of the seamless blend of vintage charm and modern functionality that defines the 1968 Camaro experience.</p><p> </p><p><article><figure><noscript><img src='https://tse1.mm.bing.net/th?q=Question and answer Revamp Your Ride: Unleashing the Ultimate 1968 Camaro Stop Turn Light Wiring Upgrade!' alt='Question and answer Revamp Your Ride: Unleashing the Ultimate 1968 Camaro Stop Turn Light Wiring Upgrade!' /></noscript><img class='v-cover ads-img' src='https://tse1.mm.bing.net/th?q=Question and answer Revamp Your Ride: Unleashing the Ultimate 1968 Camaro Stop Turn Light Wiring Upgrade!' alt='Question and answer Revamp Your Ride: Unleashing the Ultimate 1968 Camaro Stop Turn Light Wiring Upgrade!' width='100%' onerror='this.onerror=null;this.src='https://upload.wikimedia.org/wikipedia/commons/d/d1/Image_not_available.png?20210219185637';' style='margin-right: 8px;margin-bottom: 8px;' /></figure></article></p><p> </p><strong><i>Questions & Answer :</i></strong><p><strong>Q: Is deciphering the 1968 Camaro stop turn light wiring like solving a mystery?</strong></p>
<ul>
<li><p><em>A:</em> Oh, absolutely! It's like being a detective in a classic car noir film. Follow the color-coded clues, untangle the wires, and unveil the secret behind every blink and brake.</p></li>
</ul>
<p><strong>Q: Can I tackle the wiring maze as a DIY project?</strong></p>
<ul>
<li><p><em>A:</em> Of course! Think of it as a DIY adventure, like Indiana Jones exploring the Temple of Wiring Doom. Grab your toolbox, embark on the quest, and emerge victorious with a well-lit Camaro!</p></li>
</ul>
<p><strong>Q: Are there any comedic moments while dealing with the wiring?</strong></p>
<ul>
<li><p><em>A:</em> Oh, absolutely! Picture this – you and the wires engaging in a light-hearted battle of wits. It's like a sitcom where the Camaro takes center stage, and you play the role of the wire whisperer.</p></li>
</ul>
<p><strong>Q: Can upgrading the wiring make my Camaro the star of the road?</strong></p>
<ul>
<li><p><em>A:</em> Indeed! Upgrading the wiring isn't just a technical improvement; it's your Camaro's ticket to stardom. Picture it rolling down the road with upgraded lights – cue the applause from fellow drivers!</p></li>
</ul>
<p><strong>Q: Is the wiring system more than just a bunch of tangled wires?</strong></p>
<ul>
<li><p><em>A:</em> Absolutely! It's a symphony of wires, each playing a unique role. It's like the cast of a Broadway show – different wires, different functions, but when they come together, it's a performance worth applauding!</p></li>
</ul>
<p>Remember, when it comes to the <strong>1968 Camaro stop turn light wiring</strong>, questions are opportunities for comedic adventures. Embrace the quirks, enjoy the journey, and let your Camaro shine bright on the road!</p><p> </p>
Keywords : 1968 CAMARO STOP TURN LIGHT WIRINGMilohttp://www.blogger.com/profile/01418902555588264834noreply@blogger.com0tag:blogger.com,1999:blog-4101198853060839868.post-86403013035101319142023-12-18T03:00:00.000-08:002024-01-21T14:33:06.232-08:00Cruise Through Clarity: Unveiling the 1968 Camaro Tail Light Wiring Diagram for Seamless Restoration!<p> </p><p><article><figure><noscript><img src='https://tse1.mm.bing.net/th?q=Cruise Through Clarity: Unveiling the 1968 Camaro Tail Light Wiring Diagram for Seamless Restoration!' alt='Cruise Through Clarity: Unveiling the 1968 Camaro Tail Light Wiring Diagram for Seamless Restoration!' width='640' height='360' /></noscript><img class='v-cover ads-img' src='https://tse1.mm.bing.net/th?q=Cruise Through Clarity: Unveiling the 1968 Camaro Tail Light Wiring Diagram for Seamless Restoration!' alt='Cruise Through Clarity: Unveiling the 1968 Camaro Tail Light Wiring Diagram for Seamless Restoration!' width='100%' onerror='this.onerror=null;this.src='https://upload.wikimedia.org/wikipedia/commons/d/d1/Image_not_available.png?20210219185637';' style='margin-right: 8px;margin-bottom: 8px;' /></figure></article></p><blockquote>Unlock the secrets of flawless restoration! Master the 1968 Camaro tail light wiring diagram for precision, ensuring a seamless and expert-level vintage automotive restoration.</blockquote><p> </p>Rev up your restoration journey with a dash of humor as we unravel the mysteries of the <b>1968 Camaro</b> tail light wiring diagram. Buckle up for a journey through time, where wires and circuits play the leading roles in this vintage automotive comedy. Picture it: a <i>delightful dance</i> of electrons, a tango of cables, and a comedic ensemble of connectors. As we delve into the intricacies of this automotive script, prepare to chuckle your way through the backstage chaos that powers the iconic tail lights of the '68 Camaro. Fasten your seatbelt and get ready for a wiring diagram exploration that's both informative and hilariously entertaining!<p> </p><h4>Top 10 important point for '1968 CAMARO TAIL LIGHT WIRING DIAGRAM'</h4><table cellpadding='0' cellspacing='0' class='tr-caption-container' style='float: right;'><tbody><tr><td style='text-align: center;'><img border='0' src='https://tse1.mm.bing.net/th?q=Top 10 '1968 CAMARO TAIL LIGHT WIRING DIAGRAM'' width='200' /></td></tr><tr></tr></tbody></table> <ol>
<li>Embarking on the Wiring Journey</li>
<li>Understanding the Vintage Connections</li>
<li>Navigating the Maze of Color Codes</li>
<li>Empathy for Every Connector</li>
<li>Respecting the Circuit's Story</li>
<li>Walking Through Troubleshooting with Care</li>
<li>Sympathizing with the Flickering Lights Dilemma</li>
<li>Harmonizing with Grounding Techniques</li>
<li>Compassion for the DIY Enthusiast</li>
<li>Revitalizing the Past with Tender Wiring Care</li>
</ol><p> </p><h5>Several Facts that you should know about '1968 CAMARO TAIL LIGHT WIRING DIAGRAM'.</h5><h3>Embarking on the Wiring Journey</h3>
<center><img src="https://tse1.mm.bing.net/th?q=Embarking+on+the+Wiring+Journey+1968+Camaro+Tail+Light+Wiring+Diagram" alt="Embarking on the Wiring Journey"></center>
<p>Welcome to the heart of automotive history as we embark on the intricate journey of the <b>1968 Camaro tail light wiring diagram</b>. Picture this roadmap as a guide through time, connecting us to the soul of a classic masterpiece. Let empathy guide us as we delve into the wiring intricacies that bring this iconic beauty to life.</p>
<h3>Understanding the Vintage Connections</h3>
<center><img src="https://tse1.mm.bing.net/th?q=Understanding+the+Vintage+Connections+1968+Camaro+Tail+Light+Wiring+Diagram" alt="Understanding the Vintage Connections"></center>
<p>Our journey calls for a deep understanding of vintage connections, each wire telling a story of the past. Appreciate the historical significance embedded in every connection, fostering an empathic connection with the heritage of the <b>1968 Camaro</b>.</p>
<h3>Navigating the Maze of Color Codes</h3>
<center><img src="https://tse1.mm.bing.net/th?q=Navigating+the+Maze+of+Color+Codes+1968+Camaro+Tail+Light+Wiring+Diagram" alt="Navigating the Maze of Color Codes"></center>
<p>Colors speak louder than words in the world of wiring. Navigate the maze of color codes with a compassionate eye, understanding the language of hues that guides the electrons through the veins of your cherished <b>1968 Camaro</b>.</p>
<h3>Empathy for Every Connector</h3>
<center><img src="https://tse1.mm.bing.net/th?q=Empathy+for+Every+Connector+1968+Camaro+Tail+Light+Wiring+Diagram" alt="Empathy for Every Connector"></center>
<p>Each connector carries the weight of its vintage legacy. Approach them with empathy, recognizing their role in preserving the authenticity of your <b>1968 Camaro</b>'s charm. Feel the connection as you engage with each piece of the puzzle.</p>
<h3>Respecting the Circuit's Story</h3>
<center><img src="https://tse1.mm.bing.net/th?q=Respecting+the+Circuit%27s+Story+1968+Camaro+Tail+Light+Wiring+Diagram" alt="Respecting the Circuit's Story"></center>
<p>Every circuit narrates a story - respect and listen. In this empathic exploration, acknowledge the tales woven within the wires. By respecting the circuit's story, you ensure an authentic restoration that echoes the glory days of the <b>1968 Camaro</b>.</p>
<h3>Walking Through Troubleshooting with Care</h3>
<center><img src="https://tse1.mm.bing.net/th?q=Walking+Through+Troubleshooting+with+Care+1968+Camaro+Tail+Light+Wiring+Diagram" alt="Walking Through Troubleshooting with Care"></center>
<p>Issues may arise, but approach troubleshooting with care. Empathize with the electrical quirks, patiently unraveling the mysteries that may challenge the <b>1968 Camaro</b>'s luminous legacy. Walk through each step with a caring touch.</p>
<h3>Sympathizing with the Flickering Lights Dilemma</h3>
<center><img src="https://tse1.mm.bing.net/th?q=Sympathizing+with+the+Flickering+Lights+Dilemma+1968+Camaro+Tail+Light+Wiring+Diagram" alt="Sympathizing with the Flickering Lights Dilemma"></center>
<p>Flickering lights may test your patience, but empathize with the dilemma. Sympathize with the flickers, seeking solutions that will restore the brilliance to the tail lights of your beloved <b>1968 Camaro</b>.</p>
<h3>Harmonizing with Grounding Techniques</h3>
<center><img src="https://tse1.mm.bing.net/th?q=Harmonizing+with+Grounding+Techniques+1968+Camaro+Tail+Light+Wiring+Diagram" alt="Harmonizing with Grounding Techniques"></center>
<p>Harmonize with the grounding techniques, grounding the connection between your passion and the vehicle. Feel the resonance as you employ techniques that ensure a stable and reliable electrical foundation for the <b>1968 Camaro</b>.</p>
<h3>Compassion for the DIY Enthusiast</h3>
<center><img src="https://tse1.mm.bing.net/th?q=Compassion+for+the+DIY+Enthusiast+1968+Camaro+Tail+Light+Wiring+Diagram" alt="Compassion for the DIY Enthusiast"></center>
<p>For the DIY enthusiast, approach the wiring diagram with compassion. Whether you're a seasoned pro or a first-time restorer, let empathy guide your hands as you navigate the intricacies of the <b>1968 Camaro</b> tail light wiring diagram.</p>
<h3>Revitalizing the Past with Tender Wiring Care</h3>
<center><img src="https://tse1.mm.bing.net/th?q=Revitalizing+the+Past+with+Tender+Wiring+Care+1968+Camaro+Tail+Light+Wiring+Diagram" alt="Revitalizing the Past with Tender Wiring Care"></center>
<p>In conclusion, embrace the role of a caretaker, revitalizing the past with tender wiring care. Feel the satisfaction of preserving a piece of history as you breathe new life into the <b>1968 Camaro</b> through empathic restoration.</p><p> </p><h2>Unraveling the Enigmatic Dance of Light: A Creative Exploration of the 1968 Camaro Tail Light Wiring Diagram</h2>
<p>Welcome, fellow automotive enthusiasts, to a journey through time and wires as we embark on the whimsical exploration of the <b>1968 Camaro tail light wiring diagram</b>. Imagine this diagram as a musical score, guiding the electrons through a symphony of connections, creating a dazzling dance of light at the rear of this iconic masterpiece.</p>
<h3>The Overture: A Prelude to Vintage Mastery</h3>
<center><img src="https://tse1.mm.bing.net/th?q=The+Overture+1968+Camaro+Tail+Light+Wiring+Diagram" alt="The Overture"></center>
<p>Our adventure begins with the overture, a prelude to the vintage mastery awaiting us. Picture the intricate wiring as musical notes, each telling a story of a bygone era. The <b>1968 Camaro tail light wiring diagram</b> sets the stage for a symphonic restoration, where every connection plays a crucial role in harmonizing the past and the present.</p>
<h3>Harmony in Hues: Navigating the Colorful Composition</h3>
<center><img src="https://tse1.mm.bing.net/th?q=Harmony+in+Hues+1968+Camaro+Tail+Light+Wiring+Diagram" alt="Harmony in Hues"></center>
<p>As we delve deeper, we encounter the harmony in hues, navigating the colorful composition of wires. The <b>1968 Camaro tail light wiring diagram</b> speaks a language of colors, and deciphering this code is akin to interpreting a vivid painting. Each hue holds a purpose, leading the electrons through a visual symphony that illuminates the night.</p>
<h3>The Waltz of Connectors: A Dance of Empathy</h3>
<center><img src="https://tse1.mm.bing.net/th?q=The+Waltz+of+Connectors+1968+Camaro+Tail+Light+Wiring+Diagram" alt="The Waltz of Connectors"></center>
<p>Picture the waltz of connectors, a dance of empathy between metal and current. Every connector has a tale to tell, and as we join this dance through the <b>1968 Camaro tail light wiring diagram</b>, let empathy guide our steps. Each twist and turn in the diagram is a graceful movement, a connection with the soul of this classic beauty.</p>
<h3>A Sonata of Stories: Respecting the Circuit's Narratives</h3>
<center><img src="https://tse1.mm.bing.net/th?q=A+Sonata+of+Stories+1968+Camaro+Tail+Light+Wiring+Diagram" alt="A Sonata of Stories"></center>
<p>Within the wires lies a sonata of stories, and our next venture involves respecting the circuit's narratives. Each circuit is a character in this automotive saga, and by understanding and respecting its story, we ensure an authentic restoration that echoes the glory days of the <b>1968 Camaro</b>.</p>
<h3>The Troubadour's Troubles: Walking Through Troubleshooting with Care</h3>
<center><img src="https://tse1.mm.bing.net/th?q=The+Troubadour%27s+Troubles+1968+Camaro+Tail+Light+Wiring+Diagram" alt="The Troubadour's Troubles"></center>
<p>As troubadours on this automotive journey, we encounter troubles, and our empathy shines as we walk through troubleshooting with care. The flicker of lights may present a challenge, but with a caring touch, we untangle the mysteries within the <b>1968 Camaro tail light wiring diagram</b>. Each step is a verse, leading us to a solution that restores brilliance to the tail lights.</p>
<h3>Grounding Techniques: Syncopating with Stability</h3>
<center><img src="https://tse1.mm.bing.net/th?q=Grounding+Techniques+1968+Camaro+Tail+Light+Wiring+Diagram" alt="Grounding Techniques"></center>
<p>The rhythm of our exploration takes a turn towards grounding techniques, syncopating with stability. Harmonize with the grounding techniques as they form the backbone of the wiring diagram. The electrons find their stability, ensuring a reliable foundation for the luminous legacy of the <b>1968 Camaro</b>.</p>
<h3>The Artisan's Canvas: A Compassionate Approach for the DIY Enthusiast</h3>
<center><img src="https://tse1.mm.bing.net/th?q=The+Artisan%27s+Canvas+1968+Camaro+Tail+Light+Wiring+Diagram" alt="The Artisan's Canvas"></center>
<p>For the DIY enthusiast, the wiring diagram is an artisan's canvas, and our approach must be compassionate. Whether you're a seasoned pro or a novice, let empathy guide your hands. Feel the connection as you navigate the intricacies of the <b>1968 Camaro tail light wiring diagram</b>, creating a masterpiece that resonates with your passion.</p>
<h3>A Time-Traveling Finale: Revitalizing the Past with Tender Wiring Care</h3>
<center><img src="https://tse1.mm.bing.net/th?q=Time-Traveling+Finale+1968+Camaro+Tail+Light+Wiring+Diagram" alt="Time-Traveling Finale"></center>
<p>As we approach the finale of our time-traveling adventure, embrace the role of a caretaker, revitalizing the past with tender wiring care. Every twist of the wire is a brushstroke, preserving a piece of history within the <b>1968 Camaro</b>. Feel the satisfaction as you breathe new life into this classic, a testament to your empathic restoration.</p>
<p>In conclusion, our exploration of the <b>1968 Camaro tail light wiring diagram</b> transcends the technicalities. It's a creative journey, a dance of empathy, and a symphony of connections. As you embark on your own restoration odyssey, may your hands be guided by the same passion and empathy that drive the electrons through the intricate pathways of this iconic automotive masterpiece.</p><p> </p><h6>Another point of view about '1968 CAMARO TAIL LIGHT WIRING DIAGRAM'.</h6><p>When examining the <b>1968 Camaro tail light wiring diagram</b> from a professional standpoint, it's essential to approach it with precision and expertise. Here are key points from a professional point of view:</p>
<ol>
<li><p><b>Comprehensive Analysis:</b> Conduct a thorough examination of the wiring diagram, considering each element with meticulous attention to detail.</p></li>
<li><p><b>Color Code Deciphering:</b> Understand the significance of the color codes, ensuring a precise comprehension of the electrical pathways within the system.</p></li>
<li><p><b>Connector Inspection:</b> Methodically inspect connectors for wear, corrosion, or any signs of damage that could affect the overall functionality.</p></li>
<li><p><b>Circuit Understanding:</b> Gain a deep understanding of the circuits involved, recognizing the role each one plays in the overall operation of the tail lights.</p></li>
<li><p><b>Troubleshooting Proficiency:</b> Develop a troubleshooting strategy, allowing for efficient identification and resolution of any issues that may arise in the wiring system.</p></li>
<li><p><b>Grounding Techniques:</b> Implement grounding techniques with precision to ensure a stable and reliable electrical foundation for the tail lights.</p></li>
<li><p><b>Professional DIY Approach:</b> Even for the do-it-yourself enthusiast, maintain a professional approach, adhering to industry standards and best practices during the restoration process.</p></li>
<li><p><b>Documentation and Record-Keeping:</b> Maintain detailed documentation of the process, including any modifications or repairs made to the wiring system, for future reference and analysis.</p></li>
</ol>
<p>Approaching the <b>1968 Camaro tail light wiring diagram</b> with a professional perspective ensures a systematic and reliable restoration process, preserving the integrity of this classic automotive masterpiece.</p><p> </p><strong><u>Conclusion : Cruise Through Clarity: Unveiling the 1968 Camaro Tail Light Wiring Diagram for Seamless Restoration!.</u></strong><p>As we conclude our whimsical journey through the <u><em>1968 Camaro tail light wiring diagram</em></u>, let's take a moment to appreciate the artistry and precision required in restoring this automotive masterpiece. Navigating through the colorful composition of wires, we've unraveled the enigmatic dance of light that defines the soul of the <u><em>1968 Camaro</em></u>. Each connection, a note in a symphony, harmonizing the past and present, creating a luminous legacy that stands the test of time.</p>
<p>Embrace the challenges with the spirit of troubadours, for within the <u><em>1968 Camaro tail light wiring diagram</em></u> lies not just a technical guide but a canvas for passionate artisans. Whether you're a seasoned professional or a DIY enthusiast, let the empathy embedded in every connection guide your hands. With each twist of the wire, you contribute to the ongoing narrative of this classic beauty. As you embark on your own restoration adventure, may the lights of your <u><em>1968 Camaro</em></u> shine brighter, a testament to the timeless allure of automotive craftsmanship.</p><p> </p><p><article><figure><noscript><img src='https://tse1.mm.bing.net/th?q=Question and answer Cruise Through Clarity: Unveiling the 1968 Camaro Tail Light Wiring Diagram for Seamless Restoration!' alt='Question and answer Cruise Through Clarity: Unveiling the 1968 Camaro Tail Light Wiring Diagram for Seamless Restoration!' /></noscript><img class='v-cover ads-img' src='https://tse1.mm.bing.net/th?q=Question and answer Cruise Through Clarity: Unveiling the 1968 Camaro Tail Light Wiring Diagram for Seamless Restoration!' alt='Question and answer Cruise Through Clarity: Unveiling the 1968 Camaro Tail Light Wiring Diagram for Seamless Restoration!' width='100%' onerror='this.onerror=null;this.src='https://upload.wikimedia.org/wikipedia/commons/d/d1/Image_not_available.png?20210219185637';' style='margin-right: 8px;margin-bottom: 8px;' /></figure></article></p><p> </p><strong><i>Questions & Answer :</i></strong><p><strong>Q: Is understanding the 1968 Camaro tail light wiring diagram essential for a restoration project?</strong></p>
<ul>
<li><p><b>A:</b> Absolutely! Think of the wiring diagram as the musical sheet for a symphony of electrons. Understanding it is like being the conductor of a vintage automotive orchestra, ensuring every note plays its part in the dazzling dance of lights at the rear of the iconic 1968 Camaro.</p></li>
</ul>
<p><strong>Q: Why does the color code matter in the wiring diagram?</strong></p>
<ul>
<li><p><b>A:</b> The color code isn't just a mundane detail; it's the vibrant language of the diagram. Each hue is a clue, guiding you through the intricate pathways of the wiring system. Deciphering these colors is akin to translating a visual masterpiece, ensuring a harmonious flow of electrical currents.</p></li>
</ul>
<p><strong>Q: How can empathy be relevant when dealing with a wiring diagram?</strong></p>
<ul>
<li><p><b>A:</b> Empathy in the automotive realm? Absolutely! Treat each connector as a dance partner in a waltz of electrons. Understanding the story behind every twist and turn ensures a connection that goes beyond the technical, fostering a deeper appreciation for the intricate soul of the 1968 Camaro.</p></li>
</ul>
<p><strong>Q: Is troubleshooting a flickering lights issue as challenging as it sounds?</strong></p>
<ul>
<li><p><b>A:</b> Flickering lights may sound like a troubadour's troubles, but fear not! Troubleshooting is an art, and with a caring touch and methodical approach, you can untangle the mysteries within the wiring diagram. It's a journey, not a challenge, towards restoring brilliance to the tail lights.</p></li>
</ul>
<p><strong>Q: How important are grounding techniques in the 1968 Camaro tail light wiring diagram?</strong></p>
<ul>
<li><p><b>A:</b> Grounding techniques are the unsung heroes, providing stability to the entire electrical symphony. Think of them as the rhythm section, ensuring a steady beat for the luminous legacy of the 1968 Camaro. Harmonize with these techniques, and you'll witness a masterpiece unfold.</p></li>
</ul><p> </p>
Keywords : '1968 CAMARO TAIL LIGHT WIRING DIAGRAM'Milohttp://www.blogger.com/profile/01418902555588264834noreply@blogger.com0tag:blogger.com,1999:blog-4101198853060839868.post-36494105348364055622023-12-16T16:00:00.000-08:002024-01-21T14:33:06.558-08:00Revive Classic Cool: Unearth the 1968 Camaro Vintage AC Wiring Blueprint!<p> </p><p><article><figure><noscript><img src='https://tse1.mm.bing.net/th?q=Revive Classic Cool: Unearth the 1968 Camaro Vintage AC Wiring Blueprint!' alt='Revive Classic Cool: Unearth the 1968 Camaro Vintage AC Wiring Blueprint!' width='640' height='360' /></noscript><img class='v-cover ads-img' src='https://tse1.mm.bing.net/th?q=Revive Classic Cool: Unearth the 1968 Camaro Vintage AC Wiring Blueprint!' alt='Revive Classic Cool: Unearth the 1968 Camaro Vintage AC Wiring Blueprint!' width='100%' onerror='this.onerror=null;this.src='https://upload.wikimedia.org/wikipedia/commons/d/d1/Image_not_available.png?20210219185637';' style='margin-right: 8px;margin-bottom: 8px;' /></figure></article></p><blockquote>Unlock the secrets of your 1968 Camaro with a vintage AC wiring diagram. Elevate your restoration prowess with professional insights, ensuring precision and authenticity in every connection.</blockquote><p> </p>Embark on a nostalgic journey back to 1968, where the <b>vintage</b> allure of the Camaro meets the ingenious intricacies of its <i>AC wiring diagram</i>. Picture this: a time when engines roared with a distinct vigor, and car design was an art form. Now, dive into the meticulous blueprint that brings the heart of the classic Camaro to life. This isn't your typical journey through wires; it's a creative exploration, unraveling the <b>vintage</b> mystique with each circuit and connection. Let's weave through the past, where every wire tells a story and the AC system is a symphony of 60s engineering brilliance.<p> </p><h4>Top 10 important point for 1968 CAMARO VINTAGE AC WIRING DIAGRAM</h4><table cellpadding='0' cellspacing='0' class='tr-caption-container' style='float: right;'><tbody><tr><td style='text-align: center;'><img border='0' src='https://tse1.mm.bing.net/th?q=Top 10 1968 CAMARO VINTAGE AC WIRING DIAGRAM' width='200' /></td></tr><tr></tr></tbody></table> <ol>
<li>Unraveling the Mystery: AC Wires and Where They Hide</li>
<li>When Wires Danced: Groovy Connections of the '68 Camaro</li>
<li>Vintage AC: Where Coolness Meets Wiring Wizardry</li>
<li>Spaghetti Junction: Decoding Tangled Wires, '68 Style</li>
<li>AC Whiz or AC Quiz: Are You Wiring Savvy?</li>
<li>Time Traveling with Tools: '68 Camaro Edition</li>
<li>Shockingly Good Connections: AC Wiring Unleashed</li>
<li>Wired for Laughter: '68 Camaro's Electric Comedy Show</li>
<li>Camaro Comedy Hour: A Wire's Tale of Intrigue and Drama</li>
<li>AC Mastery: How '68 Camaro Wiring Became the Real MVP</li>
</ol><p> </p><h5>Several Facts that you should know about 1968 CAMARO VINTAGE AC WIRING DIAGRAM.</h5><h3>Exploring the '68 Camaro Vintage AC Wiring Diagram</h3>
<center><img src="https://tse1.mm.bing.net/th?q=Overview+1968+Camaro+vintage+AC+wiring+diagram" alt="Overview Image"></center>
<p>Welcome to the heart of classic automotive nostalgia—the 1968 Camaro. In this article, we'll delve into the intricacies of the vintage AC wiring diagram that powered this iconic vehicle, exploring its unique features and the role it played in defining the automotive landscape of the late '60s.</p>
<h3>The Blueprint Unveiled</h3>
<center><img src="https://tse1.mm.bing.net/th?q=Blueprint+1968+Camaro+vintage+AC+wiring+diagram" alt="Blueprint Image"></center>
<p>At first glance, an AC wiring diagram may seem like a maze of lines and symbols. Fear not, as we dissect the blueprint, highlighting key components that make up the intricate web of connections responsible for keeping the Camaro cool and comfortable.</p>
<h3>Time-Traveling Wires</h3>
<center><img src="https://tse1.mm.bing.net/th?q=Time-traveling+wires+1968+Camaro+vintage+AC+wiring+diagram" alt="Time-Traveling Wires Image"></center>
<p>Step into a time machine as we trace the origins of these vintage wires. Learn how the technology of the past continues to amaze and discover the ingenious methods employed by engineers to ensure optimal performance in a world before digital dominance.</p>
<h3>Decoding the Tangled Web</h3>
<center><img src="https://tse1.mm.bing.net/th?q=Decoding+tangled+web+1968+Camaro+vintage+AC+wiring+diagram" alt="Decoding Image"></center>
<p>Ever felt lost in a sea of wires? Fear not, for we'll unravel the tangled web of '68 Camaro AC wiring. From color codes to connection points, this section provides a guide to decoding the intricate network and understanding the logic behind the madness.</p>
<h3>Tools of the Time</h3>
<center><img src="https://tse1.mm.bing.net/th?q=Tools+of+the+time+1968+Camaro+vintage+AC+wiring+diagram" alt="Tools Image"></center>
<p>What tools did the engineers of the past wield to tame the electrical beast? Explore the vintage tools that were instrumental in crafting and maintaining the AC wiring system of the '68 Camaro, showcasing the ingenuity that prevailed in a pre-digital era.</p>
<h3>Shocking Revelations</h3>
<center><img src="https://tse1.mm.bing.net/th?q=Shocking+revelations+1968+Camaro+vintage+AC+wiring+diagram" alt="Shocking Revelations Image"></center>
<p>Prepare for some electrifying revelations as we unveil the unexpected stories hidden within the wiring. From quirky quirks to surprising engineering feats, this section sheds light on the shocking elements that make the '68 Camaro wiring diagram a captivating tale.</p>
<h3>Laughter in the Lines</h3>
<center><img src="https://tse1.mm.bing.net/th?q=Laughter+in+the+lines+1968+Camaro+vintage+AC+wiring+diagram" alt="Laughter Image"></center>
<p>Believe it or not, there's room for humor in the world of wires. Join us for a lighthearted exploration of the amusing anecdotes and comical quirks that bring a smile to the faces of those who dare to navigate the electrical landscape of the '68 Camaro.</p>
<h3>Mastery Unleashed</h3>
<center><img src="https://tse1.mm.bing.net/th?q=Mastery+unleashed+1968+Camaro+vintage+AC+wiring+diagram" alt="Mastery Image"></center>
<p>In the final stretch, we celebrate the mastery achieved through the '68 Camaro vintage AC wiring diagram. Discover how this piece of engineering brilliance became the unsung hero, ensuring that every ride in the classic Camaro was a testament to precision, performance, and an era gone by.</p><p> </p><h2>The Intricacies of the 1968 Camaro Vintage AC Wiring Diagram</h2>
<p>Welcome to the fascinating world of automotive history, where the iconic 1968 Camaro takes center stage. In this exploration, we'll dive into the heart of this classic vehicle and unravel the mysteries of its vintage AC wiring diagram. Let's embark on a journey back in time, tracing the lines and connections that powered the air conditioning system of this legendary automobile.</p>
<h3>Understanding the Blueprint</h3>
<center><img src="https://tse1.mm.bing.net/th?q=Understanding+the+Blueprint+1968+Camaro+vintage+AC+wiring+diagram" alt="Blueprint Image"></center>
<p>At the core of the '68 Camaro's cooling system lies a blueprint, a visual representation of the intricate web of wires and components that make up the vintage AC wiring diagram. Imagine it as a roadmap, guiding engineers and enthusiasts alike through the complex network responsible for keeping the Camaro's cabin cool and comfortable.</p>
<p>As we dissect the blueprint, we encounter a variety of symbols, each carrying a specific meaning. Circles, squares, and lines intertwine to form a unique language that engineers from the past used to communicate the design and functionality of the AC wiring system. Understanding this blueprint is akin to deciphering a code—a code that once unlocked, reveals the genius behind the '68 Camaro's cooling prowess.</p>
<h3>The Time-Traveling Wires</h3>
<center><img src="https://tse1.mm.bing.net/th?q=Time-Traveling+Wires+1968+Camaro+vintage+AC+wiring+diagram" alt="Time-Traveling Wires Image"></center>
<p>Transport yourself back to the late '60s, an era of innovation and creativity in the automotive world. The wires of the '68 Camaro carry with them a sense of nostalgia, each strand representing a technological marvel of its time. These time-traveling wires connect us to an age when digital complexities were yet to dominate, and engineering relied on ingenuity and hands-on craftsmanship.</p>
<p>Picture the engineers of that era meticulously crafting the wiring system, envisioning a future where their work would become the backbone of an enduring classic. The '68 Camaro, with its vintage AC wiring diagram, stands as a testament to the dedication and foresight of those who paved the way for automotive excellence.</p>
<h3>Decoding the Tangled Web</h3>
<center><img src="https://tse1.mm.bing.net/th?q=Decoding+the+Tangled+Web+1968+Camaro+vintage+AC+wiring+diagram" alt="Decoding Image"></center>
<p>Navigating through the wiring diagram can initially feel like entering a labyrinth of twists and turns. However, fear not, for decoding the tangled web of the '68 Camaro's AC system is an achievable feat. Color-coded wires, distinct symbols, and logical connections are the keys to unraveling the complexity of the diagram.</p>
<p>Imagine these wires as the veins and arteries of the Camaro, each carrying a specific charge to ensure the proper functioning of the AC system. As we decode the connections, we gain insight into the thoughtful engineering that went into designing a system capable of withstanding the test of time.</p>
<h3>Tools of the Time</h3>
<center><img src="https://tse1.mm.bing.net/th?q=Tools+of+the+Time+1968+Camaro+vintage+AC+wiring+diagram" alt="Tools Image"></center>
<p>Embark on a journey into the toolkits of the past, where vintage tools played a pivotal role in shaping the wiring system of the '68 Camaro. These tools, though simple by today's standards, were the unsung heroes of the era, allowing engineers to bring their designs to life with precision and accuracy.</p>
<p>From wire strippers to soldering irons, each tool had a specific purpose in the creation and maintenance of the AC wiring diagram. The hands that wielded these tools were the hands that sculpted a masterpiece, ensuring that every connection was secure and reliable.</p>
<h3>Shocking Revelations</h3>
<center><img src="https://tse1.mm.bing.net/th?q=Shocking+Revelations+1968+Camaro+vintage+AC+wiring+diagram" alt="Shocking Revelations Image"></center>
<p>Prepare yourself for some electrifying revelations as we delve into the unexpected stories hidden within the '68 Camaro's wiring. Beyond the technicalities, there lies a tapestry of intriguing anecdotes and surprising engineering feats that add character to the wiring diagram.</p>
<p>Discover the quirks and idiosyncrasies that make the '68 Camaro's AC system more than just a functional component. These shocking revelations provide a glimpse into the human side of engineering—an aspect often overlooked when examining the technical aspects of a vehicle's design.</p>
<h3>Laughter in the Lines</h3>
<center><img src="https://tse1.mm.bing.net/th?q=Laughter+in+the+Lines+1968+Camaro+vintage+AC+wiring+diagram" alt="Laughter Image"></center>
<p>Believe it or not, there's room for humor in the world of wires. As we explore the '68 Camaro's vintage AC wiring diagram, we uncover amusing anecdotes and comical quirks that add a touch of levity to the otherwise serious business of automotive engineering.</p>
<p>Imagine the engineers sharing a laugh over a particularly tricky wiring connection or a clever workaround. These moments of light-heartedness serve as a reminder that even in the meticulous world of wiring diagrams, there's room for creativity and a sense of fun.</p>
<h3>Mastery Unleashed</h3>
<center><img src="https://tse1.mm.bing.net/th?q=Mastery+Unleashed+1968+Camaro+vintage+AC+wiring+diagram" alt="Mastery Image"></center>
<p>In the final stretch of our journey, we celebrate the mastery achieved through the '68 Camaro vintage AC wiring diagram. This section explores how the wiring system became the unsung hero, ensuring that every ride in the classic Camaro was a testament to precision, performance, and the enduring legacy of an era gone by.</p>
<p>From the initial design phase to the hands-on craftsmanship, the mastery unleashed in the creation of the '68 Camaro's wiring diagram is a story of dedication and passion. As we reflect on the intricate details and engineering brilliance, we gain a newfound appreciation for the role played by the vintage AC wiring diagram in shaping the automotive landscape of its time.</p>
<h3>Conclusion: A Journey Through Time and Wires</h3>
<p>As we conclude our exploration of the '68 Camaro vintage AC wiring diagram, we find ourselves at the intersection of history and innovation. The blueprint, the time-traveling wires, the decoding process, the tools of the time, shocking revelations, laughter in the lines, and the mastery unleashed—all these elements come together to form a narrative that extends beyond the technicalities.</p>
<p>The '68 Camaro's vintage AC wiring diagram is not merely a<p> </p><h6>Another point of view about 1968 CAMARO VINTAGE AC WIRING DIAGRAM.</h6><p>In examining the '1968 Camaro Vintage AC Wiring Diagram,' it is imperative to adopt an academic perspective, delving into the intricacies of this automotive artifact with a discerning eye. Let us navigate the subject matter with a structured approach:
<ol>
<li><p><b>Historical Context:</b> Begin by contextualizing the wiring diagram within the historical framework of automotive engineering during the late 1960s. Explore the technological landscape of the era and the significance of the '68 Camaro as a representative specimen.</p></li>
<li><p><b>Architectural Analysis:</b> Conduct a meticulous examination of the diagram's architectural elements. Identify and expound upon the symbols, lines, and components that constitute the blueprint, elucidating their roles and interconnections in the broader context of air conditioning functionality.</p></li>
<li><p><b>Technological Evolution:</b> Explore the technological advancements reflected in the vintage wiring diagram. Investigate how the '68 Camaro's AC system marked a progression in automotive engineering, considering the design principles and innovations that distinguished it from its predecessors.</p></li>
<li><p><b>Functional Dynamics:</b> Delve into the functional dynamics encapsulated within the wiring diagram. Analyze how electrical currents were directed and controlled to achieve optimal air conditioning performance, considering the integration of various components and the overall efficiency of the system.</p></li>
<li><p><b>Diagnostic Significance:</b> Evaluate the diagnostic significance of the wiring diagram. Examine how it served as a diagnostic tool for technicians and engineers, providing insights into potential malfunctions and facilitating the troubleshooting process for the '68 Camaro's AC system.</p></li>
<li><p><b>Interdisciplinary Impact:</b> Assess the interdisciplinary impact of the vintage AC wiring diagram. Explore its implications not only within the realm of automotive engineering but also in its intersection with electrical engineering, design principles, and broader technological trends of the time.</p></li>
<li><p><b>Practical Application:</b> Investigate the practical application of the wiring diagram in the restoration and maintenance of '68 Camaro vehicles. Highlight how enthusiasts and technicians leverage this schematic to preserve the authenticity and functionality of the air conditioning system in classic automobiles.</p></li>
<li><p><b>Legacy and Preservation:</b> Conclude by reflecting on the enduring legacy of the '1968 Camaro Vintage AC Wiring Diagram.' Consider its role in preserving the historical authenticity of the vehicle and the ongoing efforts to document, study, and safeguard this invaluable piece of automotive heritage.</p></li>
</ol><p> </p><strong><u>Conclusion : Revive Classic Cool: Unearth the 1968 Camaro Vintage AC Wiring Blueprint!.</u></strong><p>In conclusion, delving into the intricate world of the <u>1968 Camaro vintage AC wiring diagram</u> has unveiled a tapestry of historical significance and technological evolution. This artifact stands as a testament to the engineering prowess of its time, encapsulating the essence of automotive innovation in the late 1960s. Through the lens of this schematic, we have navigated the complexities of the '68 Camaro's air conditioning system, unraveling a blueprint that not only guided technicians but also mirrored the technological advancements shaping an era marked by ingenuity and craftsmanship.</p>
<p>As we wrap up our exploration, it is evident that the <u>1968 Camaro vintage AC wiring diagram</u> is more than a technical document—it is a bridge connecting us to a bygone automotive era. Beyond its diagnostic utility, this diagram embodies the marriage of form and function, intertwining aesthetics with engineering precision. For enthusiasts, technicians, and scholars alike, the vintage wiring diagram remains a vital window into the past, allowing us to appreciate the meticulous design and practical application that defined the air conditioning systems of classic automobiles. In preserving and studying such artifacts, we contribute to the ongoing narrative of automotive history, ensuring that the legacy of the '68 Camaro and its vintage wiring diagram continues to captivate and inspire future generations.</p><p> </p><p><article><figure><noscript><img src='https://tse1.mm.bing.net/th?q=Question and answer Revive Classic Cool: Unearth the 1968 Camaro Vintage AC Wiring Blueprint!' alt='Question and answer Revive Classic Cool: Unearth the 1968 Camaro Vintage AC Wiring Blueprint!' /></noscript><img class='v-cover ads-img' src='https://tse1.mm.bing.net/th?q=Question and answer Revive Classic Cool: Unearth the 1968 Camaro Vintage AC Wiring Blueprint!' alt='Question and answer Revive Classic Cool: Unearth the 1968 Camaro Vintage AC Wiring Blueprint!' width='100%' onerror='this.onerror=null;this.src='https://upload.wikimedia.org/wikipedia/commons/d/d1/Image_not_available.png?20210219185637';' style='margin-right: 8px;margin-bottom: 8px;' /></figure></article></p><p> </p><strong><i>Questions & Answer :</i></strong><p><b>Q: What is the significance of the 1968 Camaro vintage AC wiring diagram?</b></p>
<ul>
<li><b>A:</b> The vintage AC wiring diagram for the 1968 Camaro holds immense historical significance, serving as a blueprint that reflects the engineering marvels of its time. It provides a detailed guide to the intricate network of wires and components responsible for powering the air conditioning system in this iconic vehicle.</li>
</ul>
<p><b>Q: How does the '68 Camaro wiring diagram differ from modern automotive schematics?</b></p>
<ul>
<li><b>A:</b> Unlike modern automotive schematics, the '68 Camaro wiring diagram predates the digital era, showcasing a time when hands-on craftsmanship and analog technology prevailed. The simplicity and elegance of the vintage diagram highlight a bygone approach to automotive engineering, emphasizing manual diagnostics and tactile problem-solving.</li>
</ul>
<p><b>Q: Can enthusiasts use the vintage AC wiring diagram for practical applications?</b></p>
<ul>
<li><b>A:</b> Absolutely. Enthusiasts find the vintage AC wiring diagram invaluable for restoration and maintenance purposes. It serves as a diagnostic tool, offering insights into the inner workings of the air conditioning system. Moreover, the diagram is a crucial reference for those aiming to preserve the authenticity of the '68 Camaro, ensuring that its classic features remain true to the original design.</li>
</ul>
<p><b>Q: How does the wiring diagram contribute to the overall understanding of the '68 Camaro?</b></p>
<ul>
<li><b>A:</b> The wiring diagram is a key element in comprehending the '68 Camaro's design philosophy. By dissecting the connections and components, enthusiasts gain a deeper understanding of how the vehicle's various systems interact. It serves as a window into the engineering mindset of the late '60s, offering valuable insights into the technological landscape and design principles that shaped this classic automobile.</li>
</ul><p> </p>
Keywords : 1968 CAMARO VINTAGE AC WIRING DIAGRAMMilohttp://www.blogger.com/profile/01418902555588264834noreply@blogger.com0tag:blogger.com,1999:blog-4101198853060839868.post-85566852895273148192023-12-15T05:00:00.000-08:002024-01-21T14:33:06.882-08:00Rev Up Your Restoration: 1968 Charger Dash Wiring Diagram Unveiled!<p> </p><p><article><figure><noscript><img src='https://tse1.mm.bing.net/th?q=Rev Up Your Restoration: 1968 Charger Dash Wiring Diagram Unveiled!' alt='Rev Up Your Restoration: 1968 Charger Dash Wiring Diagram Unveiled!' width='640' height='360' /></noscript><img class='v-cover ads-img' src='https://tse1.mm.bing.net/th?q=Rev Up Your Restoration: 1968 Charger Dash Wiring Diagram Unveiled!' alt='Rev Up Your Restoration: 1968 Charger Dash Wiring Diagram Unveiled!' width='100%' onerror='this.onerror=null;this.src='https://upload.wikimedia.org/wikipedia/commons/d/d1/Image_not_available.png?20210219185637';' style='margin-right: 8px;margin-bottom: 8px;' /></figure></article></p><blockquote>"Unlock the 1968 Charger's secrets with our expert dash wiring diagram. Master the circuits for a flawlessly restored classic ride."</blockquote><p> </p>Buckle up for a journey back in time as we unravel the mysteries behind the iconic 1968 Charger dash panel wiring diagram. <b>Strap in</b> and prepare for a nostalgic ride through the intricate web of wires that powered the heart of this classic beauty. Picture yourself in the driver's seat, surrounded by the <i>creative</i> engineering that defined an era. As we dive into the labyrinth of connections and circuits, let your curiosity take the wheel. This isn't just a wiring diagram; it's a roadmap to the soul of a legendary machine. So, fellow enthusiasts, let's embark on this <i>creative</i> exploration of the 1968 Charger's electrifying past!<p> </p><h4>Top 10 important point for 1968 CHARGER DASH PANEL WIRING DIAGRAM</h4><table cellpadding='0' cellspacing='0' class='tr-caption-container' style='float: right;'><tbody><tr><td style='text-align: center;'><img border='0' src='https://tse1.mm.bing.net/th?q=Top 10 1968 CHARGER DASH PANEL WIRING DIAGRAM' width='200' /></td></tr><tr></tr></tbody></table> <ol>
<li>Identifying Dash Components</li>
<li>Locating the Fuse Box</li>
<li>Understanding Wire Color Codes</li>
<li>Connecting to the Ignition System</li>
<li>Routing Wires Safely</li>
<li>Grounding Points Demystified</li>
<li>Integration with Gauges and Indicators</li>
<li>Ensuring Proper Voltage Distribution</li>
<li>Troubleshooting Tips for Common Issues</li>
<li>Securing a Neat and Reliable Wiring Setup</li>
</ol><p> </p><h5>Several Facts that you should know about 1968 CHARGER DASH PANEL WIRING DIAGRAM.</h5><h3>Unlocking the Time Capsule</h3>
<p>Prepare for a trip down memory lane as we unveil the secrets of the 1968 Charger dash panel wiring diagram. Here's your backstage pass to the technological marvel that fueled this vintage beast.</p>
<center><img src="https://tse1.mm.bing.net/th?q=Unlocking+the+Time+Capsule+1968+Charger+dash+panel+wiring+diagram" alt="Time Capsule"></center>
<h3>The Fuse Box: More Than a Hidden Treasure</h3>
<p>Ever played hide and seek with a fuse box? Fear not, intrepid reader! We'll guide you through the maze and make you feel like a wiring detective on the hunt for the elusive fuse treasures.</p>
<center><img src="https://tse1.mm.bing.net/th?q=The+Fuse+Box+More+Than+a+Hidden+Treasure+1968+Charger+dash+panel+wiring+diagram" alt="Fuse Box"></center>
<h3>Wire Color Codes: Decoding the Rainbow</h3>
<p>Who needs a rainbow when you have wires of every color imaginable? Join us as we decode the vibrant language of wires, turning your garage into a psychedelic masterpiece of automotive enlightenment.</p>
<center><img src="https://tse1.mm.bing.net/th?q=Wire+Color+Codes+Decoding+the+Rainbow+1968+Charger+dash+panel+wiring+diagram" alt="Wire Colors"></center>
<h3>Ignition System: The Spark of Life</h3>
<p>We're not talking about starting a revolution; we're talking about starting your Charger. Discover the intricacies of the ignition system and how it's more magical than any fantasy novel you've ever read.</p>
<center><img src="https://tse1.mm.bing.net/th?q=Ignition+System+The+Spark+of+Life+1968+Charger+dash+panel+wiring+diagram" alt="Ignition System"></center>
<h3>Wires on a Road Trip: Routing 101</h3>
<p>Wires, like your favorite road trip partner, need a plan. Learn the art of wire routing and witness how your Charger's internal highways are paved for a smooth and organized journey.</p>
<center><img src="https://tse1.mm.bing.net/th?q=Wires+on+a+Road+Trip+Routing+101+1968+Charger+dash+panel+wiring+diagram" alt="Wire Routing"></center>
<h3>Grounding Points: The Zen of Wiring</h3>
<p>Discover the grounding points – the Zen masters of your Charger's wiring system. It's not just about electricity; it's about achieving balance and harmony in the automotive universe.</p>
<center><img src="https://tse1.mm.bing.net/th?q=Grounding+Points+The+Zen+of+Wiring+1968+Charger+dash+panel+wiring+diagram" alt="Grounding Points"></center>
<h3>Gauges and Indicators: The Dashboard Symphony</h3>
<p>Ever wondered how your dashboard becomes a symphony of information? Join us as we dissect the integration of gauges and indicators, turning your driving experience into a harmonious orchestration.</p>
<center><img src="https://tse1.mm.bing.net/th?q=Gauges+and+Indicators+The+Dashboard+Symphony+1968+Charger+dash+panel+wiring+diagram" alt="Dashboard Symphony"></center>
<h3>Voltage Distribution: Shockingly Good Advice</h3>
<p>We're not in the business of shocking revelations, but understanding voltage distribution is electrifying! Get the lowdown on ensuring the right voltage in all the right places for a charged-up Charger.</p>
<center><img src="https://tse1.mm.bing.net/th?q=Voltage+Distribution+Shockingly+Good+Advice+1968+Charger+dash+panel+wiring+diagram" alt="Voltage Distribution"></center>
<h3>Troubleshooting Theater: Comedy in Circuits</h3>
<p>Who said troubleshooting can't be entertaining? Join us in the theater of wires where we turn common issues into a comedy act, and you become the hero of the automotive stage.</p>
<center><img src="https://tse1.mm.bing.net/th?q=Troubleshooting+Theater+Comedy+in+Circuits+1968+Charger+dash+panel+wiring+diagram" alt="Troubleshooting Theater"></center>
<h3>Neat and Reliable: Wire Management Mastery</h3>
<p>It's not just about wires; it's about creating a masterpiece of neatness. Learn the art of wire management and turn your Charger's internal wiring into a work of organized automotive art.</p>
<center><img src="https://tse1.mm.bing.net/th?q=Neat+and+Reliable+Wire+Management+Mastery+1968+Charger+dash+panel+wiring+diagram" alt="Wire Management Mastery"></center><p> </p><h2>The Blueprint of Power: Unraveling the 1968 Charger Dash Panel Wiring Diagram</h2>
<p>Welcome to the intricate world of automotive craftsmanship, where every wire and connection contributes to the symphony of power coursing through the veins of the 1968 Charger. In this deep dive, we will navigate the fascinating landscape of the dash panel wiring diagram, decoding its complexities and uncovering the secrets that make this classic icon tick.</p>
<h3>The Birth of an Icon</h3>
<center><img src="https://tse1.mm.bing.net/th?q=The+Birth+of+an+Icon+1968+charger+dash+panel+wiring+diagram" alt="Birth of an Icon"></center>
<p>Before we embark on our journey through the wiring intricacies, let's take a moment to appreciate the birth of the 1968 Charger itself. A symbol of American muscle, this car was more than a mode of transportation; it was a statement. With its sleek design and powerful performance, the 1968 Charger became an icon of an era marked by innovation and boldness.</p>
<h3>Deciphering the Dashboard</h3>
<center><img src="https://tse1.mm.bing.net/th?q=Deciphering+the+Dashboard+1968+charger+dash+panel+wiring+diagram" alt="Deciphering the Dashboard"></center>
<p>The dashboard of the 1968 Charger is not just a display of gauges and indicators; it's a control center orchestrating the car's every move. Behind the scenes, the dash panel wiring diagram acts as the maestro, ensuring that each component plays its part harmoniously. As we delve into this intricate web of connections, be prepared to witness the inner workings that transform a simple dashboard into a command center.</p>
<h3>The Dance of Wires: A Technological Ballet</h3>
<center><img src="https://tse1.mm.bing.net/th?q=The+Dance+of+Wires+A+Technological+Ballet+1968+charger+dash+panel+wiring+diagram" alt="Dance of Wires"></center>
<p>Picture a ballet where each dancer knows their steps to perfection. Now, envision the wires of the 1968 Charger engaging in a similar dance, choreographed with precision to transmit power and information seamlessly. From the fuse box to the ignition system, every move is synchronized, and the wiring diagram is the script that guides this intricate technological ballet.</p>
<h3>The Fuse Box: Gateway to Power</h3>
<center><img src="https://tse1.mm.bing.net/th?q=The+Fuse+Box+Gateway+to+Power+1968+charger+dash+panel+wiring+diagram" alt="Fuse Box"></center>
<p>Our journey into the wiring diagram starts at the fuse box, the gateway to power distribution. Much like a control center, the fuse box determines the allocation of electrical energy to different components. It's the guardian of the system, protecting against overloads and ensuring a smooth flow of power throughout the Charger's electrified veins.</p>
<h3>The Colorful Language of Wires</h3>
<center><img src="https://tse1.mm.bing.net/th?q=The+Colorful+Language+of+Wires+1968+charger+dash+panel+wiring+diagram" alt="Colorful Language of Wires"></center>
<p>Wires, like characters in a novel, speak a language of colors. Understanding this colorful dialect is essential for deciphering the wiring diagram. Each hue signifies a different function, creating a visual code that tells the story of how power travels from point A to point B. Get ready to decode the rainbow of wires and unlock the narrative embedded in their colors.</p>
<h3>Ignition System: Sparking the Heart</h3>
<center><img src="https://tse1.mm.bing.net/th?q=Ignition+System+Sparking+the+Heart+1968+charger+dash+panel+wiring+diagram" alt="Ignition System"></center>
<p>The ignition system is the beating heart of the 1968 Charger, and the wiring diagram holds the key to its rhythmic pulsations. As we explore the ignition system's intricacies, envision the spark that ignites the engine, propelling this classic marvel to life. Every connection in the wiring diagram plays a role in orchestrating this automotive symphony.</p>
<h3>Routing Wires: The Roadmap of Connectivity</h3>
<center><img src="https://tse1.mm.bing.net/th?q=Routing+Wires+The+Roadmap+of+Connectivity+1968+charger+dash+panel+wiring+diagram" alt="Routing Wires"></center>
<p>Wires are like the roads on a map, guiding electrical currents to their destinations. The wiring diagram acts as a roadmap, detailing the routes wires must take to ensure a seamless journey. Join us as we navigate the twists and turns of wire routing, understanding how a well-planned path contributes to the Charger's overall performance.</p>
<h3>The Grounding Points: Anchors of Stability</h3>
<center><img src="https://tse1.mm.bing.net/th?q=The+Grounding+Points+Anchors+of+Stability+1968+charger+dash+panel+wiring+diagram" alt="Grounding Points"></center>
<p>Imagine grounding points as anchors, providing stability to the Charger's electrical system. The wiring diagram points us to these critical junctures, where connections with the chassis ensure a reliable and grounded operation. Let's explore how these grounding points contribute to the overall stability and functionality of the 1968 Charger.</p>
<h3>Gauges and Indicators: The Dashboard Symphony Continues</h3>
<center><img src="https://tse1.mm.bing.net/th?q=Gauges+and+Indicators+The+Dashboard+Symphony+Continues+1968+charger+dash+panel+wiring+diagram" alt="Dashboard Symphony"></center>
<p>Our exploration wouldn't be complete without diving into the integration of gauges and indicators. The wiring diagram orchestrates a symphony of information on the dashboard, turning a routine drive into a musical experience. Join us as we uncover how the gauges and indicators seamlessly blend into the Charger's dashboard symphony.</p>
<h3>Ensuring Voltage Harmony</h3>
<center><img src="https://tse1.mm.bing.net/th?q=Ensuring+Voltage+Harmony+1968+charger+dash+panel+wiring+diagram" alt="Voltage Harmony"></center>
<p>Voltage distribution is the key to harmony in the electrical orchestra of the 1968 Charger. The wiring diagram ensures that each component receives the right amount of voltage, preventing discord and maintaining a smooth performance. Join us as we explore the intricacies of voltage distribution and its crucial role in the Charger's overall electrical health.</p>
<h3>Troubleshooting Theater: A Comedy of Circuits</h3>
<center><img src="https://tse1.mm.bing.net/th?q=Troubleshooting+Theater+A+Comedy+of+Circuits+1968+charger+dash+panel+wiring+di<p> </p><h6>Another point of view about 1968 CHARGER DASH PANEL WIRING DIAGRAM.</h6><p>In the whimsical world of automotive wizardry, the 1968 Charger dash panel wiring diagram stands as a masterpiece, weaving a tapestry of connections that breathe life into this classic chariot. Let's embark on a journey through the eyes of creativity as we explore the enchanting perspectives of the wiring diagram:</p>
<ol>
<li>
<p><strong>Wires as Musical Notes:</strong>
Picture each wire as a musical note, creating a symphony of connectivity. The dash wiring diagram orchestrates a harmonious composition, turning the Charger into a rolling sonata.</p>
</li>
<li>
<p><strong>Fuse Box: The Magician's Hat:</strong>
Behold the fuse box, a magician's hat of electrical wonders. It distributes power like a skilled illusionist, ensuring each component gets its share of the electrifying spotlight.</p>
</li>
<li>
<p><strong>Colorful Conversations:</strong>
Dive into the lively conversations of colored wires. It's not just a diagram; it's a visual feast of hues, where each color speaks a language that only the initiated can comprehend.</p>
</li>
<li>
<p><strong>Ignition System's Dance:</strong>
The ignition system becomes a dance floor, and the wiring diagram choreographs the dazzling moves of sparks that set the Charger's heart ablaze. It's a dance party under the hood!</p>
</li>
<li>
<p><strong>Wires Mapping Roads:</strong>
Imagine the wires as cartographers mapping out roads on an electrified globe. The wiring diagram is the GPS, guiding these wire-travelers on a journey through the Charger's internal landscape.</p>
</li>
<li>
<p><strong>Grounding Points: The Zen Garden:</strong>
Grounding points are the Zen gardens of the Charger's electrical realm. The wiring diagram invites you to meditate on stability as connections anchor themselves, providing a serene balance.</p>
</li>
<li>
<p><strong>Gauges and Indicators: Cosmic Dashboard:</strong>
Step into the cosmic dashboard, where gauges and indicators twinkle like stars. The wiring diagram unfolds the cosmic ballet, transforming a mundane drive into a celestial experience.</p>
</li>
<li>
<p><strong>Voltage as Fairy Dust:</strong>
Voltage distribution becomes the fairy dust sprinkled by an automotive enchantress. The wiring diagram ensures that every nook and cranny receives its magical dose, keeping the Charger in an electrified euphoria.</p>
</li>
<li>
<p><strong>Troubleshooting Circus:</strong>
Enter the troubleshooting circus, where gremlins and glitches become the jesters. The wiring diagram is your ticket to the comedic spectacle, turning mundane issues into a sidesplitting performance.</p>
</li>
<li>
<p><strong>Neatness as an Art Form:</strong>
In the world of wires, neatness is an art form. The wiring diagram transforms the Charger's internal circuits into a masterpiece, where every wire is a stroke of creative genius.</p>
</li>
</ol>
<p>Behold, the 1968 Charger dash panel wiring diagram isn't just a technical blueprint; it's a canvas of creativity, painting a vivid picture of the magic that happens beneath the surface of this timeless automotive marvel.</p><p> </p><strong><u>Conclusion : Rev Up Your Restoration: 1968 Charger Dash Wiring Diagram Unveiled!.</u></strong><p>As we wrap up our exploration into the intricate world of the <u><em>1968 Charger dash panel wiring diagram</em></u>, we trust that this journey has provided you with valuable insights into the heart and soul of this classic automobile. Understanding the nuances of the wiring diagram is akin to deciphering the hidden language of automotive engineering, and we hope you now feel equipped with the knowledge to navigate this intricate landscape.</p>
<p>In the realm of classic car restoration, attention to detail is paramount, and the <u><em>1968 Charger dash panel wiring diagram</em></u> serves as the blueprint for achieving perfection. Whether you're embarking on a restoration project or simply indulging your curiosity, remember that each wire, connection, and component plays a vital role in bringing this timeless icon to life. Approach the wiring diagram with the respect it deserves, and you'll find yourself not just decoding circuits, but unlocking the essence of a bygone era where craftsmanship and innovation converged.</p>
<p>Our hope is that this exploration has empowered you with a deeper appreciation for the engineering marvel that is the 1968 Charger. As you venture into the world of automotive restoration, may the wiring diagram be your trusted guide, leading you towards a seamless and electrifying revival of this classic masterpiece.</p><p> </p><p><article><figure><noscript><img src='https://tse1.mm.bing.net/th?q=Question and answer Rev Up Your Restoration: 1968 Charger Dash Wiring Diagram Unveiled!' alt='Question and answer Rev Up Your Restoration: 1968 Charger Dash Wiring Diagram Unveiled!' /></noscript><img class='v-cover ads-img' src='https://tse1.mm.bing.net/th?q=Question and answer Rev Up Your Restoration: 1968 Charger Dash Wiring Diagram Unveiled!' alt='Question and answer Rev Up Your Restoration: 1968 Charger Dash Wiring Diagram Unveiled!' width='100%' onerror='this.onerror=null;this.src='https://upload.wikimedia.org/wikipedia/commons/d/d1/Image_not_available.png?20210219185637';' style='margin-right: 8px;margin-bottom: 8px;' /></figure></article></p><p> </p><strong><i>Questions & Answer :</i></strong><p><strong>Q: Is deciphering the 1968 Charger dash panel wiring diagram as complicated as it sounds?</strong></p>
<ul>
<li><strong>A:</strong> Not at all! Think of it like solving a captivating puzzle rather than deciphering an ancient manuscript. Once you understand the colorful language of wires, it's more of a thrilling adventure than a daunting task.</li>
</ul>
<p><strong>Q: Why should I bother understanding the wiring diagram if I'm not a car expert?</strong></p>
<ul>
<li><strong>A:</strong> Think of it as gaining backstage access to the magic behind the scenes. Even if you're not a car expert, understanding the wiring diagram empowers you to appreciate the craftsmanship and innovation that went into creating the 1968 Charger. It's like peeking behind the curtain of automotive history!</li>
</ul>
<p><strong>Q: Can't I just leave the wiring to the professionals during a restoration?</strong></p>
<ul>
<li><strong>A:</strong> While professionals certainly have the expertise, diving into the wiring diagram allows you to be an active participant in the restoration process. It's like being the director of your automotive masterpiece – you guide the narrative, and the wiring diagram is your script.</li>
</ul>
<p><strong>Q: Are there any creative aspects to working with the wiring diagram?</strong></p>
<ul>
<li><strong>A:</strong> Absolutely! Think of the wiring diagram as a canvas, and you're the artist creating an electrifying masterpiece. The creative aspect lies in the precision of connecting each wire, much like brushstrokes on a canvas, shaping the narrative of your Charger's revival.</li>
</ul>
<p><strong>Q: Does understanding the wiring diagram add value to my classic car restoration?</strong></p>
<ul>
<li><strong>A:</strong> It's like adding a rare gem to your collection! Understanding the wiring diagram not only adds value but also enhances your overall appreciation for the craftsmanship. It's the difference between owning a classic car and owning a classic car with a story – the story written in the language of wires.</li>
</ul><p> </p>
Keywords : 1968 CHARGER DASH PANEL WIRING DIAGRAMMilohttp://www.blogger.com/profile/01418902555588264834noreply@blogger.com0